HP EVA to 3PAR StoreServ Online Import Migration Guide Abstract This guide provides information on using HP EVA to 3PAR StoreServ Online Import to migrate data from an EVA storage system to a 3PAR storage system.
© Copyright 2012, 2013 Hewlett-Packard Development Company, L.P. Confidential computer software. Valid license from HP required for possession, use or copying. Consistent with FAR 12.211 and 12.212, Commercial Computer Software, Computer Software Documentation, and Technical Data for Commercial Items are licensed to the U.S. Government under vendor's standard commercial license. The information contained herein is subject to change without notice.
Contents 1 Overview of HP EVA to 3PAR StoreServ Online Import....................................5 How HP EVA to 3PAR StoreServ Online Import works....................................................................5 Types of data migration.............................................................................................................6 Understanding what data is migrated..........................................................................................
7 Documentation feedback...........................................................................40 A EVA and 3PAR terms................................................................................41 B Consolidated migration procedures.............................................................42 Migrating a host.....................................................................................................................42 Selecting the host and destination......................................
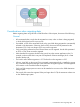
1 Overview of HP EVA to 3PAR StoreServ Online Import HP EVA to 3PAR StoreServ Online Import manages the migration of data from a source EVA storage system to a destination 3PAR storage system. Using HP EVA to 3PAR StoreServ Online Import, you can migrate EVA virtual disks and host configuration information to a 3PAR destination storage system without changing host configurations or interrupting data access.
2. A destination 3PAR storage system is connected (zoned) to the source EVA. The 3PAR storage system is configured as a new host on the source EVA. All of the volumes exported to the original host are exported to the 3PAR. 3. The 3PAR storage system "admits" these volumes, which creates a set of peer volumes that are fully backed by the data on the EVA. 4. The host is cleanly shutdown and unzoned from the source EVA. 5.
The migration process selects objects to migrate using the following rules: • Host—When selecting a single host or group of hosts with virtual disk presentations, all the virtual disks presented to the host(s) are migrated. In addition, any presentations the source virtual disks have to other hosts will include those hosts and all of their presented virtual disks in the migration.
2 Preparing for data migration Use the information in this chapter to ensure all necessary tasks are performed and considerations are understood before beginning a migration. System requirements NOTE: For detailed information on ensuring the EVA source and the 3PAR destination are configured properly for data migration, see the following: • HP P6000 Enterprise Virtual Array Compatibility Reference. See “Related information” (page 38) for the document location.
Considerations when migrating data Before migrating data using HP EVA to 3PAR StoreServ Online Import, be aware of the following: General • HP recommends that a single host be migrated at a time, unless a cluster is being migrated, in which all the hosts have to move at once. • If available, a CPG of the same RAID level as the virtual disk being migrated is automatically selected on the destination. Otherwise, the first CPG discovered will be presented as the destination CPG.
Local replication • Any sharing relationships among snapshots and mirrorclones are lost during migration. Snapshots become standalone objects on the destination 3PAR storage system. Mirrorclones cannot be migrated. Remote replication • If the source EVA storage system is using HP Continuous Access data replication, virtual disks that are in data replication relationships cannot be migrated. To migrate a virtual disk in a data replication relationship, stop the replication and migrate the virtual disk.
ports on the destination 3PAR storage system. See “Zoning the source EVA to the destination 3PAR storage system” (page 11). • Paths must be zoned between the host and destination 3PAR storage system. The time at which these paths are created is determined by the type of host—Windows/AIX or others. For more information, see “Zoning a host to the destination 3PAR storage system” (page 12). • Paths must exist between the host and source EVA. These paths will be unzoned during the migration.
3. Verify that the EVA can detect both ports on the 3PAR. Ensure that the peer port WWNs appear in the discovered port list. Alternately, verify that the EVA is shown as a connected device on both peer ports of the destination 3PAR storage system. Zoning a host to the destination 3PAR storage system The migration process requires each host involved in the migration to be zoned to the destination 3PAR storage system. Paths must be created from the host to the destination 3PAR storage system.
3. Click Add Source. The Add a Source Storage System screen displays the P6000 EVA Storage Systems qualified to serve as sources. Only storage systems in the local management group are displayed. An EVA that is associated with any other Online Import in the same management group will not be displayed. IMPORTANT: A source EVA must have an Operational State of Good. If it does not, resolve any issues before continuing with the migration. 4. 5.
NOTE: While adding a new destination 3PAR StoreServ Storage System that has patch 16 applied, the following error message appears: Unable to validate certificate. Use TPDCertVerifier.bat to update trust source at <%HOMEDRIVE%%HOMEPATH%>\InformMC\security\HP-3PAR-MC-TrustSource. If this error occurs, perform the following steps to add a destination: a. Login to the server where HP EVA to 3PAR StoreServ Online Import service is running. b. Locate the trust source as displayed in the error message.
NOTE: Before being added as a destination, the specified 3PAR storage system is validated for proper configuration. An alert is displayed if the storage system is not eligible to serve as a destination due to any of the following conditions: 9. • Wrong IP address or the IP address not being reachable • Wrong credentials (user name/password) • Wrong value for Secure data port or Event port • HP 3PAR OS version is earlier than 3.1.
3 Performing the data migration Data migration can be performed by selecting a host or a virtual disk. The sequence of tasks differs depending on the Operating System of the hosts you are migrating. Migrating a Windows host The minimally disruptive migration process is used when migrating a Windows host. The host DSM must be reconfigured to communicate with the destination 3PAR storage system, and the host must be shut down briefly.
10. Click Next. The Summary screen is displayed. 11. Review the summary information, then click Add Migration. The Host HP EVA to 3PAR StoreServ Online Import Status Summary page is displayed with the newly added migration in the list of Migrations in Progress. The Preparation status displays a clock indicating that migration preparation is being performed.
5. Read the information on the Introduction screen, then click Next. The Select explicit migration source screen is displayed. 6. Select the host that will be the source, then click Next. The Confirm Explicit and Implicit Migration Sources screen is displayed. TIP: If the number of objects included in the migration is too large, you can cancel the migration at this point. 7. Check the implicit and explicit hosts and virtual disk selections to ensure they are ready for migration, then click Next.
15. When the hosts have been unzoned, click Completed. The Data Transfer status displays the Start button. 16. Click Start to begin the migration. A confirmation screen identifies conditions that must be met before beginning the migration. IMPORTANT: Once a migration begins, it cannot be stopped. 17. When all the conditions have been met, click Start Data Transfer. A progress bar indicates how much of the data has been migrated. The progress bar is refreshed every 15 seconds. 18.
8. Ensure the 3PAR Destination Storage System is ready for migration, then click Next. The Configure Destination Volumes screen is displayed. NOTE: If the Migration OK? status is not OK, the tooltip provides information on why the migration cannot be performed until the necessary action is taken. 9. Set a. b. c. the Destination Virtual Volume Attributes. Set the Configuration to Set individually. Select the desired Destination Provisioning for the destination virtual volume.
TIP: If the number of objects included in the migration is too large, you can cancel the migration at this point. 7. Check the implicit and explicit host and virtual disk selections to ensure they are ready for migration, then click Next The Confirm Your Migration Destination screen is displayed. NOTE: If any object selected for migration is not ready for data migration, the appropriate status is displayed in the Migration OK? column, and the Next button is disabled.
IMPORTANT: Once a migration begins, it cannot be stopped. 15. When all the conditions have been met, click Start Data Transfer. A progress bar indicates how much of the data has been migrated. The progress bar is refreshed every 15 seconds. 16. Zone the host to the 3PAR destination storage system, establishing the data paths between the host and the destination. 17. Perform the following steps on the AIX host: a. Rescan 3PAR disks using the cfgmr command. b.
Migrating an HP-UX host Migration of HP-UX 11i V3 The HP-UX 11i V3 hosts can be migrated using the online data migration procedure. Both HP-UX 11i V3 standalone as well as Serviceguard cluster hosts can use online data migration. 1. In Command View, select the Storage Systems point of view. 2. Select the HP EVA to 3PAR StoreServ Online Import tab. 3. In the left navigation pane, select a host. You can select a host folder, an individual host, or a user defined host folder. 4. 5. 6. Click Add Migration.
14. When the host has been unzoned, click Completed. The Data Transfer status displays the Start button. 15. Click Start to begin the migration. A confirmation screen identifies conditions that must be met before beginning the migration. IMPORTANT: Once a migration begins, it cannot be stopped. 16. When all the conditions have been met, click Start Data Transfer. A progress bar indicates how much of the data has been migrated. The progress bar is refreshed every 15 seconds. 17.
NOTE: If the Migration OK? status is not OK, the tooltip provides information on why the migration cannot be performed until the necessary action is taken. 9. Set a. b. c. the Destination Virtual Volume Attributes. Set the Configuration to Set individually. Select the desired Destination Provisioning for the destination virtual volume. Select the desired Destination Common Provisioning Group (CPG) for the destination virtual volume. d.
3. On the other cluster nodes, export vg_shared and re-import it using the new map file. For example, ls -l /dev/vg_shared/group crw-rw-rw- 1 root sys 64 0x050000 Nov 16 15:27 /dev/vg_shared/ group 4. Note down the minor number, that is, 0x050000 from the example. vgexport vg_shared mkdir /dev/vg_shared mknod /dev/vg_shared/group c 64 0x050000 (minor number must match with above number.) vgimport -m /tmp/vg_shared.map -s vg_shared g. h.
3. In the left navigation pane, select a virtual disk. You can select a virtual disk folder or an individual virtual disk. 4. Click Add Migration. The Add Migration from a Virtual Disk Selection wizard runs. 5. Read the information on the Introduction screen, then click Next. The Select explicit migration source screen is displayed. 6. 7. Select one or more unpresented virtual disks as the source virtual disks. Click Next. The Confirm Explicit and Implicit Migration Sources screen is displayed. 8.
Load restrictions on EVA Nearline drives Due to the performance limitations of Nearline drives, care must be taken when migrating Vdisks that are being serviced from a Nearline Diskgroup. The additional load placed on a Nearline Diskgroup from the migration process can lead the hosts to experience higher than expected I/O latencies.
2. 3. In the left navigation pane, select the storage system, hosts folder, individual host, or user defined host folder. In the content pane, select the HP EVA to 3PAR StoreServ Online Import aspect tab. All migrations for the hosts folder or individual host are displayed. Viewing migrations for virtual disks 1. 2. 3. In Command View, select the Storage Systems point of view.
4 Post-migration tasks System post-migration tasks • If the boot LUN for a host server was migrated, the boot setting on the server/adapter must be changed to point to the new 3PAR destination data paths. Exporting migration job histories You can export migration job histories in csv format to an external file to track data migrations. 1. In Command View, select the Settings point of view. 2. In the left navigation pane, select the HP EVA to 3PAR StoreServ Online Import instance.
Source EVA tasks 1. 2. 3. Unlock all the source virtual disks. Re-present the source virtual disks to their original host(s). Rezone the EVA to the original host(s). Destination 3PAR tasks 1. 2. 3. Unzone the 3PAR from the host. Delete the respective virtual volumes and virtual LUNs. Delete the host if it did not exist before the migration.
5 Troubleshooting The following are problems you may encounter when using HP EVA to 3PAR StoreServ Online Import. NOTE: During the migration process, it is important to remember that the data continues to be served from the source EVA until the import of each volume is complete. If host errors occur, both the destination 3PAR and the source EVA should be checked for potential problems.
◦ • – The specified 3PAR storage system has already been added as a destination – A Peer Motion license is not installed Solution: Check each of the above conditions to identify which may be causing the problem, then resolve it. HP EVA to 3PAR StoreServ Online Import aspect tab is not appearing in the content pane ◦ Possible cause: The storage system has not been added as a source for HP EVA to 3PAR StoreServ Online Import.
IMPORTANT: It may be necessary to restart the HP EVA to 3PAR StoreServ Online Import service to solve this problem. Contact HP Customer Support for assistance before attempting to restart the HP EVA to 3PAR StoreServ Online Import service. • ◦ 34 Reload the content on the Content Pane. – Refresh the browser screen. – Log in to the application again. – Perform the following steps: 1. Stop the HP EVA to 3PAR StoreServ Online Import service. 2. Stop the HP P6000 Command View service. 3.
◦ Host set creation failed because data from destination storage system could not be fully loaded ◦ Data from destination storage system could not be fully loaded ◦ Possible cause: ◦ – The destination storage system is busy and did not provide the required data within the expected time. – Network latency between server component and the destination storage system. Solution IMPORTANT: It may be necessary to restart the HP EVA to 3PAR StoreServ Online Import service to solve this problem.
• Migration preparation failed ◦ Cause: The preparation process failed to admit volumes on the destination storage system. Solution: Verify the following: • – The destination CPGs have enough capacity. If they do not, free up enough capacity in the CPGs or add more capacity to the CPGs on the destination storage system. – No duplicate volumes exist. This may occur if either a virtual volume with same name or with the same WWN exists on the destination storage system.
Log locations Log content can be useful in identifying and solving problems that may occur during data migration. HP P6000 Command View logs The HP P6000 Command View logs are located in the following location. Folders for log, logs and trace are included.
6 Support and other resources Contacting HP Before you contact HP Be sure to have the following information available before you call contact HP: • Technical support registration number (if applicable) • Product serial number • Product model name and number • Product identification number • Applicable error message • Add-on boards or hardware • Third-party hardware or software • Operating system type and revision level HP contact information For the name of the nearest HP authorized reseller
http://www.hp.com/support/manuals In the Storage section, click Disk Storage Systems or Storage Software, and then select your product. Websites • HP Technical Support website: http://www.hp.com/support • Single Point of Connectivity Knowledge (SPOCK) website: http://www.hp.
7 Documentation feedback HP is committed to providing documentation that meets your needs. To help us improve the documentation, send any errors, suggestions, or comments to Documentation Feedback (docsfeedback@hp.com). Include the document title and part number, version number, or the URL when submitting your feedback.
A EVA and 3PAR terms In some cases, different terms are used for the same item or concept on the EVA storage system and the 3PAR storage system. The following table lists the relationship between terms.
B Consolidated migration procedures Migrating a host NOTE: If you are migrating a non-Windows host, make sure you have zoned the host to the 3PAR destination storage system before performing the migration. For more information, see “Zoning a host to the destination 3PAR storage system” (page 12). Selecting the host and destination 1. 2. 3. In Command View, select the Storage Systems point of view. Select the HP EVA to 3PAR StoreServ Online Import tab. In the left navigation pane, select a host.
11. Review the summary information, then click Add Migration. The Host HP EVA to 3PAR StoreServ Online Import Status Summary page is displayed with the newly added migration in the list of Migrations in Progress. The Preparation status displays a clock indicating that the necessary steps are being performed to prepare for the migration.
4. When the host has been unzoned, click Completed. The Data Transfer status displays the Start button. 5. Click Start to begin the migration. A confirmation screen is displayed identifying conditions that must be met before beginning the migration. IMPORTANT: Once a migration begins it cannot be stopped. 6. When all the conditions have been met, click Start Data Transfer. A progress bar indicates how much of the data has been migrated. The progress bar is refreshed every 15 seconds. 7.
c. Select the desired Destination Common Provisioning Group (CPG) for the destination virtual volume. d. If you want to use these settings for all the virtual volumes, set the Configuration to Set all same. If you want to use different settings for each volume, repeat the steps for each volume. 11. Click Next. The Summary screen is displayed. 12. Review the summary information, then click Add Migration.
Migrating virtual disks presented to a non-Windows host 1. 2. 3. 4. 5. Select the virtual disk and destination as described in “Selecting the virtual disk and destination” (page 44).. Perform a LUN rescan on each host being migrated and ensure that the paths to the destination 3PAR storage system are seen correctly. Unzone the source EVA from the host. When the hosts have been unzoned, click Completed. The Data Transfer status displays the Start button. Click Start to begin the migration.
Index A N aborting migration, 28 network and fabric zoning requirements, 10 non-Windows host migrating, 19 C considerations when migrating data, 9 D data migration considerations, 9 identifying source and destination, 12 non-Windows host, 19 performing, 16 planning for, 8 post-migration tasks, 30 preparing for, 8 tasks after failure, 30 types, 6 unpresented vistual disks, 26 viewing status, 28 what is migrated, 6 Windows clusters, 10 Windows host, 16 destination storage systems, identifying, 12 documen