
HP StoreOnce Enterprise Manager User Guide

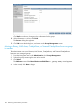
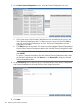

14. On the Summary screen, review the information on each tab for correctness.
Click Back to make any changes to the information.
15. If the information is correct, click Finish.
The Success dialog box appears.
16. Click OK to exit the dialog box, and return to the Group Management screen.
Removing a group
Administrators can remove a group from Enterprise Manager. All NAS shares and libraries
associated with that group are moved to the Un-Grouped group, and any user associated with
that group will no longer see details for the deleted group.
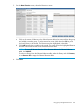
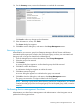
1. From the Navigation tree under Administration, select Group Management.
2. Select the group to be removed.
3. Click Remove.
A warning dialog box appears to confirm that the group should be removed.
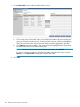
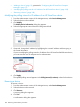
4. Click Yes to confirm the selection.
A confirmation dialog box appears to confirm the action.
5. Click Yes to remove the group.
A success dialog box appears to confirm that the group was removed.
6. Click OK to close the dialog box, and return to the Group Management screen.
The group just removed is no longer included in the list of groups.
NOTE: Removing a group moves all the libraries, NAS shares, CatalystStores, and Teamed
Catalyst from that group to the Un-Grouped group. The Un-Grouped group, itself, cannot be
removed.
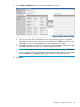
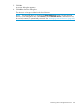
Performing device management functions
Administrators can select Device Management under Administration in the Navigation tree to
perform the following procedures:
Performing device management functions 107