HP DDS/DAT drives UNIX, Linux and OpenVMS configuration guide DDS/DAT Evolution II drives: HP DDS-4 drive (40 GB)—USB and SCSI HP DAT 72 drive (72 GB)—USB, SCSI and SAS HP DAT 72 autoloader (720 GB)—SCSI HP DAT 160 drive (160 GB)—USB, SCSI and SAS HP DAT 320 drive (320 GB)—USB 30 Mar 07 Part number: DW049-90915 Edition 1: May 2009
Legal and notice information © Copyright 2009 Hewlett-Packard Development Company, L.P. Hewlett-Packard Company makes no warranty of any kind with regard to this material, including, but not limited to, the implied warranties of merchantability and fitness for a particular purpose. Hewlett-Packard shall not be liable for errors contained herein or for incidental or consequential damages in connection with the furnishing, performance, or use of this material.
Contents About this guide . . . . . . . . . . . . . . . . . . . . . . . . . . . . . . . . . . . . . . . . . . . . . . . . . 5 Related documents . . . . . . . . . . . . . . . . . . . . . . . . . . . . . . . . . . . . . . . . . . . . . . . . . . . . . . . . . General documents and standardization . . . . . . . . . . . . . . . . . . . . . . . . . . . . . . . . . . . . . . . USB specifications . . . . . . . . . . . . . . . . . . . . . . . . . . . . . . . . . . . . . . . . . . . . . . . . . . . . . . .
Using the seek and tell features of mt . . . . . . . . . . . . . . . . . . . . . . . . . . . . . . . . . . . . . . . . . Configuring non-compression device files . . . . . . . . . . . . . . . . . . . . . . . . . . . . . . . . . . . . . . . . Detecting autoloader LUNs in Linux. . . . . . . . . . . . . . . . . . . . . . . . . . . . . . . . . . . . . . . . . . . . . Installing USB drivers on Linux . . . . . . . . . . . . . . . . . . . . . . . . . . . . . . . . . . . . . . . . . . . . . .
About this guide NOTE: DDS/DAT Evolution II drives, available with USB 2.0, U160 SCSI or SAS1.1 interfaces, are identifiable by the round LEDs on the front panel, as opposed to rectangular or oval. USB and SAS drives are only supported on Linux (and Windows). This guide contains information on connecting to various operating systems.
Copies of General Documents can be obtained from: INCITS 11 West 42nd Street, New York, NY 10036-8002, USA ISO CP 56, CH-1211 Geneva 20, Switzerland ECMA 114 Rue du Rhône, CH-1204 Geneva, Switzerland Tel: +41 22 849 6000 Web URL: http://.www.ecma.ch Global Engineering 2805 McGaw, Irvine, CA 92714, USA Documents Tel: 800 854 7179 or 714 261 1455 USB specifications • Universal Serial Bus Specification Revision 2.
1 Introduction Drivers and backup software Drivers All supported UNIX operating systems provide native driver support for HP DDS/DAT tape drives. In some cases the drivers require configuration to perform optimally. UNIX applications You can write scripts to control DDS/DAT drives in UNIX using standard backup utilities such as cpio and tar.
Introduction
2 HP (HP-UX) servers and workstations This chapter covers: • HP servers and workstations: HP-UX 11i v1 (11.11), 11i v2 (11.23) • HP servers: HP-UX 11i v3 (11.31) NOTE: Only SCSI tape drives and autoloaders are supported on HP-UX. Introduction Before you install your tape drive log on to the HP web site, www.hp.com, and download the latest hardware enablement (HWE) patch bundle for your operating system. This ensures that you will have the correct device driver for your tape drive.
OO OO OO sideba ext_bus : ba ext_bus ext_bus target tape ba ba : processor 0 1 2 0 0 : 3 6 7 1 1 4 5 : 1 0/0/1/0 0/0/1/1 0/0/1/2 0/0/2/0 0/0/2/0.0 : 0/3 0/3/1/0 0/3/1/1 0/3/1/1.3 0/3/1/1.3.
/dev/rtape/tape0_BEST /dev/rtape/tape0_BESTb /dev/rtape/tape0_BESTnb tape 12 64000/0xfa00/0x1a estape CLAIMED DEVICE online HP 0/2/1/0.0x3.0x0 /dev/rtape/tape12_BEST /dev/rtape/tape12_BESTb /dev/rtape/tape12_BESTnb /dev/rtape/tape0_BESTn SDLT600 /dev/rtape/tape12_BESTn For a particular SCSI device, you can decode the SCSI bus ID and the drive’s SCSI ID and LUN ID from the lunpath hardware path. For example: Class tape I 0 Lun H/W Path 64000/0xfa00/0x16 0/3/1/1.0x3.
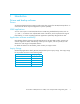
Use the ‘sam’ utility. Sam runs as a mouse-driven GUI (Figure 1) on a system with full graphics capability, or as a console text-based interface (Figure 2). If you use the text-based interface, use the Tab and arrow keys to navigate, and the Return key to select. Figure 1 SAM GUI Figure 2 SAM text-based interface For HP-UX 11i v1 (HP-UX 11.11) 1. Enter sam at the command line. % sam 2.
Kernel Configuration Drivers 3. Highlight the stape driver. If the driver has not been added to the kernel, both Current State and Pending State will read “Out”. 4. Select the following: Actions Add Driver to Kernel The Pending State will now read “In”. 5. To add the new driver to the kernel, select: Actions Create a New Kernel The stape or schgr driver is added to the kernel. 6. If you are going to attach an autoloader, use a similar procedure to change schgr to “static”. 7. Reboot the system.
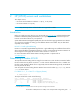
2. From the SMH Tools page (see Figure 3), select Modules from the Kernel Configuration section. Figure 3 SMH web-based interface (HP-UX11i v3) 3. In the Search box on the Kernel Configuration page, type stape and execute the search. The search results list will include both estape and stape modules. If either of these modules is not installed both Current State and Next Boot State will be shown as “unused”. A state of “static” indicates that the module is installed. 4.
5. On the Modify Kernel Module: estape page, for Next Boot State, select the “static” radio button. Check the box entitled Backup to create a backup copy of the existing kernel (see Figure 4). Figure 4 Adding estape driver to the kernel 6. If you wish, type in a Reason for Change, such as “Initial estape installation May 1st 2007” and then select the Modify tab. 7. Click the OK button at the Operation Successful page. Both estape and stape drivers will now be shown with Next Boot State as “static”. 8.
For example, when an HP DAT160 drive is found, it will be displayed as something like: Hardware Path Driver Description =========================================================== 8/0/2/0.3.0 stape HP DAT160 3. Highlight the drive and select the following from the tool bar: Actions Create Device Files Create Default Device Files This will create default device files for the drive. To view the device files that have been created, select: Actions Create Device Files Show Device Files 4.
3. Select tape from the Class drop down box on the HP-UX Peripheral Device Tool page. Select the tape device (radio button) requiring device files from the resulting list. If device files are not already present this will be indicated under the Properties header (see Figure 5)1. Figure 5 Selecting a tape device to create its device files (Agile View) 4. From the right-hand panel on the HP-UX Peripheral Device Tool page, click on Reinstall Device Files. At the next page, click the Reinstall button.
For example, using values from the ls -al output above and a LUN of 1, you would execute: mknod /dev/rac/c4t5d1 c 203 0x045100 To verify that the autoloader has installed correctly, run the following mc command: mc -p /dev/rac/ -rIDSM This will display the various elements in the autoloader. This will display the various elements in the autoloader. For more details of the mc command, run man mc.
3 HP (OpenVMS) servers and workstations NOTE: Only SCSI tape drives and autoloaders are supported on OpenVMS. Determining attached devices After connecting the tape drive to your system, boot OpenVMS and check for the presence of the new tape device. Execute the following commands.
Verifying the configuration of an autoloader on OpenVMS and MRU To verify the configuration, enter the following MRU command: $ robot show robot gka401 Robot Name: gka401 Type: SCSI Media Robot Identifier: HP Slots: Drives: Inports: Outports: Transports: DAT Autoloader 1.00 10 1 0 0 1 For further details on MRU and using the robot commands, see the MRU User Guide. What next? Once device files have been created, you should confirm that your new tape drive is working properly.
4 HP (Tru64 5.1x) servers and workstations NOTE: Only SCSI drives and autoloaders are supported on HP Alpha Tru64 systems. Updating the tape driver NOTE: DDS-4 and DAT 72 drives are natively supported on HP Alpha Tru64 v5.1B-2 and above. DAT 160 drives are natively supported on HP Alpha Tru64 V5.1B-3. Steps 1–3 below are only required for earlier versions of Tru64. 1. Versions of Tru64 before v5.1B-2 only (v5.1B-3 for DAT 160 drives): Modify the SCSI Tape Density Table in the /etc/ddr.
DENSITY: # DensityNumber = 0,3,4,5,6,7 DensityCode = default CompressionCode = 0x0 Buffered = 0x1 DENSITY: # DensityNumber = 1,2 DensityCode = default CompressionCode = 0x1 Buffered = 0x1 DAT 72 drives: SCSIDEVICE Type = tape Name = "HP" "C7438A" # PARAMETERS: TypeSubClass = TagQueueDepth = MaxTransferSize = ReadyTimeSeconds = rdat 0 0x0ffffff 120 # (16MB - 1) # seconds MODESELECT: ModeSelectNumber = 0 SavePage = No PageFormat = scsi2 BlockDescriptor = yes TransferLength = 16 Hdr.Tape.
MaxTransferSize ReadyTimeSeconds = 0x0ffffff = 120 # (16MB - 1) # seconds # # Mode select parameters for rewind after reset behavior # MODESELECT: ModeSelectNumber = 0 SavePage = No PageFormat = scsi2 BlockDescriptor = yes TransferLength = 16 Hdr.Tape.BufferMode = 0x1 Data.UBYTE[0] = 0x3D #Vendor Unique Page Code 0x3D Data.UBYTE[1] = 0x02 Data.UBYTE[2] = 0x01 Data.
Configuring an autoloader Add the following entries to /etc/mcicap to configure an autoloader: mc0:\ :mc=/dev/changer/mc1:\ :dn=/dev/tape/tape23:tc=DAT Autoloader: # Digital TLZ6L/TLZ7L 4mm DAT Tape Autoloader DAT Autoloader|tlz6l|tlz7l|Digital TLZ6L/TLZ7L|tsl9000|tsl10000:\ :it=scsi2:dt=tape:ae:re: What next? Once the device files have been created, you should confirm that your new tape drive is working properly.
5 IBM (AIX) servers and workstations NOTE: Only SCSI drives are supported on AIX . Determining the SCSI ID Before you configure your system to support your drive, determine which SCSI ID to use. IDs must be unique for each device attached to the SCSI bus. To list existing devices, use the following: % lsdev -C |grep SCSI This produces output similar to: scsi0 Available 00-00-0S Standard SCSI I/O Controller hdisk0 Available 00-00-0S-0 1.
3. A pop-up window is displayed: Select “ost” or “Other SCSI tape drive” as the tape drive you wish to change. If no device has been configured at this address before, choose connection addresses as appropriate. 4. The following details are displayed: Check the following values and change them if necessary: • BLOCK Size = 0 • Use EXTENDED file marks = “no” • RESERVE/RELEASE support = “yes” • Set maximum delay for the READ/WRITE command = 1200 Click on the “DO” button to apply the changes.
If you are using a non-graphics terminal 1. At the command line type: % smit -C tape 2. The following is displayed: If no device has been configured at this address before, select “add a tape drive” to set up the address. Otherwise, select “change/show characteristics of a tape drive”. 3. A pop-up window is displayed: Select “ost” or “Other SCSI tape drive” as the tape drive you wish to change. If no device has been configured at this address before, choose connection addresses as appropriate. 4.
HP DDS-format drives will work with tar, cpio, backup, restore and dd. For systems other than the 43P, the drive is also boot-capable, provided a boot tape is generated using mkszfile and mksysb. Once device files have been created, you should confirm that your new tape drive is working properly. Chapter 8, “Verifying the installation” provides instructions on backing up and restoring a sample file to test your installation.
6 Linux (kernel 2.6.x) servers and workstations NOTE: USB, SCSI and SAS drives are supported on Linux kernel 2.6.x. Determining the SCSI ID Look at the output of dmesg to find out what SCSI channel number is used for each connection.
available as either loadable modules (for example, usable with insmod and visible with lsmod) or are statically built into your kernel. NOTE: To add drivers to the statically built kernel you need the Linux source code available on disk and knowledge of how to use the kernel building tools that ship with various Linux distributions. This should not be attempted by novice users.
this; see the relevant man page for more information. If you use this approach, set stinit.def as described in the next section, ”Configuring non-compression device files”. Configuring non-compression device files The following process allows the use of non-compression device files. HP recommends the use of files with the mode identifier of “m” (such as /dev/nst0m). This sets the mode to non-compression, and the blocksize to variable. 1. Install mt-st if not already installed.
Installing USB drivers on Linux Two drivers are required in order to use HP DDS/DAT USB tape drives. These are included with the operating system and should be loaded automatically. Use the following procedure to check that both drivers are present: usb_storage driver 1. At the command prompt type: lsmod | grep usb_storage 2.
7 Sun (Solaris) servers and workstations NOTE: Only SCSI drives are supported on Solaris. Determining the SCSI ID Before you configure your system to support a DDS-format drives, you need to determine which SCSI ID to use. IDs must be unique for each device on attached to the SCSI bus. 1. Use the modinfo command to identify SCSI controller drivers installed on the system.
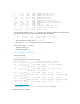
for Solaris 9 and 10 (and 8 with the latest st patch): tape-config-list = "HP DAT160","HP DAT160 tape drive","HP-DAT160"; HP-DAT160 = 1,0x34,0,0x18679,1,0x00,0,60,300,600,1200,600,600,18000; name="st" class="scsi" target=X lun=0; tape-config-list = "HP C7438A","HP DAT72 tape drive","HP-DAT72"; HP-DAT72 = 1,0x34,0,0x18679,1,0x00,0,60,300,600,1200,600,600,18000; name="st" class="scsi" target=X lun=0; tape-config-list = "HP C5683A","HP DDS-4 tape drive","HP-DDS-4"; HP-DDS-4 = 1,0x34,0,0x18679,1,0x00,0,60,300,6
The syntax for HP-DDS-4, HP-DAT72 and HP-DAT160 on Solaris 9, 10 (and 8 with the latest st patch) is: = , , , , , , , ..., , , , , , , , , where: Parameter Value 1 0x34 0 Meaning Indicates the format of the following parameters.
Parameter Value Meaning 0x26, Supported density code. The value of 0x00 means use the default density 0x47, chosen by the drive—which is 0x26 for DDS-4, 0x47 for DAT 72 and 0x48 0x48 or for DAT 160. 0x00 0 Density 0 (0x26 for DDS-4, 0x47 for DAT 72 and 0x48 for DAT 160) is the default. All timeouts are in seconds Values for the parameters for name are as follows: Parameter Value Meaning target X X specifies the SCSI ID (target) of the device.
8 Verifying the installation As part of the installation process, you will have installed the appropriate device driver for your UNIX system, and created device files to communicate with the tape drive. This section describes how you can verify that the installation has been performed correctly. In outline, the procedure is as follows: 1. Write test data to a tape. 2. Read the test data from the tape. 3. Compare the data read from the tape with the original data on disk. To verify the installation 1.
NOTE: Make sure you prefix the file name with ‘.’ when you back it up to tape. If you do not, the restore operation in step 3 will overwrite the original copy on disk. 3. Read the file back from tape: % cd /tmp % tar xvf The ‘x’ option to tar here means “extract from the archive”. Use the same value for the argument as in step 2. 4.
Glossary AT&T mode Berkeley and AT&T functional modes differ in “read-only” close functionality. In AT&T mode, a device close operation will cause the tape to be repositioned just after next filemark on the tape (the start of the next file). Berkeley mode Berkeley and AT&T functional modes differ in “read-only” close functionality. In Berkeley mode the tape position will remain unchanged by a device close operation. block A logical unit of information. Called “record” in the DDS-format specification.
DDS Digital Data Storage is a recording format that builds on the DAT format to support the storage of computer data. It was developed originally by Hewlett-Packard and Sony as an industry standard. The first generation standard was DDS-1 (or simply DDS), to which was added data compression to produce the DDS-DC standard. Further enhancements, notably narrower tracks and thinner tape, led to DDS-2, which can typically provide double the capacity of DDS-1.
Index A G agile addressing 9 AIX 25 applications 7 asynchronous data transfer 39 AT&T mode 39 autoloaders application software 7 detecting LUNs in Linux 31 group 40 B IBM (AIX) device files 25 IBM (AIX) workstations 25 determining SCSI ID 25 immediate mode 40 infinite flush 40 inquiry strings 7 installation, verifying 37 C compression 39 D DAT 39 DAT 72 40 data compression 39 data transfer 39 DDS 40 device files AIX 28 IBM (AIX) 25 direct access 40 documents, related 5 drivers 7 configuring for Solar
verifying autoloader configuration 20 OpenVMS servers and workstations determining attached devices 19 P partitions 40 persistent dsf 9 R records 39 related documents 5 S SAS compliance 6 SCSI 40 SCSI ID, determining IBM (AIX) 25 Linux 29 Sun workstations 33 sequential access 40 servers HP 9 HP OpenVMS 19 IBM AIX 25 Linux 29 software, backup 7 Solaris 33 Sun workstations 33 determining SCSI ID 33 synchronous data transfer 39 U UNIX scripts 7 V verifying installation 37 W wide data transfer 39 workstat