KS H FRPPHUFH [PO GLUHFWRU VHUYHU DSSOLDQFH VD JHWWLQJ VWDUWHG JXLGH
© Copyright 2001 Hewlett-Packard Company. All rights reserved. Hewlett-Packard Company 3000 Hanover Street Palo Alto, CA 94304-1185 Publication Number 5971-3001 March 2001 Disclaimer The information contained in this document is subject to change without notice. HEWLETT-PACKARD COMPANY MAKES NO WARRANTY OF ANY KIND WITH REGARD TO THIS MATERIAL, INCLUDING, BUT NOT LIMITED TO, THE IMPLIED WARRANTIES OF MERCHANTABILITY AND FITNESS FOR A PARTICULAR PURPOSE.
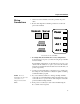
Getting Started Before You Begin This document will guide you through the installation and basic configuration of your HP e-Commerce/XML Director Server Appliance SA8250. This table lists the topics described in this document.
HP e-Commerce/XML Director Server Appliance SA8250 Getting Started Guide Parts Checklist Ensure that these items are included in the box with your SA8250: • HP e-Commerce XML Director Server Appliance SA8250 • HP e-Commerce XML Director Server Appliance SA8250 Getting Started Guide (this document) • HP e-Commerce XML Director Server Appliance SA8250 User Guide • AC power cord • Serial cable • RJ-45 network cable • Rack and rail mounting brackets with Phillips mounting screws Contact HP Custo
Physical Installation Physical Installation If you have already mounted your system, or if your system does not require mounting, proceed to “Wiring Connections” later in this document. You can physically install the SA8250 in either of two ways. Each installation method requires a particular type of mounting brackets, and are included in the SA8250's shipping container.
HP e-Commerce/XML Director Server Appliance SA8250 Getting Started Guide Side Rail Installation Side rail mounting of the SA8250 requires the use of the enclosed small mounting brackets and four of the Phillips head screws. 1. Locate the two small mounting brackets and the provided screws. 2. Attach a side rail to each SA8250 using the rows of five screw holes on the side of the SA8250, equidistant from the top and bottom.
Physical Installation Wiring Connections 1. On the rear of the SA8250, connect the provided AC power cable. 2. Refer to this diagram for all wiring connections on the front panel of the SA8250. Network Server Power Status Console Failover Act 1 Act 2 Front Panel Ports and LEDs 3. For Single NIC (Network Interface Card) configurations: Connect the Network port to your network using the provided RJ45 network cable.
HP e-Commerce/XML Director Server Appliance SA8250 Getting Started Guide Configuring Your Terminal This procedure assumes that you are running HyperTerminal* on your workstation, and that your workstation is already connected to the SA8250. If using another terminal emulator, you must adapt these instructions as appropriate. 1. Note the serial port of your workstation (COM1, COM2, etc.) 2. Run HyperTerminal on your workstation. 3.
Configuration Checklists Configuration Checklists This section contains two configuration tables, the Quick Site Configuration and the Detailed Site Configuration. One of these must be filled out before continuing. We recommend using the Detailed Site Configuration table on the next page. Its use is mandatory when installing more than one SA8250. However, if you are in a hurry and need to get a single SA8250 up and running quickly, use the Quick Site Configuration below.
HP e-Commerce/XML Director Server Appliance SA8250 Getting Started Guide Setting Parameter Choice Hostname assigned to the SA8250’s network side interface Media Type o 100BASE o 10BASE Duplex Type o FULL o HALF Will the SA8250 use Dynamic Host Configuration Protocol (DHCP)? o YES o NO o AUTO o AUTO If not using DHCP, continue below: Network port IP address IP netmask Server port IP address IP netmask Default gateway for traffic from the SA8250 to the network o NONE/DISABLED o SERIAL o ROUTE
Running Setup using the Boot Monitor Running Setup using the Boot Monitor NOTE: The SA8250 is not directing traffic when the Boot Monitor is in operation. At the first use of the SA8250, you must use the Boot Monitor to perform the initial configuration. NOTE: If Autoboot is enabled, you must first interrupt the bootup sequence by pressing a key at the Press any key to stop autoboot prompt. In a few seconds, the monitor> prompt displays. This confirms that Boot Monitor is running.
HP e-Commerce/XML Director Server Appliance SA8250 Getting Started Guide 2. If using DNS, type your information as indicated at the prompts. For example: NOTE: For more information on DNS, see “Configuring DNS” later in this chapter. monitor>dns Would you like to configure DNS (yes,no)? [no] --->yes Enter Domain name(‘-’ to cancel) --->crisc.com Enter the IP Address of the Primary name server (‘-’ to cancel) -->10.6.3.5 Specify additional name server ( to end) ---> 10.6.3.10 3.
Running Setup using the Boot Monitor 6. Login to the SA8250, using the factory defaults: login:admin password:admin NOTE: Access is controlled using Access Control Lists. For more information, see Chapter 5 in the User Guide. 7.
HP e-Commerce/XML Director Server Appliance SA8250 Getting Started Guide Configuring DNS We recommend using IP addresses for the fastest performance. You can also use a host table in the SA8250 when IP addresses are not assigned via DHCP. The host table makes SA8250 restarts faster and eliminates the chance of service failure due to DNS errors and timeouts. Using a DNS Server The SA8250 is sometimes required to identify itself and other devices on its network by name and IP address.
Configuring DNS • Names of any servers included in the configuration, if entered as names as opposed to addresses • Names of any clients from which administration via the CLI or the GUI will be performed • Names of any TFTP servers that will be used to send or retrieve configuration files Adding and Deleting Host Entries The CLI command, config sys hosts info lists the contents of the hosts file. 1.
HP e-Commerce/XML Director Server Appliance SA8250 Getting Started Guide Using the Graphical User Interface Edit the HOSTS file Before using the Graphical User Interface (GUI), you must first add the IP address and name of your SA8250 to your workstation’s HOSTS file: 1. If you already know the location of your workstation’s HOSTS file, proceed to step (5). 2. Launch Windows Explorer. 3. From the Tools menu, select Find > Files and Folders... 4. In the Named field, type hosts*.* and click Find Now.
Using the Graphical User Interface Java* plug-in To run the GUI using Windows, you must have Java plug-in version 1.1.1_004 (or earlier) installed on your workstation. If you attempt to launch the GUI without it, you can download the plug-in directly from the SA8250: To download the plug-in using Communicator* NOTE: If you have a Java plug-in version later than 1.1.1_004, you must remove it before installing this version. 1.
HP e-Commerce/XML Director Server Appliance SA8250 Getting Started Guide To download the plug-in using Internet Explorer* 5.0 1. Launch the GUI by typing the URL for the SA8250 in the browser’s Address field, and press Enter. For example: http://CSLab7k:1095/ 2. Click anywhere inside the white frame. The “Error Locating Object Handler” window displays. 3. Click Yes. A hypertext link displays. 4. Click Java Plug-in Version 1.1.1-004 for Windows. The “File Download” window displays. 5.
Where to go from here Where to go from here This table shows you where to find helpful information in the User Guide.
HP e-Commerce/XML Director Server Appliance SA8250 Getting Started Guide Support for your SA8250 U.S.
Support for your SA8250 Asia For hardware service and telephone support, contact an HPauthorized reseller or one of these support centers: Country and Number Australia – 03-8877-8000 Hong Kong – 800-96-2598 India – 91-11-6826035 Indonesia – 0800-21511 Japan – 0120-220-119 Korea – +82-2-32700911 Malaysia – 60 3 2931811 or 1-800-881811 New Zealand – Upper North Island – 09-356-6640 Lower North Island – 04-499-2026 South Island – 03-365-9805 People’s Republic of China – 86-8008105959 Philippines – 63 2 811-0
HP e-Commerce/XML Director Server Appliance SA8250 Getting Started Guide Other Countries 20 For hardware service, contact your local authorized reseller or HP sales office. For telephone support, contact your authorized reseller.