
FibrChanl-02 (fclp) B.11.23.1104 Fibre Channel Mass Storage Driver for HP-UX 11i v2 Release Notes
• fcmsutil Command reports an error when run with /dev/fclpX
Load patch PHKL_36143.
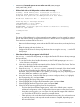
• EFI boot fails with no HP-UX partition on boot media message
Loading.: HP-UX Primary Boot: 0/4/0/0/0/0.8.0.20.0.3.0
Starting: HP-UX Primary Boot: 0/4/0/0/0/0.8.0.20.0.3.0
Using EFI boot partition (no HPUX partition on boot media)
HP-UX Boot Loader for IPF -- Revision 2.029
Press Any Key to interrupt Autoboot
\EFI\HPUX\AUTO ==> boot vmunix
Seconds left till autoboot - 0
AUTOBOOTING...Could not open file vmunix to check for a directory
Could not open vmunix
loading failed
HPUX>
This issue will be addressed in a future system firmware update. It can be caused by entering
the EFI shell without having configured boot devices in the EFI driver's configuration screens.
There are three workarounds for this issue:
◦ Return to the Boot Manager, enter and exit the EFI shell a second time, and retry the boot;
or,
◦ Reset the system and retry the boot; or,
◦ Configure the EFI driver to always map the boot devices using the drvcfg -s at the EFI
shell prompt.
• Fibre channel devices do not appear in the EFI shell
Use drvcfg -s at the EFI shell prompt, to configure the Emulex EFI driver to always manage
the boot devices.
1. To view the Emulex driver handle information, at the EFI shell prompt type: drivers –
– a list of drivers is displayed.
2. Write down the driver handle associated with the Emulex SCSI Pass Thru Driver. The first
column, labelled DRV, lists the driver handles.
3. Enter the drvcfg -s <driver handle> command; for example, if the driver handle
is 20 (your driver handle may be different): Shell> drvcfg -s 20. Information is
displayed, listing all of the HBAs in your system; your listings may vary, depending upon
how many HBAs are installed in your system.
4. Using the arrow keys, locate the HBA that you want to configure, select (i.e., highlight)
the corresponding row, and press Enter.
5. Select (highlight) the Setup Utility option and press Enter.
6. Select (highlight) the Configure Boot Parameters option and press Enter.
7. Select (highlight) the Boot Target Scan option and press Enter.
8. Select one of the scanning policies from the list presented:
◦ The Boot Path from NVRAM Targets option, which is the default option, requires
additional configuration in the Configure Boot Devices option on the previous menu.
Using this scanning policy, you can enter a list of particular targets and LUNs that
you would like the EFI driver to search for potential devices.
◦ Other policies, such as the Boot Path Discovered Devices policy, do not limit the scan
to particular devices, and may take several minutes to complete, depending upon
the size of the SAN.
Known problems and limitations 5