HP FlexFabric 11900 Switch Series Software Upgrade Guide Part number: 5998-4088 Software version: Release 2105 and later Document version: 6W100-20130515
Legal and notice information © Copyright 2013 Hewlett-Packard Development Company, L.P. No part of this documentation may be reproduced or transmitted in any form or by any means without prior written consent of Hewlett-Packard Development Company, L.P. The information contained herein is subject to change without notice.
Contents Upgrading software ····················································································································································· 1 Software types ··································································································································································· 1 Software file naming conventions ······················································································································
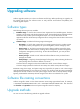
Upgrading software Software upgrade enables you to have new features and fix bugs. Before performing an upgrade, use the release notes for the new software version to verify software and hardware compatibility and evaluate upgrade impacts. Software types The following software types are available: • BootWare image—A .bin file that contains a basic segment and an extended segment. The basic segment is the minimum code that bootstraps the system.
Upgrade method Upgrading from the CLI without using ISSU Software type Remarks • BootWare • Comware images This method is disruptive. If you are upgrading MPUs, you must reboot the switch to complete the upgrade. If you are upgrading the BootWare of a card (an LPU or switching fabric module), you must reboot the card. (excluding patches) NOTE: You can upgrade the BootWare of LPUs and switching fabric modules from the CLI only.
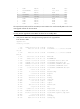
1 NONE Absent 0 NONE None 2 LSU1TGS48SF9 Normal 0 11900-2105 None 3 NONE Absent 0 NONE None 4 LSU1SUPB9 Master 0 11900-2105 None 5 LSU1SUPB9 Standby 0 11900-2105 None 6 NONE Absent 0 NONE None 7 NONE Absent 0 NONE None 8 NONE Absent 0 NONE None 9 NONE Absent 0 NONE None The output shows that the switch has two MPUs, an active MPU in slot 4 and a standby MPU in slot 5. You must upgrade software for the two MPUs.
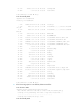
26 -rw- 139236 Jan 11 2013 14:04:55 startup.mdb 27 drw- - Jan 15 2013 16:36:31 versionInfo 503808 KB total (106432 KB free) # On the standby MPU: dir slot5#flash: Directory of slot5#flash: 11908.ipe 0 -rw- 74948608 Nov 21 2012 09:35:45 1 -rw- 2236 Jan 08 2013 09:07:45 210231A1Y30000000006201301071608474 2235 Jan 08 2013 09:37:45 210231A1Y30000000006201301080958534 6260.ak 2 -rw8219.ak 3 -rw- 167201 Nov 09 2012 13:18:36 BASIC.mdb 4 -rw- 633556 Jan 10 2013 15:00:36 BOOTWARE.
delete /unreserved slot5#flash:/11908.bin The contents cannot be restored!!! Delete slot5#flash:/11908.bin?[Y/N]:y Deleting a file permanently will take a long time. Please wait... .................................................. Deleting file slot5#flash:/11908.ipe...Done. NOTE: • The delete /unreserved file-url command deletes a file permanently, and the action cannot be undone. • The delete file-url command moves a file to the recycle bin and the file still occupies storage space.
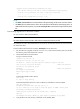
copy newest.ipe slot5#flash:/ Copy flash:/newest.ipe to slot5#flash:/newest.ipe?[Y/N]:y Copying file flash:/newest.ipe to slot5#flash:/newest.ipe...Done. NOTE: You can configure the switch as the FTP server, FTP client, or TFTP client. The transfer procedures vary slightly. For more information about FTP and TFTP, see HP 11900 Switch Series Fundamentals Configuration Guide.
# Decompress the file newest.ipe on the active MPU (in slot 4). install add flash:/newest.ipe flash: Verifying image file...Done. This operation will take several minutes, please wait........................... ....................................................Done. In this example, the decompressed image files include a boot image 11908-CMW710-BOOT-E2102.bin and a system image 11908-CMW710-SYSTEM-E2102.bin. # Specify the images as the main startup software images for the active MPU.
install deactivate patch 11908-CMW710-SYSTEM-E2102H00.bin slot 4 install deactivate patch 11908-CMW710-SYSTEM-E2102H00.bin slot 5 For more information about uninstalling patches, see HP 11900 Switch Series Fundamentals Configuration Guide. # Install the patch package 11908-CMW710-SYSTEM-E2102H01.bin. install activate patch flash:/11908-CMW710-SYSTEM-E2102H01.bin slot 4 The patches run immediately without requiring a reboot. 4. (Optional.
2 5 LSU1SUPB9 Standby 0 11900-2105 None 2 6 NONE Absent 0 NONE None 2 7 NONE Absent 0 NONE None 2 8 NONE Absent 0 NONE None 2 9 NONE Absent 0 NONE None The output shows that two switches form an IRF fabric. The following table shows MPU information. Table 1 MPU information of the IRF fabric MPU role Member ID Slot number Master MPU (also called the "global active MPU") 1 4 Standby MPU 1 5 Standby MPU 2 4 Standby MPU 2 5 3.
25 -rw- 8532 Jan 11 2013 14:04:55 startup.cfg 26 -rw- 139236 Jan 11 2013 14:04:55 startup.mdb 27 drw- - Jan 15 2013 16:36:31 versionInfo 503808 KB total (106432 KB free) # On the standby MPU in slot 5 of member device 1: dir chassis1#slot5#flash: Directory of chassis1#slot5#flash: 0 -rw- 74948608 Nov 21 2012 09:35:45 1 -rw- 2236 Jan 08 2013 09:07:45 11908.ipe 210231A1Y30000000006201301071608474 2235 Jan 08 2013 09:37:45 210231A1Y30000000006201301080958534 6260.ak 2 -rw8219.
2 -rw- 2235 Jan 08 2013 09:37:45 210231A1Y30000000006201301080958534 8219.ak 3 -rw- 167201 Nov 09 2012 13:18:36 BASIC.mdb 4 -rw- 633556 Jan 10 2013 15:00:36 BOOTWARE.btw 5 -rw- 19046400 Dec 25 2012 09:20:51 11908-CMW710-BOOT-A0035P10.bin 6 -rw- 17853440 Jan 06 2013 09:57:43 11908-CMW710-BOOT-E2102.bin 7 -rw- 98425856 Dec 25 2012 10:08:30 11908-CMW710-SYSTEM-A0035P10.bin 8 -rw- 57231360 Jan 06 2013 09:52:03 11908-CMW710-SYSTEM-E2102.
13 -rw- 567 Nov 20 2012 13:03:14 dsakey 14 -rw- 735 Nov 20 2012 13:03:03 hostkey 15 -rw- 310 Oct 17 2012 15:10:22 lauth.dat 16 drw- - Jan 08 2013 09:38:09 license 17 drw- - Jan 13 1913 09:42:06 logfile 18 -rw- 385 Jan 16 2013 13:15:08 manuinfo.txt 19 drw- - Sep 26 2012 18:02:39 20 -rw- 508689 Oct 09 2012 11:32:30 21 -rw- 17849344 Jan 15 2013 18:04:43 11908-cmw710-boot-a0035p08.bin 22 -rw- 57092096 Jan 15 2013 18:05:43 11908-cmw710-system-a0035p08.
1. Run the FTP server program on the PC at 10.10.110.1, and set the username, password, and the file directory where the software file is stored. 2. Download the file to the global active MPU: # Log in to the PC with FTP. ftp 192.168.0.23 Connected to 192.168.0.23 (192.168.0.23). 220 WFTPD 2.0 service (by Texas Imperial Software) ready for new user User (192.168.0.
Perform the following tasks as needed: • Upgrade BootWare • Upgrade Comware software • Install a patch package 1. Upgrade BootWare The following example uses new.bin to upgrade the BootWare. NOTE: The BootWare image stored on the active MPU can be used to upgrade the active MPU, LPUs, and switching fabric modules while that stored on a standby MPU is used to upgrade the standby MPU only. # Upgrade the BootWare on the global active MPU. bootrom update file flash:/new.
# Specify the images as the main startup software images for the global active MPU. boot-loader file boot flash:/11908-CMW710-BOOT-E2102.bin system flash:/11908-CMW710-SYSTEM-E2102.bin chassis 1 slot 4 main The images that have passed all examinations will be used as the main startup software images at the next reboot on chassis 1 slot 4..
display install active Active packages on slot 2: flash:/11908-CMW710-BOOT-E2102.bin flash:/11908-CMW710-SYSTEM-E2102.bin flash:/11908-CMW710-SYSTEM-E2102H00.bin Active packages on slot 4: flash:/11908-CMW710-BOOT-E2102.bin flash:/11908-CMW710-SYSTEM-E2102.bin flash:/11908-CMW710-SYSTEM-E2102H00.bin Active packages on slot 5: flash:/11908-CMW710-BOOT-E2102.bin flash:/11908-CMW710-SYSTEM-E2102.bin flash:/11908-CMW710-SYSTEM-E2102H00.
Upgrading Comware software from the BootWare menu Upgrade Comware software by using one of the following methods: • Using TFTP to upgrade through the management Ethernet port • Using FTP to upgrade through the management Ethernet port • Using Xmodem to upgrade through the console port For more information about BootWare, see "Using BootWare menus." NOTE: • The switch does not come with FTP or TFTP software. Prepare the software yourself.
Protocol (FTP or TFTP):tftp Load File Name :test.bin Target File Name :test.bin Server IP Address :192.168.80.22 Local IP Address :192.168.80.10 :main.ipe :main.ipe Subnet Mask Gateway IP Address :255.255.255.0 :0.0.0.0 Table 2 Setting TFTP file transfer parameters Field Description '.' = Clear field Press the dot (.), and then press Enter to clear the setting for a field. '-' = Go to previous field Press the hyphen (-), and then press Enter to return to the previous field.
Image file BOOT.bin is self-decompressing... Saving file flash:/ BOOT.bin ..............................................Done. Image file SYSTEM.bin is self-decompressing...Saving file flash:/ SYSTEM.bin .................................. ..Done.
Protocol (FTP or TFTP):ftp Load File Name :test.bin Target File Name :test.bin Server IP Address :192.168.80.20 Local IP Address :192.168.80.10 11908.ipe :11908.ipe Subnet Mask :255.255.255.0 Gateway IP Address :0.0.0.0 FTP User Name :UserN FTP User Password :PWD Table 3 Setting FTP file transfer parameters Field Description '.' = Clear field Press the dot (.), and then press Enter to clear the setting for a field.
Enter your choice(0-4): 7. Enter 2 or 3 as needed. For example, to upgrade the main Comware software images, enter 2. Loading..................................................................... ............................................................................ .........................Done! 31911744 bytes downloaded! Image file BOOT.bin is self-decompressing... Saving file flash:/ BOOT.bin ..............................................Done. Image file SYSTEM.bin is self-decompressing...
|<5> 115200 | |<0> Exit | ============================================================================ Enter your choice(0-5):2 6. Enter an appropriate baud rate option. For example, enter 2 to select 19200 bps. Baudrate has been changed to 19200 bps. Please change the terminal's baudrate to 19200 bps, press ENTER when ready. NOTE: If you select 9600 bps, directly go to Step 11. 7. Select Call/Disconnect from the HyperTerminal window to disconnect the HyperTerminal from the switch.
Figure 3 Modifying the baud rate 9. Select Call/Call to reconnect to the switch. Figure 4 Connecting to the switch 10. Press Enter in the BootWare interface.
====================================================== |Note:the operating device is flash | |<1> Download Image Program To SDRAM And Run | |<2> Update Main Image File | |<3> Update Backup Image File | |<4> Modify Serial Interface Parameter | |<0> Exit To Main Menu | ============================================================================ Enter your choice(0-4): 12. Enter 2 or 3 as needed. For example, enter 2 to update the main startup software image.
Download successfully! 31911808 bytes downloaded! Image file 11908-CMW710-BOOT-E2102.bin is self-decompressing.... Input the file name: 11908-CMW710-BOOT-E2102.bin Save file ...........................................
|<3> Update BootWare By Serial | |<4> Update BootWare By Ethernet | |<0> Exit To Main Menu | ============================================================================ Enter your choice(0-4): 6. Enter 4 to access the BOOTWARE OPERATION ETHERNET submenu.
Updating Basic BootWare.........Done! Updating Extend BootWare? [Y/N] 10. Enter Y to upgrade the extended BootWare. Updating Extend BootWare.........Done! ====================================== |<1> Update Full BootWare | |<2> Update Extend BootWare | |<3> Update Basic BootWare | |<4> Modify Ethernet Parameter | |<0> Exit To Main Menu | ============================================================================ Enter your choice(0-4): 11.
7. Enter 4 to set file transfer parameters. For field descriptions, see Table 3. NOTE: To use the default settings, press Enter without modifying the settings. ==================================================== |Note: '.' = Clear field. | | '-' = Go to previous field. | | Ctrl+D = Quit. | ============================================================================ Protocol (FTP or TFTP):ftp Load File Name :test.btw Target File Name :test.btw Server IP Address :192.
Enter your choice(0-4): 11. Enter 0 to return to the BootWare Operation menu. 12. Enter 0 in the BootWare Operation menu to return to the EXTEND-BOOTWARE menu. 13. Enter 0 in the EXTEND-BOOTWARE menu to reboot the switch. Using Xmodem to upgrade through the console port 1. Connect the console port of the switch to the PC that stores the source .bin BootWare image. 2. Run the terminal emulation program on the PC. 3.
NOTE: If you select the baud rate of 9600 bps, directly go to Step 12. 8. Select Call/Disconnect from the HyperTerminal window to disconnect the HyperTerminal from the switch. Figure 7 Disconnecting the terminal 9. Select File > Properties in the HyperTerminal window, click Configure in the popup dialog box, and select the baud rate of 19200 bps in the console port properties dialog box.
Figure 9 Modifying the baud rate 10. Select Call/Call to reconnect to the switch. Figure 10 Connecting to the switch 11. Press Enter in the BootWare interface.
======================================== |<1> Update Full BootWare | |<2> Update Extend BootWare | |<3> Update Basic BootWare | |<4> Modify Serial Interface Parameter | |<0> Exit To Main Menu | ============================================================================ Enter your choice(0-4): 13. Enter a number from 1 to 3 as needed. For example, enter 1 to upgrade the entire BootWare. Please Start To Transfer File, Press To Exit. Waiting ...
447616 bytes downloaded! Updating Basic BootWare? [Y/N] 16. Enter Y to upgrade the basic BootWare. Updating Basic BootWare.........Done! Updating Extend BootWare? [Y/N] 17. Enter Y to upgrade the extended BootWare. Updating Extend BootWare.........
Appendix A Using BootWare menus Accessing the BootWare menu The BootWare program is stored in the built-in flash. It consists of one basic segment and one extended segment. The basic segment enables the system to complete basic initialization, and the extended segment bootstraps the Comware software images. Table 4 lists the menus that each segment provides and the major tasks you can perform with these menus. You can access these menus only during system startup.
Shortcut key Prompt message Function Info: Press Ctrl+C to abort or return to EXTEND-ASSISTANT MENU Returns to the EXTEND-ASSISTANT menu. If the system is outputting the result of an operation, this shortcut key combination aborts the display first. Press Ctrl+D to access BASIC-BOOTWARE MENU Accesses the BASIC-BOOTWARE menu. Ctrl+D = Quit Exits the parameter settings menu. Ctrl+E Memory Test(press Ctrl+C to skip it,press Ctrl+E to ECHO INFO) Displays the test process.
Option Task Update the extended BootWare segment. <2> Update Extend BootWare If the corrupted extended segment has corrupted, choose this option to repair it. <3> Update Full BootWare Update the entire BootWare, including the basic segment and the extended segment. <4> Boot Extend BootWare Run the primary extended BootWare segment. <5> Boot Backup Extend BootWare Run the backup extended BootWare segment. <0> Reboot Reboot the device.
Enter your choice(0-5): 2 Please Start To Transfer File, Press To Exit. Waiting ...CCCCC Updating the entire BootWare To update the entire BootWare, enter 3 in the BASIC-BOOTWARE menu. Enter your choice(0-5): 3 Please Start To Transfer File, Press To Exit. Waiting ...CCCCC Running the primary extended BootWare segment To bootstrap the Comware images with the primary extended BootWare segment, enter 4 in the BASIC-BOOTWARE menu. Enter your choice(0-5): 4 Booting Normal Extend BootWare.
The Extend BootWare is self-decompressing................ Done! Accessing the BASIC ASSISTANT menu To access the BASIC ASSISTANT BOOTWARE menu, press Ctrl+U while you are in the BASIC-BOOTWARE menu. ====================================================== |<1> RAM Test | |<0> Exit To Main Menu | ============================================================================ Enter your choice(0-1): Table 7 BASIC ASSISTANT menu Option Task <1> RAM Test Perform a RAM test.
|<9> Storage Device Operation | |<0> Reboot | ============================================================================ Ctrl+Z: Access EXTEND ASSISTANT MENU Ctrl+F: Format File System Enter your choice(0-9): Availability of some options in this menu depends on the password recovery capability state (displayed on top of the EXTEND-BOOTWARE menu). For more information about the feature, see "Disabling password recovery capability.
Option Tasks Reference Skip console login authentication. <8> Skip Authentication for Console Login This option is available only if password recovery capability is enabled. Skipping console login authentication Set the storage medium from which the device will start up. <9> Storage Device Operation <0> Reboot Set the storage medium where file operations are performed. This storage medium is referred to as the "current storage medium" in this chapter. Reboot the device.
............................................................................ ............................................................................ ............................................................................ ...................................................Done. Loading file flash:/11908-CMW710-BOOT-A0035P16.bin......................... ............................................................................ ...........................................Done.
Option Tasks <3> Update Backup Image File Download a Comware software image to the current storage medium as the backup image (the file attribute is set to B). If a backup system image already exists, the B file attribute of the original image is removed. Change the baud rate of the console port. <4> Modify Serial Interface Parameter <0> Exit To Main Menu The baud rate change is a one-time operation. The baud rate will restore to the default (9600 bps) at reboot.
In this example, when the file transfer is complete, the system sets the file as the main Comware software image. The following is the sample output: Loading................................................................... .......................................................................... .......................................................................... ..................................Done! 77979456 bytes downloaded! Updating File flash:/test.bin.........................................
Option Tasks <3> Update Backup Image File Download a Comware software image to the current storage medium as the backup image (the file attribute is set to B). If a backup system image already exists, the B file attribute of the original image is removed. <4> Modify Ethernet Parameter Configure FTP or TFTP file transfer settings. <0> Exit To Main Menu Return to the EXTEND-BOOTWARE menu. 2. Enter 4 in the Ethernet submenu to configure file transfer settings.
Field Description FTP User Name Set the username for accessing the FTP server. This username must be the same as configured on the FTP server. This field is not available for TFTP. FTP User Password Set the password for accessing the FTP server. This password must be the same as configured on the FTP server. This field is not available for TFTP. 3. Choose an option from 1 and 2. For example, to upgrade the main Comware software image, enter 2.
Table 12 FILE CONTROL submenu options Option Task <1> Display All File(s) Display all files on the current storage medium. <2> Set Image File type Set the type of a Comware software image. <3> Set Bin File type Set the type of a .bin Comware software image. <4> Delete File Delete a file from the current storage medium. <4> Exit To Main Menu Return to the EXTEND-BOOTWARE menu.
|22 10321920 Nov/09/2012 13:23:51 N/A flash:/core/node1_dbmd_100_11_20| |121109-132247_1352467367.core |23 0 | Sep/26/2012 09:07:14 N/A flash:/core/node25_scmd_326_4_20| |120926-090714_1348650434.core |24 10321920 | Nov/20/2012 10:52:01 N/A flash:/core/node1_dbmd_99_11_201| |21120-105048_1353408648.core |25 10321920 | Nov/15/2012 09:33:40 N/A flash:/core/node1_dbmd_99_11_201| |21115-093243_1352971963.core | |26 19547 Dec/03/2012 16:51:32 N/A flash:/.trash/startup.
|<1>+Main |<2>+Backup | |<0> Exit | ============================================================================ Enter your choice(0-2): Modify the file attribute: ============================================================================ |<1>+Main | |<2>+Backup | |<0> Exit | ============================================================================ 3. Enter a number in the range of 1 to 4 to add or delete a file attribute for the file.
|<1>+Main | |<2>+Backup | |<0> Exit | ============================================================================ Enter your choice(0-2): Modify the file attribute: ============================================================================ |<1>+Main | |<2>+Backup | |<0> Exit | ============================================================================ Enter your choice(0-2):1 This operation may take several minutes. Please wait....
|18 57 Sep/29/2012 17:49:35 N/A flash:/mdc/mdc4/ifindex.dat | |19 6 Sep/27/2012 18:05:06 N/A flash:/mdc/mdc4/.nickname | |20 63876 Sep/29/2012 17:49:37 N/A flash:/mdc/mdc4/supb-mdc-4_9-28.| |mdb |21 | 5730 Sep/29/2012 17:49:36 N/A flash:/mdc/mdc4/supb-mdc-4_9-28.| |cfg |22 | 10321920 Nov/09/2012 13:23:51 N/A flash:/core/node1_dbmd_100_11_20| |121109-132247_1352467367.core |23 0 | Sep/26/2012 09:07:14 N/A flash:/core/node25_scmd_326_4_20| |120926-090714_1348650434.
Disabling password recovery capability can protect your system from unauthorized console access to configuration. However, if you have only console access to the system but you have lost the console login password, you can only access the system after restoring the factory-default configuration. To enable the system to start up with the factory-default configuration instead of a next-startup configuration file: 1. Enter 5 in the EXTEND-BOOTWARE menu. Enter your choice(0-9):5 2.
Table 13 BootWare Operation menu options Option Tasks <1> Backup Full BootWare Back up the entire BootWare image. When the BootWare image is corrupted, you could use the backup image for recovery. Recover the entire BootWare image. <2> Restore Full BootWare If the BootWare image has been corrupted, you can use a backup BootWare image to recover it. <3> Update BootWare By Serial Update the BootWare from the console port. <4> Update BootWare By Ethernet Update the BootWare from an Ethernet port.
Table 14 DEVICE CONTROL menu options Option Task <1> Display All Available Nonvolatile Storage Device(s) Display all available storage media. <2> Set The Operating Device Set the current storage medium. All file operations performed using BootWare menus are performed on the current storage medium. <3> Set The Default Boot Device Set the default storage medium from which the system will start up. <0> Exit To Main Menu Return to the EXTEND-BOOTWARE menu.
5. Verify that the flash has enough memory to store the downloaded files. 6. Verify that the versions of Comware software and BootWare are correct. For the compatibility between the Comware software and BootWare, see the hardware and software compatibility matrix in Release Notes. 7. Verify that the BootWare image is applicable to the target cards. 8. If a message “Something is wrong with the file” appears, check that the file is usable.
Support and other resources Contacting HP For worldwide technical support information, see the HP support website: http://www.hp.
• HP manuals http://www.hp.com/support/manuals • HP download drivers and software http://www.hp.com/support/downloads • HP software depot http://www.software.hp.com • HP Education http://www.hp.com/learn Conventions This section describes the conventions used in this documentation set. Command conventions Convention Description Boldface Bold text represents commands and keywords that you enter literally as shown. Italic Italic text represents arguments that you replace with actual values.
Convention Description NOTE An alert that contains additional or supplementary information. TIP An alert that provides helpful information. Network topology icons Represents a generic network device, such as a router, switch, or firewall. Represents a routing-capable device, such as a router or Layer 3 switch. Represents a generic switch, such as a Layer 2 or Layer 3 switch, or a router that supports Layer 2 forwarding and other Layer 2 features.
Index ACRSU Software file naming conventions,1 A Software types,1 Accessing the BASIC ASSISTANT menu,38 U C Upgrade methods,1 Contacting HP,55 Upgrading BootWare from the BootWare menu,25 Conventions,56 Upgrading Comware software from the BootWare R menu,17 Related information,55 Upgrading from the CLI without using ISSU,2 S Using the EXTEND-BOOTWARE menu,38 58