
R3102-R3103-HP 6600/HSR6600 Routers Security Configuration Guide

39
Configuring HWTACACS schemes
You cannot remove the HWTACACS schemes in use or change the IP addresses of the HWTACACS
servers in use.
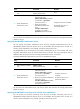
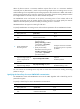
HWTACACS configuration task list
Task Remarks
Creating an HWTACACS scheme Required.
Specifying the HWTACACS authentication servers Required.
Specifying the HWTACACS authorization servers Optional.
Specifying the HWTACACS accounting servers and the relevant parameters Optional.
Specifying the shared keys for secure HWTACACS communication Required.
Specifying a VPN for the HWTACACS scheme Optional.
Setting the username format and traffic statistics units Optional.
Specifying the source IP address for outgoing HWTACACS packets Optional.
Setting HWTACACS timers Optional.
Displaying and maintaining HWTACACS Optional.
Creating an HWTACACS scheme
The HWTACACS protocol is configured on a per scheme basis. Before you perform other HWTACACS
configurations, create an HWTACACS scheme and enter HWTACACS scheme view. You can configure
up to 16 HWTACACS schemes.
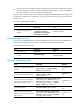
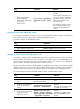
To create an HWTACACS scheme and enter HWTACACS scheme view:
Ste
p
Command
Remarks
1. Enter system view.
system-view N/A
2. Create an HWTACACS scheme and
enter HWTACACS scheme view.
hwtacacs scheme
hwtacacs-scheme-name
Not defined by default.
You can delete an HWTACACS scheme only when it is not referenced.
Specifying the HWTACACS authentication servers
You can specify one primary authentication server and one secondary authentication server for an
HWTACACS scheme. When the primary server is not available, the secondary server is used. In a
scenario where redundancy is not required, specify only the primary server.
An HWTACACS server can function as the primary authentication server of one scheme and as the
secondary authentication server of another scheme at the same time. You cannot specify the same IP
address as both the primary and the secondary authentication servers in a scheme.
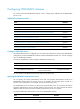
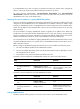
To specify HWTACACS authentication servers for an HWTACACS scheme:
Ste
p
Command
Remarks
1. Enter system view.
system-view N/A