
R3303-HP 6600/HSR6600 Routers Security Configuration Guide


89
Enabling EAP relay or EAP termination
When configuring EAP relay or EAP termination, consider the following factors:
• The support of the RADIUS server for EAP packets
• The authentication methods supported by the 802.1X client and the RADIUS server
If the client is using only MD5-Challenge EAP authentication or the "username + password" EAP
authentication initiated by an HP iNode 802.1X client, you can use both EAP termination and EAP relay.
To use EAP-TL, PEAP, or any other EAP authentication methods, you must use EAP relay. When you make
your decision, see "A comparison of EAP relay and EAP termination" f
or help.
For more information about EAP relay and EAP termination, see "802.1X authentication procedures."
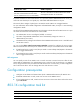
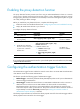
To configure EAP relay or EAP termination:
Ste
p
Command Remarks
1. Enter system
view.
system-view N/A
2. Configure EAP
relay or EAP
termination.
dot1x authentication-method
{ chap | eap | pap }
By default, the network access device performs EAP
termination and uses CHAP to communicate with the
RADIUS server.
Specify the eap keyword to enable EAP termination.
Specify the chap or pap keyword to enable
CHAP-enabled or PAP-enabled EAP relay.
NOTE:
If EAP relay mode is used, the user-name-format command configured in RADIUS scheme view does no
t
take effect. The access device sends the authentication data from the client to the server without any
modification.
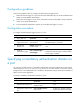
Setting the port authorization state
The port authorization state determines whether the client is granted access to the network. You can
control the authorization state of a port by using the dot1x port-control command and the following
keywords:
• authorized-force—Places the port in the authorized state, enabling users on the port to access the
network without authentication.
• unauthorized-force—Places the port in the unauthorized state, denying any access requests from
users on the port.
• auto—Places the port initially in the unauthorized state to allow only EAPOL packets to pass, and
after a user passes authentication, sets the port in the authorized state to allow access to the network.
You can use this option in most scenarios.
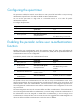
You can set authorization state for one port in interface view, or for multiple ports in system view. If
different authorization state is set for a port in system view and interface view, the one set later takes
effect.
To set the authorization state of a port: