
R3303-HP 6600/HSR6600 Routers Security Configuration Guide

379
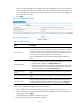
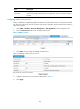
4. Click Apply.
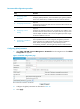
Table 20 Configuration items
Item Descri
p
tion
Resource Name
Enter a name for the remote access service resource.
The resource name must be unique in the SSL VPN system. Resources are uniquely
identified by their names.
IMPORTANT:
If you do not configure the command for Command, HP recommends including the
resource type, local address, and local port in the resource name so that users can view
the desired information after they log in to the SSL VPN system.
Remote Host
Specify the host name or IP address of the remote host that provides the remote access
service.
Remote Port Specify the port number that the remote host uses for the remote access service.
Local Host Specify a loopback address or a character string that represents a loopback address.
Local Port
Specify the port number that the local host uses for the remote access service. HP
recommends using a port number greater than 1024 that is rarely used.
Command
Configure the Windows command for the resource.
After you configure the command, users can start the related application to access the
remote server by clicking the resource name on the SSL VPN service interface.
For example, you can configure the command for a Telnet service in the format telnet
<local address> <local port>, such as telnet 127.0.0.1 2300. If you specified the
default port number of the remote access service as the local port number, you can omit
the local port in the command.
Configuring a desktop sharing service resource
Desktop sharing, or remote desktop, allows users to access the sessions on a remote host from your local
host. With desktop sharing, you can connect the computer in office, and access all the applications, files,
and network resources at home as if you were working on the computer at the office. Common desktop
sharing services include Windows remote desktop, Virtual Network Computing (VNC) desktop sharing,
and Citrix desktop sharing. For some desktop sharing applications, data is transmitted in plain text and
can be easily intercepted. SSL VPN can encrypt the data to ensure data security.
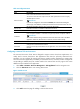
1. Select VPN > SSL VPN > Resource Management > TCP Application from the navigation tree.
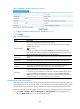
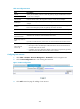
2. Click the Desktop Sharing Service tab to view existing desktop sharing services.
Figure 144 Desktop sharing services
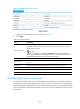
3. Click Add to enter the page for adding a desktop sharing service.