
R3303-HP HSR6800 Routers ACL and QoS Configuration Guide

60
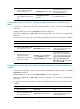
Configuring the maximum queue size
Configure the maximum queue size and use tail drop.
When low-priority services preempt the bandwidth for the AF service, you can increase the queue size for
the AF service.
To configure the maximum queue size:
Ste
p
Command
Remarks
1. Enter system view.
system-view N/A
2. Create a traffic behavior and
enter traffic behavior view.
traffic behavior behavior-name
The specified traffic behavior name
cannot be the name of any
system-defined behavior.
3. Set the maximum queue size.
queue-length queue-length N/A
Check that the queue af command or the queue wfq command has been configured before you
configure the queue-length command. Executing the undo queue af command or the undo queue wfq
command cancels also the queue-length command.
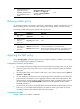
Enabling WRED
When you enable WRED, follow these guidelines:
• Before enabling WRED, configure the queue af command or the queue wfq command.
• The wred command and the queue-length command are mutually exclusive.
• When WRED is disabled, other configurations under it are deleted.
• The WRED configuration in QoS policies overrides the WRED configuration directly configured on
interfaces.
To enable WRED:
Ste
p
Command
Remarks
1. Enter system view.
system-view N/A
2. Create a traffic
behavior and enter
traffic behavior view.
traffic behavior
behavior-name
The specified traffic behavior name cannot be
the name of any system-defined behavior.
3. Enable WRED.
wred [ dscp | ip-precedence ]
• dscp—Uses the DSCP value for calculating
the drop probability for a packet.
• ip-precedence—Uses the IP precedence
value for calculating the drop probability for
a packet. This keyword is used by default.
Configuring the exponent for WRED to calculate the average queue size
Before configuring the WRED exponent, make sure the queue af command or the queue wfq command
has been configured and the wred command has been used to enable WRED.
To configure the exponent for WRED to calculate the average queue size:
Ste
p
Command
Remarks
1. Enter system view.
system-view N/A