Ignite-UX Administration Guide for HP-UX 11i Abstract This guide describes installing, configuring, and using Ignite-UX to install and recover HP-UX. It is intended for administrators with in-depth knowledge of HP-UX operating system concepts, commands, and configuration; HP computer hardware and software; upgrading software, applying patches, and troubleshooting problems; and knowledge of TCP/IP networking concepts and network configuration.
© Copyright 1999, 2013 Hewlett-Packard Development Company, L.P. Confidential computer software. Valid license from HP required for possession, use or copying. Consistent with FAR 12.211 and 12.212, Commercial Computer Software, Computer Software Documentation, and Technical Data for Commercial Items are licensed to the U.S. Government under vendor's standard commercial license. The information contained herein is subject to change without notice.
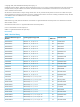
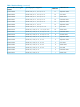
Table 1 Revision History (continued) Document Manufacturing Part Number Operating Systems Supported B2355-90849 HP-UX 11.00, 11i v1, 11i v1.6, 11i v2 17 September 2004 B2355-90837 HP-UX 11.00, 11i v1, 11i v1.6, 11i v2 16 June 2004 B2355-90834 HP-UX 11.00, 11i v1, 11i v1.6, 11i v2 15 March 2004 B2355-90831 HP-UX 11.00, 11i v1, 11i v1.6, 11i v2 14 December 2003 B2355-90788 HP-UX 11.00, 11i v1, 11i v1.6, 11i v2 13 September 2003 B2355-90829 HP-UX 11.00, 11i v1, 11i v1.
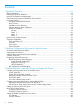
Contents 1 Ignite-UX Overview...................................................................................10 Ignite-UX Features...................................................................................................................10 Getting the Ignite-UX Software ................................................................................................12 Ignite-UX Commands and Manpages........................................................................................
4 Simple Network: Creating a Server for Anonymous Clients............................42 Overview of Anonymous Clients...............................................................................................42 Configuring an Ignite Server to Boot Anonymous PA-RISC Clients..................................................42 Using the Server Setup Wizard............................................................................................42 Editing the instl_boottab file............................
Agile View Concepts...............................................................................................................71 Practical Considerations..........................................................................................................73 System Installation Configuration..........................................................................................73 Support for >2 TB boot disk.............................................................................................
11 Golden Images.....................................................................................151 Advantages of Golden Images...............................................................................................151 Creating a Golden Image......................................................................................................151 Installing the HP-UX Operating System ...............................................................................
Put two HP-UX 11i v2 golden archives, one Itanium-based and one PA-RISC, on a DVD....184 Create a recovery DVD...........................................................................................184 Create an HP-UX 11i v2 Itanium-based recovery DVD using an existing network recovery image...................................................................................................................184 Error messages....................................................................................
Ignite-UX Server Problems .....................................................................................................224 Installing Systems with Ignite-UX..............................................................................................224 Installing from Media............................................................................................................229 Installing from Golden Images........................................................................................
1 Ignite-UX Overview Welcome to Ignite-UX! This chapter contains information for new and experienced users alike.
One-Step Installation Once you configure a system with a common configuration you want replicated to other systems, use Ignite-UX to either manually or automatically install each client system. This common configuration can include any supported HP-UX 11i operating system, and you can add any required patches and applications. Custom Installations It is easy to create a system that is ready to go as soon as the installation session completes.
Getting the Ignite-UX Software Ignite-UX is available in standard SD (Software Distributor) depot format from OE and AR media, and from the HP Software Depot Website. Any Ignite-UX bundle is safe to install at any time. None of the filesets in Ignite-UX bundles will cause a reboot to occur. • OE and AR Media Ignite-UX released on OE or AR media can only be installed on a server running the HP-UX version supported by the OE or AR media. This Ignite-UX is the complete product.
IMPORTANT: Installing individual bundles instead of the complete product might cause problems for Ignite-UX if the complete product was installed previously. Refer to the Installing and Updating Ignite-UX white paper if you are unsure of what to install to upgrade Ignite-UX. Links to the Ignite-UX white papers are found at http://www.hp.com/go/ignite-ux-docs.
Table 2 Ignite-UX Command Manpages (continued) Ignite-UX Command Manpages Description archive_impact(1M) Calculate the per file system disk space for tar, cpio, and tar archives, and create the impacts statements for use in configuration files. instl_bootd(1M) Boot protocol server for Ignite-UX clients. instl_combine(1M) Combine a LIF volume and file system for use on CD/DVD. This command is used to construct custom, bootable, installation media.
Each client’s installation status is indicated by the colored border around its icon, and the installation gauge shows the relative progress: • Green: The operating system is completely installed, booted, and running with no errors or warnings. • Yellow: A warning condition exists and should be investigated. • Red: An error condition is present. The operating system is partially installed, or the installation has stopped. • No color: Installation has not yet started or the client has been stopped.
Figure 3 Ignite-UX GUI By Properties View • Save View as Default - Saves the current Ignite-UX GUI View settings. Options Menu Use the Options menu to set server configuration variables and to control the refresh rate of the Ignite-UX display. • Server Configuration - Identify and set up your installation server. The selections here are covered in detail in “More Server Setup Options” (page 36). • Change Refresh Interval - Select how frequently you want the client display updated.
Figure 4 Client Status Dialog Box • Install Client - Starts the HP-UX installation process for the selected client. This process is explained in Chapter 10: “Booting and Installing HP-UX on Clients Using the Server” (page 110). • Stop Install... - Stops the installation process on the selected client. After stopping an install, you can reboot or halt the client. • Create Network Recovery Archive - Creates a network recovery image using the make_net_recovery command.
describes the major components of Ignite and where they come from. Ignite installation and recovery is described in terms of phases, with each phase described in detail. The Ignite-UX Install Environment HP-UX installation and recovery is accomplished using the Ignite-UX install environment. The Ignite install environment is a small subset of the HP-UX operating system that allows HP-UX to install itself onto a system.
for networking when its kernel is up and running. The mechanisms for distributing the first and second IP addresses are sometimes different. PA-RISC Systems When a PA-RISC system boots from an Ignite-UX server, the first IP address request is answered by the instl_bootd daemon. This communication uses ports 1067 and 1068. The file /etc/ opt/ignite/instl_boottab is referenced to assign the first IP address to the booting system whether it is registered or anonymous.
5. 6. 7. 8. (Improved agile device selection and recovery has eliminated the need for this feature and might result in this step being removed in the future.) Configuration content from the install file system is loaded to determine if the Ignite TUI should be started and if special inventory control is needed. (The Ignite TUI is started by default.) A system I/O inventory is performed.
install kernel, the RAM file system is still the root disk. For the commands in this phase, the new disk file systems is the root file system. A reboot is required to change the HP-UX kernel root disk from the RAM disk to the final disk. 1. Release RAM disk space to accommodate software installation and kernel build processes to be done later. 2. Load the archive if indicated in the config (for recovery and golden image installation). 3.
No Tape Boot Support — Two-Step Media Recovery” (page 214) and the Ignite-UX Installation Booting white paper available at http://www.hp.com/go/ignite-ux-docs for more information. • Network interface: One or more network adapters to support network boot and installation is required. A network adapter directly connected to each supported subnet is preferred. Note that multiple simultaneous network installations and recovery operations can create significant network traffic.
export DISPLAY=system_name:0.0 If DISPLAY is not set on the server, the Ignite TUI will run. • Software: Get Ignite-UX and any software depots you plan to distribute to clients from the product media (CD or DVD). Ignite-UX can also be downloaded from the web; see “Getting the Ignite-UX Software ” (page 12) for more information. • Client access to server: There are multiple methods of having clients contact the Ignite server, each suited to a different environment.
2 Making Configuration Decisions for Ignite Servers Ignite is flexible when configuring networking options and even allows options that don't require networking. Also, you can switch to a source other than the boot source for install content. These features allow you to choose from a variety of installation and recovery solutions. Below are installation solutions, starting with the most simple and progressing to those more complex. This chapter finishes with network booting debugging techniques.
Further, the decision tree for network booting Itanium-based systems assumes there is only one DHCP server on your subnet configured to answer boot requests, and that it is running HP-UX. If you want to boot a system without using the network and your Ignite-UX server, see the decision tree shown in Figure 34 (page 98). NOTE: A lot of clients can only be booted using their built-in LAN interfaces. Other LAN interfaces might not be supported for boot.
Figure 6 Decision Tree When Configuring a Server for Booting Itanium-Based Systems Configure individual entries in bootptab — To network boot registered Itanium-based clients, the server uses the bootpd daemon to answer boot requests, and has clients’ IP addresses and LAN addresses registered in /etc/bootptab. One drawback to this option is that you must configure an entry for every system that needs to boot. The advantage of this method is that it works on all versions of HP-UX.
booted from a source local to the client system. Regardless of how Ignite-UX is started, it has the same network capabilities once it is running. • Use bootsys to boot a system already running HP-UX If the client system is already running HP-UX, the Ignite-UX bootsys command may be used to copy the install kernel and install file system to the client system's HP-UX file system. After reboot, the HP-UX boot loader can boot for installation using that copied content.
HP-UX Diagnosing and Debugging Simple Network Debugging If network boot is used on a local subnet and the Ignite-UX server is not found, check these items: • Verify the client is on the same subnet as the Ignite-UX server or boot helper. • Investigate instl_bootd errors in /var/adm/syslog/syslog.log. • In the /var/adm/inetd.sec file, ensure the service instl_boots exists, and that the IP address 0.0.0.0 is allowed. (Normally, all addresses are allowed via 0.0.0.0.
Domain Name Server: Host Name: Domain Name: 10.1.1.1 hpuxsys1 xyzco.com RDP Diagnosing and Debugging An RDP server can be configured to log PXE boot and TFTP activity. The PXE Configuration Utility may be used to control logging. Logging should be disabled when you are finished diagnosing and debugging.
3 Simple Network: Creating a Server for Registered Clients This chapter describes how to install a basic Ignite-UX server configuration for network booting and installing HP-UX on clients registered with the server. This chapter does not discuss support for anonymous clients. For information about how to set up anonymous clients, see Chapter 4 (page 42). See the Ignite-UX Quick Start Guide available at http://www.hp.com/go/ignite-ux-docs if you are new to HP-UX.
Figure 8 Ignite-UX GUI Welcome Dialog Box To learn more about the Ignite-UX GUI now, click Tutorial and Demo... Once the Ignite server is configured, you can access the tutorial by selecting Actions→Run Tutorial/Server Setup→Tutorial and Demo from the Ignite-UX interface. To bypass this welcome the next time you start Ignite-UX, click the Do not show this screen again check box. Launch the Server Setup Wizard To begin configuring your Ignite-UX server, click Server Setup...
Figure 9 Server Setup Wizard To set up an Ignite-UX server for PA-RISC clients, complete step 1 (Set up IP addresses), skip step 2 (Set up DHCP addresses), and complete step 3 (Set up software). Click Next to advance to the Server Setup: IP Addresses dialog box (Figure 10). NOTE: To end the setup process at any time and leave the system unchanged, click Cancel.
Register the PA-RISC Clients with the Server Select Configure Booting IP Addresses Now from the Server Setup: IP Addresses dialog box (Figure 10 (page 32)), then click Next to proceed to the Configure Booting IP Addresses dialog box shown in Figure 11 (page 33). Figure 11 Configure Booting IP Addresses Use the Configure Booting IP Addresses dialog box to register client IP addresses with their physical MAC addresses.
Once you exit the Configure Booting IP Addresses dialog box, a registered client’s boot request is answered by instl_bootd, and the client will boot to the reserved IP address listed in the Booting IP Addresses window. NOTE: No intervention is required to have instl_bootd pick up changes to the /etc/opt/ ignite/instl_boottab file. When a boot request is received, instl_bootd always checks whether the file was modified since last read, and rereads it before answering any boot request.
From now on, when a registered client’s boot request is answered by bootpd, it will boot to the reserved IP address you entered in the /etc/bootptab file. You can make changes to the bootptab file at any time. IMPORTANT: The server that sends the response to the boot request is the same system from which the client will attempt to tftp the boot file. If you are not using an HP-UX system to reply to a request, you must make the required boot files available and current with new releases of Ignite-UX.
Figure 12 Software Depot Setup Page Select the depot source (media or installed depot) and then click Next. For media, you are prompted to insert the media and select a device. For an installed depot, you are prompted for the hostname of the system containing the operating system depots. Enter the hostname, then click Show Depots.... Select a depot containing a core operating system from the list, and then click OK. You are then asked to confirm your choices.
Figure 13 Ignite-UX Server Configuration Tabs The following options are available: • Default Configuration – Click the button next to Default Configuration to select from the list of available configurations. The selected configuration is the default that will be used when installing clients. You can override this default setting on a per-client basis with Ignite-UX. • Default Printer – Click the button next to Default Printer, then select one of the available (configured) printers.
• The Configure Booting IP Addresses... button gives you access to the Configure Booting IP Addresses dialog previously described in “Register the PA-RISC Clients with the Server” (page 33). • Add DHCP Addresses... – The assignment of DHCP IP addresses for booting is only used for anonymous clients. See Chapter 4 (page 42) for more information. The IP addresses you provide here are used during boot and installation. These addresses are in use for most of the Ignite-UX download to a client.
Figure 15 Session Options Tab The options you can configure on this tab are explained as follows: • Confirm new clients – Controls whether a confirmation dialog box appears each time a new client is booted from the Ignite-UX server. • Ask for customer information during client installation – Controls whether an input window appears to enable entry of customer name, system serial number, and order number. This information is stored in the manifest.
Setting Up Additional Software on the Server After you have successfully installed and configured your Ignite-UX server, you might want to set up additional software on the server for installation on clients. Commands written for this task handle Software Distributor (SD) depots and bundles, but it is possible to configure Ignite to install non-SD software.
1. 2. Make a copy of the /var/opt/data/examples/noncore.cfg file and edit it for your particular software. The file contains extensive comments to help you make the changes you need. Use manage_index to add configuration files to configuration clauses in the INDEX file. See manage_index(1M). IMPORTANT: Do not use archives with files in /var/adm/sw/* as software sources. Delivering files to /var/adm/sw/* can corrupt the SD Installed Product Database.
4 Simple Network: Creating a Server for Anonymous Clients This chapter describes how to configure your server to network boot and install HP-UX on anonymous clients. Overview of Anonymous Clients When booting registered PA-RISC clients, the clients’ IP addresses and MAC addresses were entered in the /etc/opt/ignite/instl_boottab file. If the clients were Itanium®-based, they were registered in the /etc/bootptab file.
Configuring an Ignite Server to Boot Anonymous Itanium-Based Clients Working With DHCP Even on a simple network, there could be devices such as printers requesting network boot. This section describes the challenges involved and solutions for DHCP booting and then acquiring IP addresses for networking.
Make sure that at a minimum, HP-UX 11i v2 is installed on your Ignite-UX server or boot helper system. Add your device pool group entry to the /etc/dhcptab file on your Ignite-UX server or boot helper system. You should not need to restart bootpd if it is already running. When a new bootp DHCP request is received, bootp checks to see whether it must reread any configuration files. If you want to force bootp to reread the configuration file, send it the SIGHUP signal.
A DHCP server or boot helper system configured to respond to any DHCP boot request containing PXEClient will respond to both Itanium-based servers and industry standard servers. A PXE response suitable for an industry standard server is unlikely to allow an Itanium-based system to boot. lease-time How long in seconds the IP address may be used to boot a system. The example value is 300 seconds (5 minutes) but you may need more time if your network is a busy one.
IMPORTANT: The class-id entry above is a regular expression designed to allow a response to a class-id of an Itanium-based system performing a network boot or an IgniteDHCPDeviceGroup in /etc/dhcptab. This is not a valid class-id for use in an Ignite-UX install file system. Systems using a DHCP device group for installing anonymous Itanium-based systems should have is_net_info_temporary set to TRUE to prevent systems from using the IP address gained via DHCP after installation.
5 Complex Networks: Challenges and Solutions Most information about Ignite server set up assumes a simple network consisting of one subnet where the server supports network boot and installation. This simple network configuration is assumed so documentation can be clear and concise. Often, real network environments are significantly more complex. Configuring an Ignite server to operate correctly in a complex network configuration requires special consideration of network topology.
Multiple Subnets The challenge with an Ignite server connected to multiple subnets is ensuring the server is correctly configured to handle client network interfaces for boot and installation on the different subnets. If subnets are isolated or performance is a concern, you will need to ensure that installation traffic is correctly routed to the Ignite server. The following diagram shows the example systems used when outlining solutions for a complex network with multiple subnets.
Multiple Boot Servers If there are multiple servers that support boot and installation on a subnet (sysrdp and hpignite), these systems are very likely to interfere with each other. This is common when systems running different operating systems coexist on the same subnet and network installation is used to manage these systems. Network boot and installation servers are typically designed with the assumption that they are the only such server on the subnet.
An Ignite-UX Server for Each Subnet If your organization has separate groups that have distinct needs and compute resources, the simplest approach to deal with complex networks might in fact be to manage distinct subnets rather than set up a central Ignite server. An Ignite server can be placed on each subnet. You may manage each server separately. This avoids the complexities of multiple subnets. Similarly, boot servers for other operating systems can have their own subnets.
The native VLAN is defined in the configuration of the switch. In this situation, the Ignite server might not have access to the native VLAN of the client. If the Ignite server does not have access to the native VLAN, it will not have access to any of the untagged traffic from the client. This becomes a problem, since during an Ignite-UX installation or recovery, no network traffic is tagged until the session is complete and the final system is running. This includes two-step media recovery.
To use this approach, modify bootptab entries to use the appropriate boot loader. The boot loader will use the AUTO file in the same directory where nbp.efi is located. Ignite requires the HP-UX version of the install kernel and install file system to match the HP-UX OS version to be installed. By having different defaults in the AUTO files, the correct install kernel and file system will be automatically selected.
You can typically configure boot servers to use the network address to decide whether to respond to the client system or not. If the server responds, the network address is typically used to determine the correct client-specific network configuration (IP address, netmask, gateway, etc.). When using this approach, boot servers typically have configuration content that allows them to respond to a set of MAC addresses. For HP-UX servers, the /etc/bootptab file is used to identify the clients to respond to.
The server keyword specifies the IP address for your Ignite-UX server. It refers to a specific LAN interface on the Ignite-UX server. The same is true for the sd_server keyword that specifies the depot server IP address for any depots needed for installation. server = "10.2.1.11" sd_server = "10.2.1.11" netmask[] = "255.255.255.0" route_gateway[0] = "10.3.1.
Having the Client Contact the Correct Server The server keyword in the IINSTALLFS configuration information specifies the IP address for your Ignite-UX server. It refers to a specific LAN interface on the Ignite-UX server. The same is true for the sd_server keyword that specifies the depot server IP address for any depots needed for installation. If a client is on a subnet that does not have a route to the IP address specified by server, then it will not be able to contact the server after it boots.
1. Install the Ignite-UX minimum core functionality onto the helper system. The Ignite-UX_server:/depot is the same Ignite product software depot or media used to set up the master Ignite server. # swinstall -s Ignite-UX_server:/depot Ignite-UX.MinimumRuntime 2. On the boot helper system, set the default Ignite-UX server.
If the Next Server boot helper is a PA-RISC system, this boot loader file will have to be copied from an Integrity system. Note that the Ignite-UX product may be installed instead of copying this file in place. The Next Server response is configured in /etc/bootptab using the sa option. The IP address given with the sa option should be the DHCP PXE Next Server (SiAddr) IP address for additional boot content. This example configuration is for the following complex network diagram.
When a client system broadcasts a request for network boot, the bootp relay boot helper will forward the request to the master bootp server indicated in the bootptab. The master bootp server will respond to the bootp relay boot helper, which will then forward the response back to the client system. The master Ignite boot server and master bootp server should be the same system.
ip=10.4.1.100:\ bp=10.2.1.11 To use the bootp relay boot helper with PA-RISC systems, boot using standard ports, such as: boot lan.10.2.1.11 The installation option to use HP-UX specific network ports might not work: boot lan.10.2.1.11 install Multi-Capable Subnet Boot Server It is possible to set up a boot server that supports boot for multiple operating systems, including HP-UX. The multi-capable boot server may be an HP-UX system or a non-HP-UX system.
Keeping versions and configuration content consistent between these servers can be difficult. If these servers are managed by different groups, ongoing administration might make this approach impractical.
6 Complex Networks: Multi-Capable Servers This chapter presents a variety of ideas for using servers in a complex network. There is no one solution when configuring servers in a complex environment – look for the solutions that work in your data center. This chapter focuses on Integrity systems only.
Start→All Programs→Altiris→PXE Services→PXE Configuration Utility It may also be started from the RDP Deployment Solutions Console. IMPORTANT: The recommended Minimum delay is 9 seconds and the Maximum delay is 10 seconds. These values should be large enough to provide predictable results considering some possibility of HP-UX boot server delays due to the server being busy and possible network congestion.
• .\MenuOption162.0 (nbp.efi renamed as required by the RDP server) • .\MenuOption163.0 (nbp.efi renamed as required by the RDP server) • .\Rel_B.11.23 • .\Rel_B.11.23\IINSTALLFS • .\Rel_B.11.23\IINSTALL • .\Rel_B.11.31 • .\Rel_B.11.31\IINSTALL • .\Rel_B.11.31\IINSTALLFS • .\fpswa.efi • .\hpux.efi • .\AUTO The RDP server requires the file name of the initial boot loader file and the name of the MenuOption to match. Normally, MenuOption160 will be used by the RDP server.
On the Boot Menu tab, select the New... button to create a MenuOption for HP-UX boot and installation. You should validate that the selected MenuOption number in the Final Location on PXE Server text box is consistent with the HP-UX Ignite content provided.
1. Enter the name of the MenuOption to be created in the Name: text box. For HP-UX, the name “HP-UX Managed” is recommended. If HP-UX release-specific MenuOptions are created by using different AUTO content, a name such as “HP-UX 11.31 Managed” is recommended. 2. 3. 4. Configure the Pre-boot Image Properties. • Select Operating System type Other. • Select only the ia64 Processor Option, since HP-UX only supports ia64 systems. Make sure x86 and x64 are unselected.
Using an RDP MenuOption for HP-UX Once the HP-UX MenuOption is set up using either the PXE Configuration Utility command or UI, the RDP PXE server will include “HP-UX Managed” as an option during network boot of ia64 client systems. When a client system is booted from an RDP PXE server, the system will prompt you to “Press [F8] to select a boot option.” When booting on a serial console, function keys are typically not available. The m key may be used to bring up the boot menu instead of the F8 function key.
This file should be located on the Linux system at /opt/ignite/boot/nbp.efi. This file needs to be accessible via TFTP. Configuring an HP-UX Server to Support Linux Boot and Installation By using HP-UX network services configuration files, an HP-UX server can be set up to support Linux network boot and installation if you place Linux boot and install content on the HP-UX server. You must acquire the boot and install content from a Linux distribution or Open Source website.
or copied to the server from media via dd(1) and then made available for NFS or FTP access. For example: RedHat: /ISOimages/RHEL5UP1 /ISOimages/RHEL5UP1/RHEL5.1-Server-20071017.0-ia64-disc1-ftp.iso /ISOimages/RHEL5UP1/RHEL5.1-Server-20071017.0-ia64-disc2-ftp.iso /ISOImages/RHEL5UP1/RHEL5.1-Server-20071017.0-ia64-disc3.ftp-iso /ISOImages/RHEL5UP1/RHEL5.1-Server-20071017.0-ia64-disc4.ftp-iso /ISOImages/RHEL5UP1/RHEL5.1-Server-20071017.0-ia64-disc5.ftp-iso /ISOImages/RHEL5UP1/RHEL5.1-Server-20071017.
| . USE AT YOUR OWN RISK! ^C to go back to EFI; ESC does nothing. | | | | /------------------------------------------------\ | | | Install SLES9 | | | | Install RHEL5 Update 1 | | | | | | | | | | | | | | | | | | | | | | | | | | | \------------------------------------------------/ | | | | Kernel Options: ________________________________________________________ | | | | ^C now to go back to EFI; ESC does nothing. Once started, there's no | | turning back (i.e. you have to reboot to get back to EFI).
| | +-----------------------------------| / between elements | selects | next screen Then you must specify the location of Linux install content.
7 Managing I/O for Installation and Recovery This chapter introduces Ignite-UX I/O concepts and describes how multi-path concepts enhance Ignite-UX. This chapter also assists the user moving from the legacy naming model to the agile naming model by touching on changes found in multi-path aware Ignite. Introducing Multipathing In its current implementation, beginning with C.7.1.x, Ignite-UX is aware of multiple paths to I/O devices. Ignite-UX now supports agile view on HP-UX 11i v3.
Figure 17 Agile Multiple Path I/O Stack Addressing Model Lunpath hardware path Persistent DSF Legacy DSF Legacy DSF Hardware path LUN hardware path Lunpath hardware path LUN Lunpath hardware path Hardware path Lunpath hardware path The persistent DSF represents the device, regardless of its location in the I/O configuration. With the new model, legacy DSFs and hardware paths enjoy multi-path capabilities because after device open, I/Os use every path associated with the I/O device.
However, if you can remember part of the WWID, you can use the Ignite user interface Disk Selection dialog box Filter text box to limit displayed devices to those with WWIDs containing the text you can remember. Agile addressing means the hardware path actually used by the system to access a device is independent of the path used to select the device. Selecting a disk via one hardware path might result in the system choosing some other, better hardware path.
Figure 19 Ignite-UX Client Installation Configuration Tabs The hardware path displayed in the Root Disk text box is the lunpath hardware path for HP-UX 11i v3 and later, or the legacy hardware path for HP-UX 11i v2 and earlier. By selecting Root Disk..., the Disk Selection – Root Disk dialog box is displayed (Figure 20 (page 74)).
NOTE: Inventory blocking may be used to reduce the time required to discover devices during Ignite-UX start-up. Devices blocked from inventory will not be listed in the Disk Selection dialog boxes. For more information on using Ignite-UX variables such as inventory_block_path and inventory_block_protocols, see instl_adm(4), “Controlling the I/O Configuration Process” (page 81), and “Additional... Button” (page 124). For more information on the agile naming model, see Figure 18 (page 72).
Figure 22 More Info Dialog Box For HP-UX 11i v3 and later, the More Info screen displays all the lunpath hardware paths for a device. (Note that the paths can be long - horizontal scrolling may be needed to see the entire path.) The Legacy HW Path displayed depends on the lunpath hardware path currently selected in the selection list window. One legacy hardware path is listed. For a concise list of all the legacy hardware paths leading to the device, select the All Paths... button (Figure 23 (page 76)).
Figure 24 Disk Selection – Add/Remove Disks Dialog Box The More Info screen is made available on the Disk Selection – Add/Remove Disks dialog box too, to validate selections and help make the change to the agile naming model. Support for >2 TB boot disk Starting with the HP-UX 11i v3 OE Update March 2013 release, the maximum size of the boot disk has been increased from 2 TB to 16 TB on HP Integrity systems.
Starting with HP-UX 11i v3 OE Update March 2013 release, Ignite-UX supports the size of Swap, Dump, and unused logical volumes up to 1 TB instead of the previous limit of 128 GB on 11i v2 and 11i v3. During a cold installation or recovery, larger amounts of swap, dump, or swap volumes can be utilized in disk or volume groups by defining multiple swap, dump, or swap volumes. The limit for unused volumes on 11i v1 is 1 TB; however, the limit for swap and dump has not been increased.
Figure 25 Consistency of I/O Addressing Device Addressing Identification System Event Lu Le ga LU npa cy Pe N th rsi H H Leg H/ D ste /W /W ac W ev W nt ic y DS Pa Pa DS Pat e ID WI t t h D F h h F Reboot C C C C C C C Reinstallation on same system and devices.
Recovery and the Agile View During recovery, Ignite-UX C.7.x makes changes to the new system I/O configuration to match the original system I/O configuration. This is necessary because some aspects of a system configuration depend on the unpredictable order of system I/O inventory. The overall goal of this process is to make the system I/O configuration appear as if the system simply rebooted at the time the recovery archive was created.
and bay) with the device at that location in the recovered system configuration. This method is intended to handle replacement of devices. Note that not all I/O protocols support physical location addressing. • Lunpath — Matching is done based on lunpath hardware path. This method matches the original persistent DSF associated with a lunpath hardware path with the device at that lunpath hardware path in the recovered system configuration. This method is intended to handle replacement of devices.
Table 5 I/O Configuration Variables (continued) I/O Configuration Variable Description _hp_hide_other_disks (string) This may be set to one or more space-separated hardware paths of disks that should be “hidden” from being configured or otherwise modified during the installation. This is useful for hiding multiple disks. hw_instance_number (string) Setting this keyword forces a specific instance number assignment for the specified hardware device.
Ignite-UX will use persistent DSFs for installation and recovery. VxVM installation support software will create VxVM volumes using appropriate DSFs for the VxVM version used. See “Important Characteristics of the Agile View” (page 78) for more information.
8 Security The purpose of this chapter is to assist system and network administrators in understanding the network ports and protocols used by Ignite-UX during its various phases of operation, and to assist in configuring the HP-UX Bastille and IPFilter products. HP is not able to provide support for configuring third-party firewalls to work with Ignite-UX. Ignite-UX Server Ports Ignite-UX server network port usage is described below by server activity.
Figure 26 Port Usage: Initiate LAN Boot for Itanium-Based Clients Initiate LAN Boot: Itanium-Based Systems Client Server Timeline 67 PXE/DHCP (udp) [Request IP address for boot] 67 1 68 1. DHCP/bootp (udp) [Network boot information] 68 The client sends a boot request to the server over port 67. The request is handled by the bootpd daemon on the server.
Figure 28 Port Usage: Client Cold Boot and Installation Client Cold Boot and Installation Initiated from Client Firmware Client Server Timeline Download and Boot Kernel Initiate LAN Boot - see the diagram for your hardware tftp (udp) Common to all Server-based Installations [Initial boot content] NFS (tcp/udp) [Record log information on server] tftp (udp) [INSTCMDS, SYSCMDS] swinstall depot sequence [Image] 4. 5. 6. 86 Security 3 2049 4 NFS (tcp/udp) 3.
NOTE: Although swinstall is illustrated here, the install could use one or more of swinstall with remsh (port 514), NFS (ports 49152–65535), ftp data (port 20), and ftp (port 21).
Figure 30 Port Usage: make_net_recovery Initiated from the Client make_net_recovery Initiated from Client Client Server Timeline ping (icmp) tftp (udp) [/opt/ignite/data/Version from server to client] 69 9 check_version swlist@server (tcp/udp) 2121 [Port to listen to] Pn (tcp/udp) [Output of swlist] 10 Pn swinstall (tcp/udp) 2121 [Port to listen to] 11 Pn swinstall (tcp/udp) [IUX-Recovery depot] NFS (tcp/udp) [Recovery image] Pn 2049 5 9.
Figure 31 Port Usage: make_net_recovery Initiated from the Server make_net_recovery Initiated from Server Client Server Timeline remsh (tcp) [Run make_net_recovery command] 514 or ssh (tcp) [Run make_net_recovery command] 12 22 Proceed as make_net_recovery initiated from client 12. The server remotely executes make_net_recovery from the client. The command is run via remsh by default, or by ssh if the client was added for recovery on the server with the ssh option.
Systems and Workgroups: A Guide for HP-UX System Administrators for systems running HP-UX 11i v2 and earlier. CAUTION: The configuration processes in this section change the security properties of your system. When enabling services, protocols, and ports, careful consideration should be given to the impact to your network and system security.
pass pass pass pass pass pass pass pass c.
# ports required for Ignite-UX ############################################################ pass in log quick proto icmp from any to any icmp-type 8 keep state pass in log quick proto tcp from any to any port = 512 pass in log quick proto tcp from any to any port = 514 pass in log quick proto tcp/udp from any port = 2049 to any keep frags pass in log quick proto tcp/udp from any to any port 49152 >< 65535 c. In the IPFilter Module of Bastille, change the following line to Yes if it is not already.
Use vi to add _hp_loadfile_use_nfs=”true” to the file: # cat /tmp/ifs.cfg # instl_adm defaults: # NOTE: Manual additions between the line containing "instl_adm defaults # and "end instl_adm defaults" will not be preserved. server="10.1.54.230" netmask[]="255.255.248.0" route_gateway[0]="10.1.48.1" route_destination[0]="default" # end instl_adm defaults. _hp_loadfile_use_nfs="true" Now use instl_adm to update the install file system: # instl_adm -f /tmp/ifs.cfg 2.
4. Disable TFTP on the Ignite-UX server (optional). Unless you need to initiate installations via network boot, you may now disable TFTP on the Ignite-UX server. You may remove or comment out the "tftp" entry from /etc/inetd.conf. If the system to be installed is running any version of HP-UX, booting from the network can be avoided by using the bootsys command or by booting from media and switching to the Ignite-UX server.
9 Booting and Installing HP-UX From the Server Using the Client Console This chapter discusses booting and installing HP-UX on clients from the server using the client console. Ignite-UX can be run in terminal user interface (TUI) mode on the client system. See the HP-UX Installation and Update Guide available from http://www.hp.com/go/ hpux-core-docs for instructions on how to install HP-UX from the Operating Environment DVD media.
ERROR: The system install or recovery session cannot continue. The system will now reboot. If Ignite-UX detects only the minimum amount of RAM on the client system, you will see these messages: WARNING: RAMFS Setup memory issue. WARNING: The system does not contain the minimal amount of memory needed for install or recovery. Ignite-UX requires minimum_amount of available memory for the “B.xx.xx” release.
Figure 33 Decision Tree for Booting and Installing HP-UX From the Server Using the Client Console Using the Client Console Is HP-UX running ? YES Use bootsys -c NO Local server or boot helper ? YES Boot from local server or boot helper Itanium-based and dbprofile support ? NO YES Use dbprofile See the decision tree for stand alone systems Use bootsys -c - If the client system is currently running HP-UX, you can use bootsys -c on the client console to boot from the Ignite-UX server.
Figure 34 Decision Tree for Booting From Media and Installing HP-UX From the Server Stand alone systems DVD drive? NO iLO vMedia support? YES NO See the decision trees for network server installation YES OE install media matches server? NO Create matching installation media on server YES Boot from HP-UX OE install DVD, then switch to network server Boot from installation media then switch to network server Boot from HP-UX OE install DVD, then switch to network server - This option requires the
After booting the system, see “Installing HP-UX From the Client Console” (page 105) for information on installing HP-UX from the client console. Booting PA-RISC Clients from the Console This section describes how to boot HP-UX on PA-RISC clients from the client console using an Ignite-UX server. See the "Preparing the Client for Installation " section for important notes. If you need further help with the boot process, enter: BOOT ADMIN>help boot 1.
4. When an Ignite-UX server responds, the installation begins with the following query: hpux KernelPrompt "Choose Operating System to Install :" 1. 2. 3. 4. target OS is B.11.11 target OS is B.11.23 PA target OS is B.11.31 PA Exit Choose an operating system to install that your hardware supports : Select the operating system version that you want to install on the client by typing the appropriate number, and then press Enter to continue the installation.
Change Boot Order Manage BootNext setting Set Auto Boot TimeOut Select Active Console Output Devices Select Active Console Input Devices Select Active Standard Error Devices Cold Reset Exit 3. Select Add a Boot Option. EFI Boot Maintenance Manager ver 1.10 [14.60] Add a Boot Option. Removable Load File Load File Load File Exit 4.
HP-UX Primary Boot: 0/2/2/0.0.0.0 LAN1 EFI Shell [Built-in] Boot option maintenance menu Security/Password Menu Use ^ and v to change option(s). Use Enter to select an option 11. Select the new boot option, LAN1 in this case, from the list and press Enter. The following is an example of a successful network boot using the new LAN1 boot option: Loading.: LAN1 Running LoadFile() CLIENT IP: 10.1.52.128 GATEWAY IP: 10.1.48.1 Running LoadFile() MASK: 255.255.248. DHCP IP: 10.1.53.
creates a new direct boot profile (or updates the profile if it exists) called testprofile. The profile contains the following information: Ignite-UX server IP address (-sip) 192.1.2.1 Ignite client IP address (-cip) 192.1.1.20 Gateway IP address (-gip) 192.1.1.1 Network mask (-m) 255.255.255.0 Boot file name (-b) /opt/ignite/boot/nbp.
-b "boot_file" Load boot file from the boot server. boot_file is the full path to the boot file on the boot server. -od "optional_data" Pass optional command line arguments to the boot file. -rm name Remove a direct boot profile with the name name. -cp src_name dst_name Copy a db-profile from src_name to dst_name. -h Display help for this command NOTE: A direct boot profile name can be 12 characters long at most, and spaces are not allowed.
NOTE: Use select when no default LAN device is provided so a list of available LAN devices is provided for user selection. Use -od to specify optional data to be passed to the boot file. Use -dn to specify a direct boot profile to be used to handle the LAN boot. Use the dbprofile command to create and manage direct boot profiles.
TIP: As an alternative to using the Tab key to navigate, simply type the shortcut key (the underlined letter) of the item you wish to select. For instance, press B to reboot. Figure 36 User Interface and Media Options Leave the selection for User Interface Options at the default: Advanced Installation. TIP: Similar to the previous screen, you can use shortcut keys (indicated with an underline) to make a selection. Selecting Cancel will return you to the Welcome to Ignite-UX! screen.
Figure 38 NETWORK CONFIGURATION with no DHCP If a DHCP server is found, the NETWORK CONFIGURATION screen will contain the client's hostname and IP address. If there is networking configuration information on the server, the parameters regarding contacting the server will be filled-in as well. Set the NETWORK CONFIGURATION parameters so the client system can contact the Ignite-UX server. When the parameters are set, select OK.
The TUI itool has the same functionality as the GUI itool that runs on the Ignite-UX server. Navigate the TUI using the Tab to move around and by pressing Enter to make selections. See “The Client Installation Configuration Interface” (page 117) for detailed information on using the client installation interface to configure a client's installation. TIP: Shortcut keys also work in the itool TUI, but similar to the NETWORK CONFIGURATION screen, you cannot use them when positioned at an input field.
Setting 100 Full Duplex If you want all Fast Ethernet LAN interfaces to run at 100 Full Duplex, this would cause some immediate problems for Ignite-UX because of the duplex mismatches created. To correct the mismatches, you would add the following code to the install file system to extract, update, and replace the current configuration in the install file system: instl_adm -d > /tmp/cfg.tmp Edit the file: vi /tmp/cfg.tmp Add the following clause: ( lan[].
10 Booting and Installing HP-UX on Clients Using the Server This chapter discusses the steps for the installation of HP-UX on client systems from an Ignite-UX server. See the HP-UX Installation and Update Guide available from http://www.hp.com/go/ hpux-core-docs for instructions on how to install HP-UX from the Operating Environment DVD media.
Figure 40 Noninteractive Installation Using the bootsys Command Ignite-UX Server Depots Welcome to Ignite-UX Config files Index bootsys for non-interactive installations ... IP1 IP2 Client 1 Client 2 ... You can invoke bootsys from the command line interface (CLI), or from the Ignite-UX GUI (see “Installation Using the Ignite-UX GUI” (page 112)).
Installation Using the Ignite-UX GUI This section describes how to add clients to the Ignite-UX server using the GUI, and then how to use the GUI to manage Ignite-UX tasks. The Ignite-UX GUI only runs on an Ignite-UX server. Ignite uses a terminal user interface (TUI) with keyboard navigation when run remotely from a client or other system. This section does not address configuring the Ignite-UX server for network boot. To do that, see Chapter 3 and Chapter 4.
After a client is displayed in the GUI workspace, you can: • Click a client icon to select it for further actions. • Double-click the client icon to display the Client Status dialog box. • Right-click to activate the Actions menu for the selected client. For more about the available Ignite-UX selections, see “Introduction to the Ignite-UX Graphical User Interface” (page 14), or select Help. Booting a Client To add a client to the Ignite-UX server, use the GUI to boot a client currently running HP-UX.
4. Select OK. Figure 44 Boot Confirmation Dialog Box A boot confirmation dialog box is displayed. If you want to boot the client to add it to the Ignite-UX server, select Yes; otherwise select No. Figure 45 Boot Process Terminal Window A terminal window is displayed detailing the remote shell (remsh) communication and booting progress of the client, including any errors that may occur.
Once the client has successfully booted, its icon is added to the Ignite-UX GUI. Figure 48 New Client Displayed in GUI On a successful boot, the client console will wait for action from the Ignite-UX server.
Figure 49 Client Console Awaiting Server Action Configuring the Installation To begin the installation, select a client by clicking on its icon, and then select one of the following from the Actions menu: — Install Client->New Install... to install a new client as described in “New Installation” (page 116). — Install Client−> Repeat Install... to use the configuration of a previously installed client as described in “Repeat an Installation” (page 145).
Initializing the Installation The system hardware inventory of the target system is displayed when a new installation is initiated. Check to make sure the hardware connected to the client is present and displayed information is correct. Notice that for Ignite servers running HP-UX 11i v3, all paths to each device and the WWID are displayed. This information is available by scrolling down in the System Hardware Inventory on the GUI, or by clicking the [ H/W Details ] button on the TUI.
Set Root Password... button on the System tab, and set the DNS information located via the Network Services... button on the System tab. Figure 53 Ignite-UX Client Installation Configuration Tabs The Show Summary, Save As, Reset Configuration, Go!, Cancel, and Help buttons are available from all tabs with the same functionality.
that is not configured on the server (Figure 43), you will not be able to install the client with that version of HP-UX using this Ignite-UX server. Figure 54 No Environments Note Descriptions... Button Click this button to view more information about the selected configuration. Environments: List Button Click the selection list button adjacent to Environments: and select the operating system or HP-UX 11i OE that you want to install from the list.
The selection in the View By: pulldown controls the display in the View window. The selection in the View window controls the display in the Path/Location window. Available selections in the View By: pulldown are: • Adaptor Displays the available Host Bus Adaptors (HBAs) in the View window. The Path/Location window displays all the paths to all disks attached to the HBA currently selected in the View window. • Disks/Paths Displays one path for each disk/LUN in the View window.
Figure 56 More Info Dialog Box The Legacy HW Path window is not available on systems running HP-UX 11i v2 and earlier. The Legacy HW Path will update based on the lunpath hardware path currently selected in the selection list window. For a concise list of all the legacy hardware paths leading to the device, select the All Paths... button, only available on systems running HP-UX 11i v3 and later.
Table 9 File System Default Choices (continued) PA-RISC Itanium-Based VxVM with VxFS Yes Yes LVM with VxFS Yes Yes For guidelines in planning file system layouts and for disk-management strategies, see the HP-UX System Administrator’s Guide for HP-UX 11i v3, or Managing Systems and Workgroups: A Guide for HP-UX System Administrators. Additionally, see the section “File System Tab ” (page 137) for detailed information on file system configuration.
Each language has a corresponding locale (language variant), which describes the system management of a language for doing the following: • Messaging • Representing numbers • Displaying monetary values • Telling time • Generating characters • Sorting text Click Default Language... to see the Default Language Choices (Figure 58). They are listed in two columns: Language and Locale. Each language may have more than one way of representing itself on the system.
Additional... Button Click Additional... to select among certain preconfigured use models and variables from your current configuration files. The buttons available are determined from the variables in your configuration file and enable you to choose a setting for each variable. If for example you are using LVM, you will see selections for easily setting up multiple disks, the default LVM version, striping, and file system creation. The default value for the Default root group LVM version... is 1.0.
Figure 60 Additional Configuration Controls Dialog Box 2 Software Tab Use the Software tab to choose from the applications you configured when you set up your Ignite-UX server. You can access a specific depot and you can change depot locations. This display does not dynamically update from a newly selected depot. When you choose a new depot, it must be identical in content to the current one. If not, use make_config on the Ignite-UX server to configure the new depot prior to invoking Ignite-UX.
Figure 61 Software Tab for HP-UX 11i v1 and 11i v2 Figure 62 Software Tab for HP-UX 11i v3 Category Select a topical category to display the products that are available. When All is selected, all software bundles in the depot are displayed. Selecting a category other than All will shorten the list. Additional categories may be visible if defined by any custom configuration files.
Starting with HP-UX 11i v3, software bundles are organized by the categories "optional", "recommended", and "required", instead of "selectable", "default-installed", and "always-installed". See the HP-UX Installation and Update Guide available from http://www.hp.com/go/ hpux-core-docs for a detailed description of the software bundles and OE structure in your version of HP-UX. Note that Ignite-UX is in the "selectable" or "optional" category.
Figure 64 Change Depot Location Note Ignite-UX does not dynamically update from a newly selected depot. When you choose a new depot, it must be identical in content to the current one. If the new depot is not identical to the current one, use make_config on the Ignite-UX server to configure the new depot prior to invoking Ignite-UX. Use the Change Depots Locations dialog box to select a different depot. Figure 65 Change Depots Locations Use the Server: and Depot: text boxes to identify the new depot.
Figure 66 Interactive Swinstall Notes NOTE: For systems running HP-UX 11i v3 and later, swm (Software Manager) Will be used instead of swinstall. References to swinstall by Ignite-UX can mean either swm or swinstall, depending on the release. On systems running HP-UX 11i v3 and later, see swm(1M) for more information. The installation will be interrupted at the start of the software load phase, and the following message will be displayed on the console screen.
After selecting a depot, press n to view the software available within the depot. Figure 69 Interactive Swinstall Bundle List Select or deselect individual bundles with the space bar. Press i to continue the Ignite-UX installation. If you press x, you will receive this message: Would you like to exit, save or continue the job? [x]/s/c Press c to return to the swinstall session. Ignite-UX will check to ensure you have loaded some basic software, but in general, exiting without installing is not recommended.
Figure 70 System Tab Final System Parameters List Button You can choose to set the System tab parameters now or at the first boot of the client. If you select first boot, you do not need to modify any parameter on the System tab now. DHCP Managed Primary NIC Selection This check box is used to control whether the primary network interface is configured using information obtained via DHCP (Dynamic Host Configuration Protocol). When this is selected, the IP Address and Subnet Mask fields are not shown.
Address: 10.1.48.11 Trying DNS Non-authoritative answer: Name: test.corp.com Address: 10.1.50.12 # You can also use ping to determine the hostname, the IP address of a system, and if a given IP address is already in use. If you are in doubt, be sure to coordinate IP address allocation with your network administrator. IMPORTANT: Do not inadvertently use the IP address of the name server. Your network could stop functioning; results are unpredictable.
Set Root Password... To ensure the security of the client system, create a password for the root account by clicking this button. The Set Root Password dialog box is displayed, as shown in Figure 72. Figure 72 Set Root Password Dialog Box To strengthen security, HP recommends that you observe the following requirements when setting a password: • The password should be eight characters long. • Characters should be from the English alphabet.
Figure 73 Network Services Tabs Static Routes. If your network is divided into subnets, you will probably need to specify a gateway system to reach other subnets: • Destination - The field has the word "default" or the IP address of the destination network. • Gateway - This is the IP address of the device connecting your network to the remote network, or your own IP, if wildcard routing is used.
Recovery over the network requires the domain name and DNS server IP address to be set for the client now, unless the Final System Parameters list button on the System tab is set to Ask at first boot. The list of DNS servers by IP address is populated if they are predefined on the Ignite-UX server. Use the nslookup command on a running system to find this information if you need to add a DNS server to this list. Enter the IP address of the name server in the DNS Server IP Address text box.
Figure 76 NIS Tab NIS. It is common for the nonserver hosts in a network to be NIS clients. Whenever a process on an NIS client requests configuration information, it calls the NIS server instead of looking in its local configuration files. The set of configuration data maps shared by the servers and clients is called the NIS domain. For more information, see domainname(1), domainname(1M), and Installing and Administering NIS Services. Figure 77 XNTP Tab XNTP.
Figure 78 Network Interface(s) Dialog Box 1. 2. 3. 4. 5. 6. Select an Interface card from the selection list. Select DHCP Managed if you want the selected interface configured using information obtained via DHCP. When this is selected, the IP Address and Subnet Mask fields are not shown. Enter or modify the IP Address: as needed; this is not required with DHCP Managed. Enter or modify the Subnet Mask: as needed; this is not required with DHCP Managed.
Figure 80 File System Tab IMPORTANT: The information appearing on this tab is tailored to the operating system release and hardware architecture. HP recommends that extreme care be exercised when altering these values. Adding or Changing a File System Configuration Adding a new file system or changing an existing one are similar actions in that the same information is needed for both. IMPORTANT: Renaming or changing the disk file system structure causes the old file system on that disk to be lost.
Mount Dir: Modify this field to set the root disk, using the standard HP-UX mount directory designations (/, /usr, /stand, /var, /opt, etc.). You can also specify your own mount points, such as /special or /apps. Avail: Displays the available disk space on the currently selected volume group. Size: The Size: selection list is used to select the type of sizing, and the text field allows you to enter the size value.
Table 10 Volume Requirements for LVM and VxVM Volume Manager Volume Requirements LVM • One of the volumes must be root (/). • A swap volume (primary) is required. • Directory names must have valid HP-UX names (for example, /usr or /database). VxVM • One of the volumes must be root (/). A root volume group will always be created with VxVM version 3.5. • One of the volumes must be boot (/stand) with HFS usage. • A swap volume (primary) is required.
2. 3. 4. More Info dialog box. For information on supported devices, see “Supported Peripherals ” (page 23). Click the Usage: selection list button to select a different use for this disk or None to remove it. Depending on your selection, other fields and buttons appear. For example, selecting VxVM results in the appearance of the Disk Group:... button and associated field. Select Modify to execute your changes. Select OK when you are finished and to return to the File System tab.
3. 4. 5. Configure the Trks/Cyl: (tracks and cylinder) and Disk RPM: fields by direct editing, as needed. The default values are recommended because these values are predetermined for each supported disk device. Click Modify to implement all changes. Click OK when you are finished and you are returned to the File System tab. For more detailed information regarding these disk parameters, see mkfs_vxfs(1M) and mkfs_hfs(1M).
1. Click ----Additional Tasks---- and select Volume Parameters.... A dialog box similar to the one in Figure 84 is displayed, which is an example of an LVM volume. Figure 84 Advanced Volume Layout Dialog Box 2. Modify the following values as needed: Cont Alloc: This sets the contiguous allocation policy. A contiguous logical volume has these characteristics: • Physical extents are allocated in ascending order. • No gap is enabled between physical extents within a mirror copy.
Group Parameters Group Parameters - You can set additional volume group parameters as follows to further define volumes. 1. Click ----Additional Tasks---- and select Group Parameters.... A dialog box similar to the one in Figure 85 appears, which is an example of an LVM group layout. Figure 85 Advanced Group Parameters Dialog Box 2. Modify the following values as needed: • LVM Version: — 1.0 or 2.2. The default value can be set via the Basic tab “Additional...
Populate the Scripts to be Executed: list by adding or removing scripts from the Available Scripts: list. Descriptions for each action follow. Figure 86 Advanced Tab Adding a Script To add a script for Ignite-UX to execute after the installation, select the item from Available Scripts: column, then click <---Add---. For more information regarding the use of scripts to automate Ignite-UX tasks, see Chapter 12: “Customizing Your Installation” (page 158), and see instl_adm(4).
Figure 87 Repeat Install Dialog Box The Configuration File list (Figure 87) is populated by the last installation configuration, and all those that you have created using the Save As...button that is on all of the installation configuration tabs. These saved installation configurations are stored in /var/opt/ignite/saved_cfgs/. If there are no saved configurations, the Repeat Install action is not available and you must begin a new installation as described in “New Installation” (page 116).
Figure 88 Installation Confirmation Dialog Box The confirmation dialog box lists disks that are to be written to during the installation process, and a preinstallation analysis log of any notes, warnings, or errors. • If you do not want to proceed with the installation at this time, click
Figure 89 Client Status... Dialog Box The information is updated automatically as the status of the client changes. You can view specific installation information using the View Logfile... button, which invokes a dialog box displaying the log file as it is written to during the installation.
Figure 90 Installation Log File Carefully review the scrolling status information for errors. Continuous scrolling is the default behavior. Toggle scrolling on and off with the Automatic Scrolling checkbox. The complete installation log is available on the Ignite-UX server in /var/opt/ignite/clients/hostname/install.log. NOTE: Because errors can occur during the installation that result from other components within HP-UX, all errors may not be written to this log file.
A manifest file for each installed client is saved on the Ignite-UX server in: /var/opt/ignite/clients/client/manifest/manifest.info, and on the client in: /var/opt/ignite/local/manifest/manifest.info. To print the system manifest from the Ignite-UX server command line, enter: print_manifest The ASCII file is printed to stdout using format instructions from the manifest template file. For more information, see print_manifest(1M). An example manifest is shown below.
11 Golden Images A golden image is a combination of a golden archive (an archive with files set to the newconfig state) and a configuration file describing a system’s disk layout and file system. A golden image is used as a common configuration to install systems. The compressed golden archive format can be tar, cpio, or pax. (To use the pax format with 11i v2, you must have the PAX-Enh™ product installed. The pax format is not available for 11i v1.
To create a golden system, follow the steps described in this section: • “Installing the HP-UX Operating System ” (page 152) • “Installing Critical Patches onto the Operating System” (page 152) • “Installing Optional Software” (page 153) • “Customizing the System ” (page 153) • “Creating the Golden Archive” (page 153) Once you have a system with the base operating system, you may choose to place patches, applications, kernel configurations, etc.
2. Install the patch non-interactively: # swinstall -x autoreboot=true -x match_client=true \ -s /PHCO_34240.depot This assumes you have already met the dependencies of PHCO_34240. These instructions can also be found in the PHCO_34240.text file. For more information, see the Patch Management User Guide for HP-UX 11.x Systems and the HP-UX Software Assistant Administration Guide, available at http://www.hp.com/go/swa-docs.
The -p option creates intermediate directories. It is best to store it in a directory of type /var/opt/ignite/archives/Rel_rel. This directory must be NFS-exported if you are using NFS to transfer the archive to the client. 4. If you do not have enough disk space, or you want the archive created on a remote server, you may use the following options: # /tmp/make_sys_image -d directory_to_place_archive -s destination_system_IP_address 5.
c. In the init sw_sel clause for your golden image, leave the default description or change it to something representative of your archive. description = "Archive HP-UX 11.11 CDE" d. Modify the following line so archive_path resolves to the archive file. This path must be relative to the path specified by nfs_source in the sw_source clause. archive_path = "hostname.gz" e.
Here are the HP-UX 11i v1 sw_source and sw_sel examples: sw_source "core archive" { description = "HP-UX Core Operating System Archives" load_order = 0 source_format = archive source_type="NET" . . . post_load_script = "/opt/ignite/data/scripts/os_arch_post_l" post_config_script = "/opt/ignite/data/scripts/os_arch_post_c" #If nfs_source is used, be sure to export the source. nfs_source = "10.2.72.150:/var/opt/ignite/My_Golden_Images" . . . } init sw_sel "golden image" { description = "Archive HP-UX 11.
4. Verify the syntax of the configuration files listed in the INDEX file. # instl_adm -T Fix any errors found by instl_adm and repeat the instl_adm -T to verify any changes. 5. Ensure the NFS file system is exported correctly. In the sw_source clause above, we specified the location of the golden archive to be a file on an NFS server. You must ensure clients have access to this directory on the Ignite-UX server. Ignite-UX automatically tries to export /var/opt/ignite/clients for its use.
12 Customizing Your Installation This chapter introduces Ignite-UX configuration files, provides examples of how you can use them, and offers debugging tips. Additionally, it describes how to create local customizations for clients using post-installation scripts, and how to exclude software patch files from archives. Using Configuration Files Ignite-UX is driven by configuration files that define how clients are installed and configured. A configuration file can be thought of as a set of instructions.
Figure 92 Configuration File Use and Locations / opt/ignite var/opt/ignite data/Rel_rel boot config INSTALLFS config.local data/Rel_rel clients/0xLLA core_cfg INDEX config apps_cfg custom_cfg Default disk layout Installation process control Software and custom configurations Local overrides Client-specific configuration for reinstall Instructions for installation Ignite-UX processes config files in the order shown below.
installation process when this area is available. Boot control parameters are detailed in the Control Parameters section of instl_adm(4). You must use instl_adm(1M) to add, change, or delete these boot control and network definitions. NOTE: Before upgrading to a new version of Ignite-UX, consider retaining the current control parameters, located in the first 8 KB of your install file system, so that you can reapply them after you have successfully updated your Ignite-UX server.
The unique customizations appear in the directory dedicated to the client by MAC address, which is linked to a directory containing the client name: /var/opt/ignite/clients/client/config This file is created when you use the Ignite-UX GUI to specify the client configuration. 7. Creating and saving custom configuration choices - You can create your own custom configurations using the Ignite-UX GUI, save them for repeated use, and easily select them when installing clients.
Figure 93 Configuration Choices Dialog Box A typical /var/opt/ignite/data/INDEX file might contain clauses similar to the following excerpt: . . . cfg "HP-UX B.11.23 Default" { description "Default B.11.23 release configuration." "/opt/ignite/data/Rel_B.11.23/config" "/opt/ignite/data/Rel_B.11.23/core_cfg" "/opt/ignite/data/Rel_B.11.23/hw_patches_cfg" "/var/opt/ignite/config.local" } = TRUE . . . cfg "CAD System-11.23" { description "Supplies the CAD System configuration." "/opt/ignite/data/Rel_B.11.
you can further customize the configuration using the GUI, or accept the configuration defaults to begin the installation immediately. The order of the configuration files within a cfg clause is significant; attributes specified in a later configuration file can override the same attributes specified in an earlier configuration file.
physical_volume disk[2/0/1.6.0] fs_partition { usage = HFS size = remaining mount_point = "/" } swap_partition { usage = SWAP mount_point = "primary" size = 512 } } Combining Disks to Form a Single Volume Group You can put two disks together to form a single volume group. Two file systems are defined; both are striped across both disks. The following example illustrates this concept: volume_group "appsvol" { usage=LVM physical_volume disk[2/0/1.5.0] { } physical_volume disk[2/0/1.4.
Defining an Installation Depot The next example defines a single SD depot from which software can be installed. Two different pieces of software are defined for the SD depot. Each can be selected independently for installation. The impacts lines tell Ignite-UX how much space this software requires in a given directory. This information is used to size the file systems correctly. The sw_category construct enables you to group the software so the GUI can present it in chunks that make sense to you.
"/var/opt/ignite/scripts/multi_plane_graphics" } You can also specify multiple conditions. The following example installs a particular piece of previously defined application software if the client is a supported PA-RISC or Itanium-based server or workstation having at least two disks. A message lets you know why it is happening: ( (HARDWARE_MODEL ~ "9000/7.*" | MODEL ~ "ia64 .* workstation .*") & (num_disks >= 2) ) { note += "Installed application software contained in apps1.
mod_kernel += "dbc_min_pct 35" mod_kernel += "dbc_max_pct 65" post_config_cmd += " /usr/sbin/ch_rc -a -p NFS_SERVER=1 /usr/sbin/ch_rc -a -p NFS_CLIENT=1 /usr/sbin/ch_rc -a -p NUM_NFSD=8" } Figure 94 shows the Software tab when the NFS server configuration file is used. As shown, the selected category is Machine Uses as defined in the configuration file using the sw_category clause as in the previous example.
from the Ignite-UX GUI using the Additional Configuration Controls dialog box. For more information see the section “Additional... Button” (page 124). To specify this option at the global level (for example in the /var/opt/ignite/config.local file), you can add the following line: sd_command_line += " -xpatch_save_files=false " To default the variable controlling the operating system patches to “no”, add the following to config.
How the Installation Functions It is important to understand how an installation functions when using Ignite-UX. The diagram in Figure 95 illustrates when the various commands and scripts are executed during the installation process.
# Performing task "Add Remote Printer": Adding "remoteprinter" # /usr/sbin/lpadmin -premoteprinter -ormserver.com -orptsslj \ -mrmodel -v/dev/null -orc -ocmrcmodel -osmrsmodel /usr/sbin/lpadmin -dremoteprinter /usr/sbin/accept remoteprinter /usr/bin/enable remoteprinter NOTE: Make sure that the directory the post-installation script resides in is available to tftp by examining and changing the /etc/inetd.conf file. 1. 2. Create a script to set up access to a default network printer.
13 Automating Installations This chapter shows how to use the bootsys command and configuration files to automate the Ignite-UX installation process. Starting a Noninteractive Installation with bootsys Ignite-UX can install HP-UX on a client noninteractively using the default configuration specified in the /var/opt/ignite/data/INDEX file for the given operating system. The /var/opt/ ignite/data/INDEX file can have a unique clause for each operating system you want to support.
session for use in subsequent sessions. For more information regarding configuration files, see “Using Configuration Files” (page 158). To specify a saved configuration as the default, define it in your server’s /var/opt/ignite/ data/INDEX file, or use the bootsys command with the -i option and name you have given it. Specifying Defaults in the config.local File The /var/opt/ignite/config.local file is normally included in every configuration (cfg) clause in the /var/opt/ignite/data/INDEX file.
Ignite-UX overwrites this client-specific config file at the end of the installation, creating a record of the parameters defined for this client’s most recent installation. The configuration data in this file is used to override the default installation parameters. For more information regarding configuration files, see “Using Configuration Files” (page 158). The easiest way to create a client-specific custom configuration file is to start with one of the default files provided by Ignite-UX.
1. Determine the MAC address of the client, either through the boot_admin commands at boot time or by using lanscan(1M) after the client is booted. For more information, see boot(1M), efi(4), isl(1M), and pdc(1M). 2. Create the following directory, assuming the MAC address is 0x08000992E346: mkdir /var/opt/ignite/clients/0x08000992E346 3. Copy an example configuration file to be used as a starting point: cp config /var/opt/ignite/clients/0x08000992E346/config 4.
Example 1 In this example, if the client’s root disk is smaller than 8.5 GB and has less than 1 GB (1024 MB) of random access memory (RAM), then the primary swap partition size (_hp_pri_swap) is set to 512 MB; otherwise, it is set to 1 GB. If the disk is larger than 8.5 GB, then _hp_pri_swap is set to 1024 MB or 4096 MB, depending on the memory size. Add the following lines to the end of the file /var/opt/ignite/config.
Example 4 You can specify an entirely different custom configuration based on the size of the client’s RAM and disk size.
14 Creating Your Own Boot and Installation Media This chapter explains how to create custom HP-UX boot and installation media. Installation media can be a tape or DVD containing: • A golden archive • A recovery archive • A software depot • A golden or recovery archive, plus a software depot NOTE: It is possible to create a bootable USB flash drive that works with Integrity systems. See the Ignite-UX USB Memory Stick Boot white paper, available at http://www.hp.com/go/ ignite-ux-docs.
Figure 96 Possible PA-RISC Installation Tape Layouts Logical Interchange Format The first file on a PA-RISC bootable tape is a logical interchange format (LIF) volume containing all the components required to boot from the tape. It also includes the Ignite-UX toolset and configuration information that controls how Ignite-UX will operate. Additionally, this tape file will include configuration files that describe installation functionality.
IMPORTANT: The first 8 KB of the install file system ([W|V|I]INSTALLFS) can contain Ignite-UX configuration content. If it does, this information is used first and can override configuration statements in the LIF INDEX and CONFIG files. If the tape contains a golden archive, you will want to consider whether the tape should contain special config content to control system setup in some custom way.
Other edits — • The archive_type must match what was done by make_sys_image. For more information about archive_type, see instl_adm(4). • If you have only one archive, as in this example, you can delete the entire clause called golden image2. It is included in the template file in case you have two different types of archives, such as one for 32-bit and one for 64-bit architecture.
Example PA-RISC Installation Tape Creation 1. Create the LIF volume. The LIF will be created in /var/tmp/lifvol by entering the following make_medialif command: # make_medialif -f /opt/ignite/data/Rel_B.11.11/config \ -f /var/tmp/myOSarchive_cfg \ -f /var/tmp/depot_cfg \ -l /var/tmp/lifvol -r B.11.11 The LIF volume now contains the default settings Ignite-UX provides, plus information on the archives and depot. 2. Modify the install file system configuration.
4. Create the installation tape. This series of commands creates a tape with DDS-1 characteristics and copies the files in the correct tape layout as described in “Possible Tape Contents” (page 177): # # # # # mt dd dd dd mt -t /dev/rmt/0mn rew if=/var/tmp/lifvol of=/dev/rmt/0mn obs=2k if=/var/tmp/myOSarchive.gz of=/dev/rmt/0mn obs=10k if=/var/tmp/serialdepot of=/dev/rmt/0mn obs=10k -t /dev/rmt/0mn rew NOTE: You must ensure you use a no-rewind device file, such as /dev/rmt/0mn.
/opt/ignite/data/scripts/examples Detailed usage information is available via # make_media_install -? and summary information is available via # make_opticaldisc_recovery -? Additional information is available at the start of the scripts. Boot CD/DVD Examples Two-step media recovery using a bootable CD/DVD is necessary to restore from tapes created with the Ignite-UX command make_tape_recovery on certain Itanium-based systems that do not support direct tape boot.
# mkdir /var/opt/ignite/media/pseudo_root/archive # cp goldenarchive.gz /var/opt/ignite/media/pseudo_root/archive # make_media_install -r B.11.31 -o IA -a goldenarchive.gz -m iso_directory Put a PA-RISC HP-UX 11i v2 golden archive on a DVD On a system with a DVD writer, execute the following commands. (The iso_directory is the target directory for the .iso media file. The -r option specifies the release, such as B.11.11, B.11.23, or B.11.31.
No DVD special files Prior to the first time you run make_media_install, you must create DVD special files. If the DVD special files are missing when you run make_media_install, you will receive an error message similar to :-( unable to open(“/dev/rscsi/c0t0l0”.O_RDONLY): No such file or directory :-! consider 'mknod /dev/rscsi/c0t0l0 c 203 0x000002; chmod 0600 /dev/rscsi/cotol0' + Error 83 /opt/ignite/lbin/growisofs failed.
When dealing with more than one depot, use the load_order option to control the exact sequencing of media installations. It is helpful to use the media_title option so Ignite-UX can prompt for media using meaningful text. To create the configuration file for the second depot, you could use the following command: # make_config -x no_sd_server -s \ -c -x load_order=2 \ -x media_title="Installation DVD Number 2" Continue to create configuration files for all your depots.
Create the second DVD 1. Run mkisofs to create the second DVD image (path_to_dvd2image): # /opt/ignite/lbin/mkisofs -D -r -U -v -max-iso9660-filename \ -o Burn the DVD images and test them 1. 2. Write the ISO images to media as a raw file using open source software such as cdrecord, growisofs, or software included with CD/DVD hardware. Test the DVD images to verify you can boot from the first one, and test that you can use them to install systems successfully.
15 Recovery Overview System recovery restores a recovery image previously created for a specific system, and is useful in the case of hardware or software failure. See the System Recovery section below for more information. System Recovery Ignite-UX system recovery allows quick recovery from a failed disk. The failure can be either a hardware failure or a catastrophic software failure. This section assumes you are creating a recovery image to be stored on the Ignite-UX server via the network, or on tape.
System Recovery Tools The make_[tape|net]_recovery tools have few differences aside from using different media. Both system recovery tools share the same basic recovery image creation options, data structures, recovery image file content, and installation dialog boxes. The main differences are that make_tape_recovery does not require an Ignite server and make_net_recovery can be run from the client with a small subset of the Ignite product.
Considerations When Using Veritas Volume Manager from Symantec If you intend to use or are using VxVM, consider the following issues that impact the make_[tape|net]_recovery tools: — Ignite-UX only supports cold installing Symantec products that are in an OE depot as shipped by HP. — HP only supports an environment where the versions of VxFS and VxVM match. For example, if you install VxFS 4.1, you must also install VxVM 4.1.
The make_tape_recovery tool creates a bootable tape that can be used to restore a system using the system’s tape drive. Remember that make_tape_recovery is subject to the requirements and limitations inherent with tape media: • A tape drive must be available on each system to be archived. • If you want to save previous recovery images, remove the tapes containing the existing recovery images from the tape drives before creating new ones.
As of Ignite version C.7.7, make_[tape|net]_recovery has a -u option that will update the client Ignite software to the version on the server specified by the -s option. For more information, see make_net_recovery(1M) or make_tape_recovery(1M). Recovery Image Creation Process The process of creating a recovery image using Ignite-UX is described as follows: 1. Prepare the client.
3. Run the recovery interface. If the -i option is specified on the command line, the recovery user interface is executed next. This interface enables users to set or change the following default values for the image: • Long description of the recovery image. This description adds identifying information that can help distinguish between recovery images when the timestamp is not sufficient. This information is shown by clicking Description on the Basic tab during installation configuration.
make_arch_config uses archive_impact to calculate the file system impacts for the recovery archive, and includes these in the sw_sel clause it writes. 7. Update the CINDEX file. Lastly, make_[tape|net]_recovery uses manage_index to update the /var/opt/ignite/clients/client/CINDEX file for the client. This file contains a list of all the recovery configurations available for the client.
To list the files and directories included in a recovery image, use the list_expander command in the following way: /opt/ignite/lbin/list_expander -f archive_content where archive_content is the file that identifies keywords specifying inclusions and exclusions for the recovery image. It is the same archive_content file discussed in the "Recovery Image Creation Process" section above.
NOTE: • If the system is configured in EBN (Enclosure Based Naming) scheme, then list_expander might not show the correct list. Change the mode to Operating System Native (OSN) naming scheme by running the vxddladm. See vxddladm(1M) manpage for more information on changing the naming scheme. • The following circumstance may cause list_expander to halt: When processing information, list_expander uses the libc function ftw, see ftw(3C), to recursively descend the directory hierarchy.
IMPORTANT: Ignite-UX version C.7.12.519 supports the recovery of a system with APA configured on HP-UX 11i v3 March 2011 update or later. Ignite-UX version C.7.14.264 contains additional fixes for systems with APA configured. HP recommends using Ignite-UX version C.7.14.264 or later when creating recovery archives for systems configured with APA. For more information about configuring APAs, see APA Administration Guide available at:http:// h20566.www2.hp.com/portal/site/hpsc/public/psi/home/?sp4ts.
Creating and Using Recovery Tapes The Ignite-UX make_tape_recovery command creates a system recovery tape that can be used to boot and recover a system that is not bootable due to corruption of the root disk or root volume group. A system can be booted and installed from the tape without user intervention, including configuration, customization, software selection, hostname, and networking information.
Recovering a Minimal Operating System To create a minimal operating system recovery tape at /dev/rmt/0mn containing only the operating system elements required to boot the system, perform the following steps: 1. Load a writable tape in the default tape drive for your system. 2. As superuser, enter make_tape_recovery. A tape will be created without further interaction. System recovery from this tape involves booting from the tape to recover the minimum core operating system.
Tape Recovery for Itanium-Based Systems To boot from tape on an Itanium-based system you must first create a tape boot option on the EFI Boot Manager menu. Verify that your Itanium-based system has firmware support for tape boot. If there is firmware that supports tape boot available for your system, you may first need to upgrade your firmware to make this functionality available.
this is the case, you will need to use the search command to list the devices on the HBA the tape drive is connected to. See your system’s Operations Guide for details on the search command. A third way to find the EFI device path is to use the tape drive’s hardware path as a map to it. The ioscan -fkeCtape command will list the hardware path of the tape drive. For our example, the hardware path is 0/1/1/1.4.
Figure 101 Boot Configuration Select Add Boot Entry from the Boot Configuration menu. Figure 102 Add Boot Entry The EFI Boot Manager will then display a menu listing the available devices to choose from. Select the tape drive you wish to boot from. See Determining the Tape Drive’s EFI Path above for how to select the correct device.
Figure 103 List of Selectable Boot Devices Enter a description in the next dialog box. This is the text that will appear in the Boot Menu listing. For this example, the new boot option will be called "Ultrium Tape." Figure 104 Enter a Description for the Boot Option Next, you will be prompted for load options. Press Enter at this point without entering anything.
Figure 105 Enter Load Options The last step is to save your edits to NVRAM. If you have made a mistake, press n, otherwise press y and the changes will be saved to NVRAM. Figure 106 Save Changes to NVRAM You will be returned to the main EFI Boot Manager menu. If you answered y to the Save changes to NVRAM question, your new boot option will appear listed with the description text you entered in Figure 104.
Figure 107 The Boot Manager Menu with the New Option At this point you have successfully configured a tape boot option, and it may be selected from the EFI Boot Menu. For more information on creating recovery tapes, see make_tape_recovery(1M).
Determine Tape Drive EFI Path Using Command Line Interface To get the tape driver EFI path, run the following command at the EFI shell: Shell>> tapeboot select Fibre-Channel Figure 108 Output From tapeboot select Another way to identify the tape driver's path is to use the EFI Boot Manager menu. The File Explorer window of the EFI Boot Manager menu displays tape devices connected through Fiber Channel path.
The make_net_recovery tool creates a system recovery image and stores it on a system that may be accessed using the network. The recovery image created by make_net_recovery is specific to the system it was created for and its identity includes hostname, IP address, networking information, etc. In the event of a root disk failure, the recovery image can be installed using Ignite-UX to recover the system.
TIP: You can execute the Ignite-UX GUI from a different system as if you were on the Ignite-UX server by using the following commands: • On your host system, allow the Ignite-UX server to access your display by adding the Ignite-UX server hostname to your xhost list: xhost +Ignite-UX_server_hostname • Set the DISPLAY variable to your local host system, if necessary. For example: export DISPLAY=your_host_system:0 where your_host_system is the hostname of your system. 1.
Clicking Yes produces a terminal window allowing you to enter the root password, clicking No halts the addition of this client and returns you to the Ignite-UX GUI. Once communication with the client is established and the client directory is constructed, a client icon appears in the Ignite-UX GUI. 6. Ensure that the client icon for which you want to create a recovery image is selected, and then select Create Network Recovery Archive from the Actions menu.
3. At the client, from the main menu, select Install HP-UX. a. Respond to the Network Configuration dialog box. b. Respond to the UI Display Options dialog box (run at the Ignite-UX server or at a client.) c. If working from the Ignite-UX server, select the client for the system to be recovered. 4. 5. Select Install/New Install. Select the recovery configuration to use, and then allow the recovery to continue.
5. Exit to the main menu by pressing Esc. The new boot option now appears in the EFI Boot Manager main menu. EFI Boot Manager ver 1.10 [14.62] Please select a boot option HP-UX Primary Boot: 0/1/1/1.2.0 EFI Shell [Built-in] Boot from lan0 --------------------------------Boot Configuration System Configuration Use ^ and v to change option(s). Use Enter to select an option 6. Select the new boot option you created. The following is an example of a successful boot using the new boot option.
2. Rename the recovery archive. (The path to your recovery archive might be different from the example.) The name of the saved recovery archive can be anything unique, but it should be outside the naming convention yyyy-mm-dd,hh:mm. # cd /var/opt/ignite/recovery/archives/client # mv yyyy-mm-dd,hh:mm Recovery_Archive.sav 3. 4. If the system where recovery images are stored is different from your Ignite-UX server, log in to the Ignite-UX server. Rename the recovery archive directory.
Making Recovery Configuration File Additions Using the recovery config.local file To have a configuration file automatically added to all new recovery configuration clauses for a given client, create a new Ignite-UX configuration file called: /var/opt/ignite/clients/client/recovery/config.local For local tapes the file is located in: /var/opt/ignite/recovery/config.local This config.local file will automatically be included in your recovery configuration for this client each time you run make_net_recovery.
/opt/ignite/data/Rel_release/config, where release is the operating system release on the client you intend to recover. For example: /opt/ignite/data/Rel_B.11.11/config would be added for a client with the HP-UX 11.11 operating system. This new configuration file entry should be the first entry in the clause you are modifying. When you use the Ignite-UX GUI during recovery, select the File System type you want to use on the Basic tab.
2. Media Installation This screen provides an option to switch the install source from the default CD/DVD to a recovery tape. This is helpful for those systems and for tape devices which do not support booting from a tape. [ ] CD/DVD Installation [ * ] Boot from CD/DVD, Recover from Tape [ OK ] 3. [ cancel ] [ Help ] Select Boot from CD/DVD, Recover from Tape and select OK to advance to the Tape Drive Selection screen: Tape Drive Selection There are one or more tape drives detected on the system.
Using the make_[tape|net]_recovery method The make_[tape|net]_recovery tools are designed to reproduce a system exactly the way it was at the time the snapshot was taken. These tools try to accommodate cloning in various ways: • You can change hostname and networking information. • You can make changes to disks and file systems during the recovery. • You can detect hardware model changes and rebuild the kernel.
the directory is exported only to the individual client. To do this, log in to the system that holds the recovery image (normally the Ignite-UX server). For HP-UX 11i v3 systems: • Edit the /etc/dfs/dfstab file on the source client. • Append ,ro=target_client to the -o argument of the source client's line, where target_client is a fully qualified client name. • Run # shareall -F nfs For HP-UX 11i v1 and 11i v2 systems: • Edit the /etc/exports file on the source client.
Because networking information can be changed using the interface and will not be overwritten by files extracted from the image, it is natural to think about sharing recovery images for systems with identical or nearly identical hardware. But unlike shared configurations that appear in the configuration list for all clients, network recovery configurations only appear in the configuration list of the client for which they were created.
lvlnboot, used by save_config does not work when a disk is removed and the system is in this intermediate state. If this command is not working, a recovery cannot succeed. Question: Why is the EFI volume not restored during a recovery? Ignite-UX destroys the old EFI volume on the boot disk and creates a new EFI volume every time the system is installed. At no point during the installation is the old EFI volume copied and restored to the disk.
0m, and recovered from a different device file, such as /dev/rmt/2m, even though the physical device is the same. Question: How can I recover a system which has volume groups configured using Cluster-wide Device Special Files (cDSF)? Ignite-UX supports cluster-wide Device Special Files (cDSF) from the C.7.16.x release. No extra steps need to be performed during the creation of an archive or during the recovery process.
16 Support and Other Resources Contacting HP Before you contact HP Be sure to have the following information available before you contact HP: • Technical support registration number (if applicable) • Product serial number • Product model name and number • Product identification number • Applicable error message • Add-on boards or hardware • Third-party hardware or software • Operating system type and revision level HP contact information For the name of the nearest HP authorized reseller: •
• Ignite-UX Release Notes • Ignite-UX Supported Versions • Ignite-UX Frequently Asked Questions • Ignite-UX Custom Configuration Files • Ignite-UX USB Memory Stick Boot White Paper • Ignite-UX and SAS Devices White Paper • Ignite-UX and MirrorDisk/UX White Paper • Successful System Cloning using Ignite-UX White Paper • Successful System Recovery using Ignite-UX White Paper • Installing and Updating Ignite-UX White Paper • Ignite-UX Installation Booting White Paper • Read Before Instal
For information about the firmware versions required to support direct boot profiles on various Itanium systems, see the following link: • http://www.hp.com/go/hpsc Typographic Conventions The following conventions are used in this document: Table 13 Typographic Conventions Typeface Usage Examples Italics Emphasis The VxVM components in the Ignite-UX install environment and the installation must be version 5.0.
A Troubleshooting For information regarding system recovery troubleshooting, see “System Recovery Questions and Answers” (page 217). Also, see the Ignite-UX Frequently Asked Questions manual, available at http://www.hp.com/go/ ignite-ux-docs. Errors and Warnings During an HP-UX installation, messages indicating the status of tasks are written to the client log file and either the log viewer (Ignite-UX server GUI-based installation) or the console (client UI-based installation).
Problem Installing Clients on Multiple Subnets Problems occur when installing clients on multiple subnets. Executing a LAN boot of clients on multiple subnets to a single, multi-homed Ignite-UX server has the following limitations: • • The instl_bootd daemon allocates IP addresses from the instl_boottab file and matches the IP addresses with the subnet from which the request came.
Software Distributor debugging can be enabled on a per-session basis without modifying the Ignite-UX server configuration files. From the initial Ignite-UX menu on the client, select Advanced Options then Edit config file. This invokes vi and you could add, for example: env_vars += "SDU_DEBUG_RPC=1" sd_command_line += "-x logdetail=true -x loglevel=2" Additionally, these configuration statements can be added to the Ignite-UX server configuration file /var/opt/ignite/config.
https://h20293.www2.hp.com/portal/swdepot/try.do? productNumber=HPUXIEXP1111 or http://h20293.www2.hp.com/portal/swdepot/displayProductInfo.do?productNumber=HPUXIEXP1123 — Check to see if there are other systems on the network that may also be replying to the booting client system. Check to see if the system booting is on a different subnet to the bootp server to ensure that any router between the two allows the forwarding of bootp requests. The configuration is router specific. Check tftpd: — 3.
When you reinstall a system, the /var/statmon/sm directory is wiped out. In this case, if the reinstalled system tries to recontact a server that has cached information, the server will try to communicate over an old RPC port. The communication will fail for rpc.lockd and any file locking done by an application over that NFS mount will hang.
rbootd daemon is running. The rbootd daemon always runs, whereas instl_bootd is started using inetd and only runs when needed. Also, for these older clients, there is an intentional delay built into the rbootd process when a client wants to do an installation boot (as opposed to a diskless boot). This prevents the server from showing up during the first search. Retrying the search two or three times may be necessary.
Ignite-UX changes some files during the configuration process, including resolv.conf and nsswitch.conf. The Ignite-UX os_arch_post_l and os_arch_post_c scripts place these files on the client after the install. These scripts are delivered in /opt/ignite/data/scripts/. You will probably only need to modify os_arch_post_l. Search on resolv.conf and nsswitch.conf for directions on what to change.
on the determined size. The EFI code calculates the wrong size, hence the allocated buffer is too small to hold the file. Apart from updating the firmware, using a tftp server that supports the tsize option will also solve this problem. The tsize option allows a tftp client to ask the tftp server for the size of the file. This saves the client from having to download the file to determine its size.
B Configuring DHCP Services HP-UX and Ignite-UX support retrieving network information using the Dynamic Host Configuration Protocol (DHCP). This appendix describes setting up DHCP. Ignite-UX allows for setting up DHCP for use during system installation. This appendix is for those who want to use DHCP for ongoing IP address management, as well as for system installation. All partitionable Itanium-based systems provide an alternative to using DHCP for network booting.
DHCP Usage Examples You can configure a DHCP server to respond only to specific clients during an installation using instl_adm to configure specific dhcp_class_ids. Your situation might fall into one of these categories: • The network has a DHCP server and the clients being installed will be requesting IP addresses from it. See the section “Manage Clients That Will Use DHCP During and After Installation” (page 233).
For information regarding creating a DHCP device group for booting anonymous Itanium-based clients, see “Ignite-UX Server and Boot Helper Setup for DHCP” (page 43). Using bootptab as an Alternative to DHCP If you want to have more control over the allocation of IP addresses and their mappings to your clients, you can configure entries in /etc/bootptab for each client.
C LIF Volume Contents The logical interchange format (LIF) volume contains portions of content needed for boot and installation, and is required on any medium used for Ignite-UX boot, installation and recovery, including network server, root disk (bootsys), tape, and CD/DVD. The make_medialif command creates the LIF volume. For more information on creating a LIF volume, see make_medialif(1M). A Description of the Files in the LIF Volume.
Additional configuration files can be appended using the -f option of the make_medialif command. Information in this file allows complete access to all the archives and depots on the media. The CONFIG file is referenced in the INDEX file. For more information, see “Using Configuration Files” (page 158). • HPUX — HP-UX bootstrap loader. It loads the kernel and starts HP-UX. For Ignite-UX, the HP-UX bootstrap loader loads the install kernel ([W|V|I]INSTALL) and install file system ([W|V|I]INSTALLFS).
• INSTCMDS and INSTCMDSIA — A compressed tar archive of commands required for specifying the system configuration to install on PA-RISC and Itanium-based systems, respectively. It includes commands needed to set up disk volumes and file systems. • SYSCMDS and SYSCMDSIA — A compressed tar archive of commands required for installation of PA-RISC and Itanium-based systems, respectively. It includes commands needed to complete installation and recovery.
D Using Integrated Lights Out Virtual Media with Ignite-UX The virtual media (vMedia) functionality is part of the iLO 2 Advanced Pack feature set and is enabled by purchasing the optional iLO 2 Advanced Pack license and granting the vMedia right. You can use iLO vMedia to boot and install HP-UX onto an Integrity system from a remote system's DVD device or ISO DVD image. The remote system may be a PC.
E Expert Recovery With expert recovery, you can repair aspects of the operating system on a damaged root disk using an Ignite-UX server or HP-UX OE media to boot the system. There are minor differences in message content between using a server or media, but the process is functionally identical. When using media, enabling and using networking is strictly optional.
1. Boot your system from the Ignite-UX server or the OE media to begin the recovery process. For specific information regarding how to boot your system from an alternate boot source, see the HP-UX System Administrator’s Guide for HP-UX 11i v3, or the Managing Systems and Workgroups: A Guide for HP-UX System Administrators manual. The following menu is displayed once the booting process is complete. Select Run an Expert Recovery Shell. 2. If you booted from a server, you will see the following screen.
Press Enter. 3. As usual, Ignite-UX will attempt to obtain networking information via DHCP. If that is set up correctly, the following screen will be filled-in; otherwise, you must enter the correct networking information. Confirm the networking information by selecting [ OK ]. 4. Expert recovery will load commands as needed.
Select r and then Enter to continue with the recovery process. 5. Verify the root disk hardware path at the DEVICE FILE VERIFICATION MENU. Generally speaking, the information displayed on the menu is correct and a followed by Enter is the correct selection. 6. Select a and then Enter from the HP-UX Recovery MENU to mount the root disk and push a shell.
From this point the specifics of your system might cause your screens to appear differently than shown here. Select the first option on all screens to continue through the process. 7. Proceed through the next set of screens to get to the shell prompt. The following screens are for an Integrity LVM disk layout. Your screens might differ depending on your system – especially device files will be different. (The following screen will not appear if you have a VxVM root disk layout.
If fsck ran successfully, you can now restore an accidentally removed /dev/console device file or reset a damaged /etc/passwd file back to its newconfig state. 8. To restore an accidentally removed /dev/console device file, enter the following command: # mknod /ROOT/dev/console c 0 0 To reset a damaged /etc/passwd file to its newconfig state, enter the following command: # cp /etc/passwd /ROOT/etc/passwd 9. If you require additional content, it can be loaded using the loadfile command.
F Terminal Keyboard Shortcuts The Ignite-UX client-side installation tools support HP terminals, VT100, and Wyse 60 to navigate within the Ignite-UX GUI using a keyboard. The following sections describe the various keyboard shortcuts that can be used in conjunction with the support terminals. Basic Keyboard Shortcuts These basic keyboard shortcuts can be used on both the vt100 and wyse60 terminals. Table 14 Basic Keyboard Shortcuts Action Keys Move among window elements.
Table 16 Advanced Actions (continued) Action Key Combination Select (highlight) all items in a list. F2, then / on the main keyboard Deselect all items in a list. F2, then \ on the main keyboard Open a menu on the menu bar by using the mnemonic (underlined) letter F2, then the mnemonic (underlined) letter Press a button if the cursor is not resting on it.
Some of the advanced keyboard actions in the following table require a key-combination using the PF1 key. In other words, you must first press the PF1 key, release it, and then press some other key. For example, to scroll a list one page requires you must press PF1, release it, and then press either the 2, 4, 6, or 8 keys on the numeric keypad. The advanced keyboard actions for a vt100 are as follows: Table 18 Advanced Keyboard Actions Action Key Combination Scroll a list up one page.
Glossary A glossary term appears in boldface italics when used for the first time in the text of this manual. Italicized terms in the following glossary refer to other terms in the glossary. 0–9 0xLLA See Link Level Address (LLA) A add_new_client An Ignite-UX command that constructs a client directory on an Ignite-UX server without requiring the client to be booted from the Ignite-UX server first. See add_new_client(1M).
boot content [W|V|I]INSTALL [W|V|I]INSTALLFS INSTCMDS or INSTCMDSIA, config files, and other files to support boot and Ignite-UX functionality needed to switch to another install source. boot helper media Installation media with no archive. Meant for booting only. Installation is completed using an Ignite-UX server.
/var/opt/ignite/clients/MAC_address/CINDEX file for recoveries, on an Ignite-UX server. configuration file A file that contains information describing installation behavior, archive contents, or the contents of a depot. Configuration files are referenced by the INDEX and CINDEX files. See instl_adm(4). copy_boot_tape An Ignite-UX command that replicates a PA-RISC recovery tape made with make_tape_recovery. See copy_boot_tape(1M).
F file system A collection of files and supporting data structures residing directly on a mass storage device or on a virtual or logical disk. There are various file system implementations, such as HFS and VxFS. See also install file system. fileset For SD-UX, a collection of files within a product. The product may be part of a bundle. See sd(5). G gateway The IP address of a system that routes forwarded traffic to a non-local network. A gateway IP address is usually associated with a router.
INSTCMDSIA A compressed tar archive of commands in the LIF volume, or on an Ignite-UX server, required for disk layout on an Itanium-based system. instl_adm An Ignite-UX command that checks syntax on Ignite-UX configuration files and manages the configuration file in an install file system on an Ignite-UX server. See instl_adm(1M). instl_bootd A boot protocol daemon for Ignite-UX clients that responds to PA-RISC systems requesting boot services from the Ignite-UX server. See instl_bootd(1M).
single LUN hardware path. The string 64000/0xfa00.0x22 is an example of a LUN hardware path. LUN hardware paths are part of the agile view introduced in HP-UX 11i v3. lunpath hardware path The representation of a hardware path for a mass storage device. It is identical in format to a legacy hardware path up to the HBA. After the HBA, additional addressing is represented in hexadecimal format. The string 0/2/1/0.0x50001fe1500170ac.0x4017000000000000 is an example of a lunpath hardware path.
NIS domain The group of systems sharing NIS configuration information. O offline diagnostic environment (ODE) Diagnostic utilities stored in the boot area or service partition able to run without the operating system. optional With 11i v3, software bundles that are not installed with HP-UX by default. You must select these bundles before installation. Ignite-UX is an example of an optional software bundle.
registered client A client system that has its MAC address registered with the server in order to always boot to the same assigned IP address. For PA-RISC systems, the client’s MAC address is assigned to an IP address in the /etc/opt/ignite/instl_boottab or /etc/bootptab file. For Itanium-based systems, the default is to use the /etc/bootptab file. Contrast with anonymous client. required With 11i v3, software and network driver bundles that are required and always installed with HP-UX.
U Unique LUN ID A general term for a LUN identifier, which might specifically be a physical disk's WWID, a WWID assigned to a SAN virtual LUN, the uniq_name assigned to a LUN for which a WWID could not be obtained, or some other type of identifier unique to a LUN. V Veritas A set of products from Symantec that include VxVM and VxFS. VINSTALL The install kernel for V-class PA-RISC systems. VINSTALLFS The associated file system for the VINSTALL kernel.
Index A active/passive devices, 96 additional network interfaces, 136, 137 additional software setup on server, 40 advanced tab, 144, 145 always-installed software bundle, 127 anonymous clients, 42, 71 at (1), 174 AUTO file as part of the LIF, 178 description, 235 in boot sequence, 86, 111 selecting HP-UX version to install, 51 automatic installations example configuration file, 173 overview, 171 scheduling, 174 specifying defaults, 172 using configuration files, 172 with bootsys, 171 B B5725AA product bun
adding software depot, 213 and make_[net|tape]_recovery, 194 cloning systems with make_net_recovery, 216 config.local, 213 default cfg clause, 218 modifying recovery file system layout, 213 renaming a recovery image, 211 CLI, 10 client actions, 16 customizing status display in Ignite-UX GUI, 15 halting after installation, 39, 159 memory requirements, 95 preparation for installation, 95 status screen, 16 command line interface see CLI commands, Ignite-UX, 13 CONFIG file description, 235 config.
adding boot addresses, 38 anonymous client booting, 43 class ids, 45 design, 234 design information, 234 document information, 232 example uses, 233 isolating noncontrollable servers, 45 PXE, 43 server, configuring, 232, 234 using bootptab, 234 DHCP device group booting of Itanium-based anonymous clients, 43 isolating from noncontrollable DHCP servers, 45 usage examples, 233 dhcpclient daemon, 234 direct boot profiles, 102 see also dbprofile directed boot detailed information, 102 overview, 43, 52 disk arra
hyperthreading, 124 I I/O configuration and agile recovery, 80 in startup phase, 19 recovery, in phase 1, 20 supported peripherals, 23 variables in config file, 81 I/O inventory and agile recovery, 80 blocking, 75, 81 display in itool, 117 ignoring specified devices, 82 ignoring specified protocols, 82 in startup phase, 20 IGNITE product bundle, 12 Ignite-UX bundles, 12 commands, 13 disk requirements, 21 features, 10 hardware requirements, 21 installing on clients, 127 installing the product, 12, 13 interf
setting gateway on boot helper, 56 setting install file system, 159 setting install params dynamically, 174 setting network duplex, 109 setting server on boot helper, 56 instl_adm(4), 158 instl_bootd daemon and updating instl_boottab, 34 booting anonymous PA-RISC clients, 42 booting PA-RISC systems, 19 booting registered PA-RISC clients, 25 decision tree for booting Itanium-based clients, 26 installing clients on multiple subnets, 225 problems installing from client, 28 problems with finding server, 228 ins
manpages, 13 media see custom installation media see HP-UX memory requirements for clients, 95 N network configuration options, 24 configuring destination IP, 134 configuring gateway, 134 configuring interfaces, 136, 137 network recovery adding clients for recovery, 207 CINDEX file, 211 config file additions for all client's recoveries, 213 configuring to show all information, 39 creating and using network recovery images, 206 examples, 209 for Itanium-based clients, 210 for PA-RISC clients, 209 from Actio
system tools, 189 tools comparison, 190 using a network image, 206 using a recovery tape, 198 verify recovery images, 196 versions of Ignite, 191 RedHat see Linux registered clients, 30 required software bundle, 127 requirements client, 95 Ignite-UX server, 21 volume, 140 rpc.lockd daemon, 227 rpc.
tape recovery with no tape boot support, 214 two-step using boot CD/DVD, 183 tape depot, accessing, 180 tape format for PA-RISC, 177 tape recovery configuring to show all information, 39 creating and using recovery tapes, 198 examples, 198 for Itanium-based systems, 200, 205 for PA-RISC systems, 199 from Actions menu, 17 overview, 188 pros and cons, 215 Q and A, 217 troubleshooting, 218 with no tape boot support, 214 tasks adding DHCP boot addresses, 38 automatic installations, 173 automatic system recoveri
X X server display, 22 XNTP configuring, 136 screen, 136 xntpd daemon, 136 265