
User Service Guide, Second Edition - HP Integrity BL60p Server Blade


Removing and Replacing Components
Preparing the Server Blade for Servicing
Chapter 4
44
Preparing the Server Blade for Servicing
To service any internal server blade component, power down the server blade and remove it from the server
blade enclosure.
CAUTION Electrostatic discharge can damage electronic components. Be sure you are properly grounded
before beginning any installation procedure. For more information, see the “Safety
Information” on page 22.
Power Off the Server Blade
System power in the server blade does not completely shut off with the front panel power switch, or the
Virtual Power Button feature. The function toggles between on and standby modes, rather than on and off.
The standby position removes power from most electronics and the drives, but portions of the power supply
and some internal circuitry remain active.
WARNING Before proceeding with any maintenance or service on a system that requires
physical contact with electrical or electronic components, be sure that either power
is removed or safety precautions are followed to protect against electric shock and
equipment damage. Observe all WARNING and CAUTION labels on equipment.
To service internal server blade components:
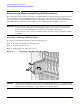
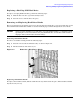
Step 1. Identify the proper server blade in the server blade enclosure. The enclosure slots are one through
eight from left to right.
Step 2. Remove power from the server blade in one of the following ways:
• Use the integrated Lights Out (iLO) Virtual Power Button feature in the Remote Console to
power off the server blade from a remote location. It may take up to 30 seconds for the server
blade reach standby mode. Wait for the power LED to go from green to amber.
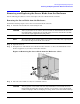
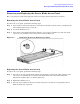
• Press the power button on the front of the server blade. Refer to Figure 4-5. It may take up to
30 seconds for the server blade to reach standby. Wait for the power LED to go from green to
amber.
Figure 4-5 Pressing the Power Button
Slot 1