HP Smart Update Manager User Guide Part Number 613175-003 August 2010 (Third Edition)
© Copyright 2009, 2010 Hewlett-Packard Development Company, L.P. The information contained herein is subject to change without notice. The only warranties for HP products and services are set forth in the express warranty statements accompanying such products and services. Nothing herein should be construed as constituting an additional warranty. HP shall not be liable for technical or editorial errors or omissions contained herein. Confidential computer software.
Contents Introduction .................................................................................................................................. 6 HP Smart Update Manager overview ........................................................................................................... 6 Using this guide ........................................................................................................................................ 7 New features of HP SUM 4.1.0 .............................
Command-line arguments ............................................................................................................... 66 Component configuration for Windows components only ................................................................... 71 Command-line examples ................................................................................................................ 71 Return codes ....................................................................................................
Non-matching systems error reported when building source Linux RPMs or installing Linux RPMs built from source ........................................................................................................................................................... 109 Linux component version discrepancy for source RPMs ............................................................................... 110 HP SUM displays No components found in the selected repository(ies) message .............................
Introduction HP Smart Update Manager overview HP SUM is a technology, included in many HP products for installing and updating firmware and software components on HP ProLiant and HP Integrity servers, enclosures, and options. HP SUM provides a GUI and a command-line scriptable interface for: • Deployment of firmware for single or one-to-many HP servers and network-based targets such as iLOs, OAs, and VC Ethernet and Fibre Channel modules.
• Support for updating firmware on network-based targets such as the OA, iLO 2/iLO 3 through Network Management Port, and VC Ethernet and Fibre Channel modules on HP ProLiant servers NOTE: HP SUM does not support third-party controllers. This includes flashing hard drives behind these controllers. Using this guide HP SUM is delivered with many different deliverables. A deliverable is an HP product which contains HP SUM and a set of firmware or software components.
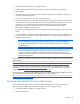
• A local administrative system with 512 MB of memory • Sufficient hard-drive space of at least twice the file size of the components to be deployed • WMI enabled • All remote host servers connected to the same network and use TCP/IP to enable the systems to be seen by the administrative system • An account with administrator privileges on each host server HP recommends that the user name and password for the administrator account on each host server are the same as those on the local administrativ
• gawk 3.1.0-3 or later • sed 3.02-10 or later • pciutils-2.1.8-25.i386.rpm or later To successfully deploy HP SUM on remote target systems based on a Linux operating system, the following must be available: • tcl-8.x package • expect-5.x package Starting with Linux PSP 8.40 and later, ensure the following platform-specific compatibility libraries are also installed. • • • • • For Red Hat Enterprise Linux 4x86 servers: o compat-libstdc++-296-2.96-132.7.2.i386 or later o lm_sensors-2.8.
• • • For SLES 10 AMD64/EM64T servers: o compat-2006.1.25-11.2.x86_64 or later o compat-32bit-2006.1.25-11.2.x86_64 or later o compat-libstdc++-5.0.7-22.2.x86_64 or later o perl (required to provide the libperl.so) o libnl (required for QLogic and Emulex drivers) o e2fsprogs-32bit For SLES 11 x86 servers: o perl (required to provide the libperl.so) o libstdc++33-3.3.3-11.9.i586 or later o perl-SNMP-5.4.2.1-6.3.i586 or later o net-snmp-5.4.2.1-6.3.
NOTE: HP SUM is no longer supported on SUSE Enterprise Linux 9. IMPORTANT: The HP Smart Update Manager does not support cross-platform deployments (for example, deployments from Linux systems to Windows® systems). Supported deliverables overview HP SUM support is specific to the deliverable in which it is delivered. Make sure you use the correct version of HP SUM that is released along with the deliverable supporting the environment. NOTE: Not all functionality is available in each version of HP SUM.
HP SUM version Delivered with • HP ProLiant Support Pack for Linux 8.40 • HP Smart Update Firmware DVD 9.0 Support and limitations For ProLiant Workstation Blades: 4.0.0.64 • HP Workstation Support Pack for Windows for HP WS460c G6 Blade • HP Smart Update Firmware DVD 9.0 (offline only) • HP Integrity Support Pack for Windows® on Itanium®-based systems • Support for Integrity Support Pack for Windows® 7.
IMPORTANT: Before deploying software updates to a target server, be sure that a recent backup of the target server is available in the event the deployment procedure fails. Scenario Description HP SUM command HP deliverable Interactive, graphical deployment on a local host (Run HP SUM on the server being updated.
Scenario Description HP SUM command HP deliverable Scripted deployment to a remote host Use this scenario when you: • • (Run HP SUM from a workstation and update a remote host over the network using scripts.) • Are familiar with command line tools • Must perform a customized, scripted deployment • • Need to update multiple targets including OA, VC, and server-based firmware Windows®: hpsum -s target Target1 -target Target2 -username User1 -password PW1 • Linux: .
Deploying software using the ProLiant Support Pack (PSP) for Microsoft Windows The HP SUM utility delivered with the Windows PSP enables you to deploy software components from a single, easy-to-use interface for ProLiant server and options. This utility enables legacy support of existing software and firmware components while simplifying the overall deployment process. You do not have to run the SETUP executable files SETUPC.EXE, SETUPEX.EXE, and SETUP.
choose which components to install or not install. Additionally, the HP SUM utility enables software deployment for multiple HP ProLiant servers from a single GUI. For more information about PSP, see the HP ProLiant Support Pack for Windows and Linux User Guide on the HP website (http://h20000.www2.hp.com/bizsupport/TechSupport/DocumentIndex.jsp?contentType=SupportManu al&lang=en&cc=us&docIndexId=64179&taskId=101&prodTypeId=18964&prodSeriesId=345557).
IMPORTANT: Before deploying firmware updates to a target server, be sure that a recent backup of the target server is available in the event the deployment procedure fails. For more information about deploying firmware on HP ProLiant servers, see the HP Smart Update Firmware DVD User Guide on the HP website (http://h20000.www2.hp.com/bizsupport/TechSupport/DocumentIndex.jsp?contentType=SupportManu al&lang=en&cc=us&docIndexId=64179&taskId=101&prodTypeId=18964&prodSeriesId=345557).
Component Supported CPLD/SPLD5 Yes When updating HP ProLiant blade servers in an HP BladeSystem Matrix, do not select ftp.hp.com to download the latest components. Ensure the component source contains versions of components that match the BladeSystem Matrix Compatibility chart before using HP SUM to deploy any software of firmware. To view the BladeSystem Matrix compatibility chart, see the HP website (http://www.hp.com/go/matrixcompatibility).
For Windows® operating systems, the HP USB Key Creator for Windows® utility must be downloaded from the HP website (http://www.hp.com) and installed on a workstation. After installation, the utility places a shortcut in the HP System Tools folder in the Programs start menu. To create your bootable drive key and copy the contents of the DVD: 1. Insert the HP USB drive key in an available USB port. 2. Select the HP USB Key Utility shortcut in the HP System Tools folder. 3.
NOTE: Ensure that execute privileges are available in Linux by using the chmod 700 * command. By default, the files are copied off the DVD in Linux as read-only with no execution privileges. 2. Copy any updated files into the same directory where the files were copied in step 1. 3. Execute HP SUM to have the new components recognized. Deploying components not on HP Smart Update Firmware DVD Make sure you use the correct version that is released along with the deliverable supporting the environment.
If HP Smart Update Manager detects a TPM, a pop-up warning message appears. To enable firmware updates without the need to type in the TPM password on each server, the BitLocker Drive Encryption must be temporarily disabled. Disabling the BitLocker Drive Encryption keeps the hard drive data encrypted. However, BitLocker uses a plain text decryption key that is stored on the hard drive to read the information. After the firmware updates have been completed, the BitLocker Drive Encryption can be re-enabled.
6. Close all the windows, and then start the firmware update. To enable advanced startup options, use the following command: cscript manage-bde.wsf -protectors -disable c: When the firmware update process is completed, the BitLocker Drive Encryption support can be reenabled by following steps 1 through 4 but clicking Enabled in step 5 instead. The following command can be used to re-enable BitLocker Drive Encryption after firmware deployment has completed. cscript manage-bde.
If the TPM is detected and enabled with Option ROM Measuring, the installation is silent; the /tpmbypass switch is not given, and any firmware updated must be applied to the server. No pop-up warning appears. A new log file is generated (%systemdrive%\cpqsystem\log\cpqstub.log). Because the installation is silent, the installation is terminated and cannot continue. If the TPM is detected and enabled, the installation is silent, and the /tpmbypass switch is supplied. The installation occurs.
HP SUM User Interface Deployment scenarios HP SUM deploys firmware and software on a local host or one or more remote hosts. The remote hosts must be online and running the same operating system as the system running HP SUM. For example, when the remote hosts are running Linux, HP SUM must also be running on a Linux operating system. The following table describes when typical HP SUM deployment scenarios are used.
Deployment to multiple remote hosts NOTE: A remote host can be the IP address or DNS name of a remote server, remote iLO NIC port, Virtual Connect Ethernet or Fibre Channel Module for c-Class BladeSystem, BladeSystem Onboard Administrator, or 3 Gb SAS BL Switch firmware. To deploy components to multiple remote hosts using the GUI: 1. Ensure that all minimum requirements are met as described in "Minimum requirements (on page 7)." 2.
Local host installations HP Smart Update Manager can deploy smart components on a local host or on one or more remote hosts. You can deploy components on a local host by using the HP Smart Update Manager GUI. To access the HP Smart Update Manager, see Deployment Options. Selecting the location to check for updates The Source Selections screen enables you to select components from a directory and the HP FTP site (ftp://ftp.hp.
When using HP SUM delivered with the Integrity support pack, the following screen appears when selecting the location to check for updates, since HP SUM does not support the ability to download the latest components from ftp.hp.com for these servers.
NOTE: FTP downloaded from HTTP proxy fails. Components from the HP FTP site are only presented for selection on the Select Items to Install screen if their versions are newer than what is already on the system. If a system has all of the latest versions of firmware and software, no components from HP.com are presented on the Select Items to be Installed screen. NOTE: HP SUM does not support the ability to download the latest Linux RPMs and Virtual Connect components from ftp.hp.com for ProLiant servers.
Download Permission (applicable only for ProLiant servers) Before starting any discovery, HP SUM searches the web digest for self-discovery components that must be downloaded for the discovery process. Self-discovered components are components including but not limited to NIC firmware and tape firmware that HP SUM uses to discover the hardware in the system. If the Check ftp.hp.
Selecting an installation host To continue with the deployment process using a local host, select a host from the Select Installation Host(s) screen, and then click Next. The Select Installation Host(s) screen enables you to choose a host for component installation. By default, the first time you run HP SUM on a particular system, the only host available is the local host. However, you can also select remote hosts as your targets.
o Ping Scan for Remote Hosts o Port Scan for Remote Hosts o LDAP Query for Remote Hosts o Onboard Administrator scan for iLO Hosts • Manage Hosts—Enables you to add, edit, and delete hosts. • Manage Groups—Enables you to add, edit, and delete groups. • Edit—Enables you to edit the selected host. • Next—Proceeds to the next step in the installation process where the local or remote system checks for already installed items. • Exit—Exits HP SUM.
To continue to system discovery, click Next and the discovery process occurs. If the system discovery process finds one or more predefined bundles, the Select Bundle Filter screen appears. Selecting bundles to filter When the discovery process is complete and there is a bundle in the repository, the Select Bundle Filter screen appears. The Select Bundle Filter screen displays information about the predefined bundles available on your system and enables you to select which bundles to install.
The following image illustrates the Select Bundle Filter screen. The Set Options for Bundle Filter section allows you to set options for non-bundle product versions. o To view all versions of the products included in the bundle, select ALLOW NON-BUNDLE VERSIONS. This option enables you to include updates that might be newer than those released in the bundle. o To view updates of products not included in the bundle, select ALLOW NON-BUNDLE PRODUCTS.
Selecting components to install When the discovery process is complete and a bundle has been selected, the Select Items to be Installed screen appears. The Select Items to be Installed screen displays information about which components are available for installation on your system and enables you to select or clear components to install. The Select Items to be Installed screen includes the following sections: • Host—Lists the system on which the selected items are installed.
The Select Items to be Installed screen also includes the following buttons: • Select All—Selects all available components for installation. • Deselect All—Clears all components selected for installation. • Default—Restores the selections in the product installation pane to the default view, which is based on the existing configuration of the local system. • Exit—Exits HP SUM. • Install—Installs all selected components.
• Updates to be Installed—The components in this section can be installed on your system. • Optional Updates—The components in this section are not selected for installation by default, even if the product is not already installed or is installed but not up-to-date. To include the component in the installation set, you must select the component.
Icon Text Description Ready All selected components are ready to be installed. Already up-todate No component installation is required. None Selected No components are selected for installation. x Critical Action X components are not ready for installation due to failed dependencies, where x is the number of components. The installation cannot proceed until the dependencies are met or the component is deselected for installation.
NOTE: In Linux, the Reboot Delay time is automatically converted from seconds to minutes. Any value under a full minute, 59 seconds or less, will be rounded to the next minute for Linux. Make any changes, and click OK. NOTE: The reboot options do not apply when deploying firmware to HP Integrity BL860c/BL870c/BL890c i2 Servers with HP SUM. HP SUM will reboot the server automatically during the firmware update process when the user has selected Upload and Activate.
Icon Text Description Deselected by user The component has not been selected for installation. Excluded by Filtering The components excluded which are not applicable to the target server. Failed dependencies The component has a dependency that has not been met. To determine the nature of the failed dependency, click View Failed Dependencies. Build Failed The component build has failed. To view the Build.log, click the View build log link.
If a component displays as Build Failed, you must resolve the issue before proceeding with the installation. If a failed dependency occurs, then you must resolve it by ensuring the prerequisite libraries or the appropriate software or firmware components are available before proceeding with the installation.
The following figure displays the Failed Dependencies screen.
Installation options You can specify firmware upgrade behavior for installable components by selecting one or more options from the Additional Options field. CAUTION: Updating the firmware while a shared device is in use can lead to data loss. Before enabling the Allow Shared Devices option, be sure any other servers sharing the selected devices are offline. • Select Allow Downgrades to downgrade the current firmware to an older version.
Default Allow downgrades Allow rewrites Firmware upgrade v3.05 No change 3.05 3.10 Firmware upgrade v3.10 No change No change 3.10 NOTE: When updating installation for NIC components, select the devices to be updated in the window that appears. After you have selected all the components that you want to install, click Install to proceed with the installation. The Installation Progress screen appears.
Icon • Icon Text Description Same/older version successfully installed The existing component was successfully downgraded or reflashed to the same or older version. Update returned an error An update error has occurred. For details, see the HP SUM log file. Installation failed The component was not installed. To see additional details, click View Installation Log. Additional—Enables you to view the installation log for each component and reminds you if a reboot is required.
NOTE: After updating hard drives in external enclosures such as MSA20, you must power cycle the external enclosures. The Reboot button in HP Smart Update Manager only reboots the server but never power cycles an external enclosure. The following installation logs contain information about the installation activity for each host being updated: • hpsum_log.txt log—Contains a brief summary of the installation activity • hpsum_detail_log.
Inventory Progress screen appears while HP SUM builds an inventory of available updates. When the inventory process is complete, the Select Installation Host(s) screen appears. Selecting remote hosts or groups The Select Installation Host(s) screen enables you to choose multiple hosts and groups for component installation.
Linux operating system media. To proceed with remote deployment, start HP SUM. Searching for remote hosts Clicking Host Search enables you to search for hosts in the network using the following options: • Ping Scan for Remote Hosts—This option is used to search for hosts using an IP address range. • Port Scan for Remote Hosts—This option is used to search for hosts using the IP address range along with the Ports to Scan.
• Interconnect switch - 3 GB SAS BL Switch NOTE: Local hosts cannot be included in a list with remote hosts or in a group. When selecting iLO and iLO 2 for ProLiant, iLO 3 for Integrity, OA, VC, or 3 Gb SAS BL Switch as a target, only the firmware component for that particular hardware can be updated. The server host must be selected to update all other firmware and software components. The iLO firmware can be updated by either selecting the iLO version or the server host.
1. Click Add Host. The New Host dialog box appears. 2. Select the method to add a host from the following: o Enter the DNS name of the host you want to add. o Enter the IP address of the host you want to add. o Enter the IP address range of the hosts you want to add. The starting and ending IP addresses must both be on the same subnet. When using the IPv6 format, the last field in the ending address is limited to 32 targets.
1. On the Manage Hosts screen, click Edit Host. The Edit Host dialog box appears. 2. Edit the Host Name and Description. 3. Click OK. To delete a host: 1. On the Manage Hosts screen, click Delete Host. 2. When the confirmation screen appears, click Yes.
Managing groups To add, edit, or delete groups, click the Manage Groups button. The Manage Groups screen appears.
1. Click Add Group. The Edit Group dialog box appears. 2. Enter a group name. 3. Enter an optional user-defined description given to the group to be added. 4. Select the hosts to be added to the group from the Available Hosts pane. You can add new hosts from this screen by clicking the New Host button. For more information on adding hosts, see "Managing hosts (on page 47)." 5. Click the Enter button to move the selected hosts to the new group. 6. Click OK.
1. Select the group, and then on the Manage Groups screen, click the Edit Group button. The Edit Group dialog box appears. 2. Edit the group name as needed. 3. Edit the optional user-defined description given to the host as needed. 4. Click the Enter and Remove buttons to add or remove hosts as needed. 5. Click OK. To delete a group: 1. Select the group on the Manage Groups screen, and then click the Delete Group button. 2. When the confirmation screen appears, click Yes.
Entering credentials for hosts When you select a single remote host, the Enter Credentials for Host screen appears. You must enter your username and password as the credentials for the host. To enter the credentials for the host, choose one of the following: • Select Enter Username and Password, and then enter the username and password. • Select Use Current Credentials to use the credentials of the user currently logged in. This option is for Windows operating systems only.
When you select a group or multiple hosts, the Enter Credentials for Group screen appears. The screen separates the remaining hosts that still require credentials from the completed hosts. Each pane is divided into the following columns: • Name—Specifies the name of the host • Status—Specifies the credentials status of the host Icon • Text Description Entered The credentials for the host have been entered. Needs Credentials The credentials for the host have not been entered.
To enter the credentials for the host, perform the following steps: 1. In the left pane, select the host from the list of hosts requiring credentials. If all credentials are the same, to select all the hosts on the list, click Select All. 2. To enter the required credentials and move the selected host to the Completed Hosts pane, click Enter. 3. To continue, click Next.
HP SUM User Interface 57
Selecting bundles to filter on multiple hosts If the system discovery finds one or more predefined bundles, the Select Bundle Filter screen appears. If you specify a bundle on the command line when starting HP SUM, this screen does not appear. For more information about the screen, see "Selecting bundles to filter (on page 32)." To proceed with the installation process, click OK.
Selecting components to install on multiple hosts The Select Items to be Installed screen displays the server hosts and the status information. The Select Items to be Installed screen includes the following buttons: • View Host—Enables you to view additional information about a host after you select it. • Install—Installs all selected components on all remote hosts. The Install button is grayed out when a dependency failure occurs. • Exit—Exits HP SUM.
Icon Text Description Host Skipped Due to Existing HP SUM Session The host is skipped due to an existing HP Smart Update Manager session. Action Required The host is not ready for installation. Click View Host for additional information. Discovery Failed The host is not ready for installation. The detection of installed hardware, software, and firmware has failed. NOTE: The default reboot behavior after updates are installed might also appear in the Status column.
• Upload but Do not Activate—The component is uploaded to the server which is up and running, however the firmware is not activated until the next time the server is rebooted.
If the user has not changed the default option or has selected Upload and Activate, a warning message displays, indicating that HP SUM will reboot the server during the firmware update process. To continue the update, press OK. You can deploy the Online System, FPGA, iLO-3 MP and Power Monitor firmware using CLI in silent mode. However, you cannot specify the Upload and Do not Activate mode using CLI. Only the default Update and Activate mode is available, and no parameter is required.
Viewing the installation results for multiple hosts When the installation is complete, the Installation Results screen appears. The Installation Results screen is divided into the following columns: • Host—Specifies the IP address or DNS name of the host. • Status—Specifies the overall installation status of the components on the remote host. Icon Text Description Success The host was updated successfully. Nothing to install The host is already up-to-date.
To view single-host installation results, double-click or select the host, and then click View Host. Proceed as described in "Viewing the installation results (on page 43).
Scripted deployment Command-line interface The HP SUM command-line interface enables you to script custom installations.
Command-line arguments HP SUM recognizes the following command-line arguments. These arguments prepopulate the GUI in the Select Items to be Installed screen. If you specify the host or group, then the Select Items to be Installed screen does not appear. You cannot use some arguments, such as /romonly and /softwareonly together. Command-line argument Description Help /h[elp] or /? This argument displays command line Help information.
Command-line argument Description /s[ilent] This argument causes the installation to run silently with no GUI or console output. All data writes to the log file. Any generated prompts use the default option and continue the installation without user input. If a component requires input before installation (such as configuration information), then the component installation fails, and an error message writes to the log file.
Command-line argument Description HP Integrity Servers. /use_d[ownloaded] This argument specifies that the checkbox for Include components previously downloaded from HP.com on the Source Selection screen is selected. This enables those previously downloaded components to be included in the list of possible updates. This argument is not supported on HP Integrity Servers.
Command-line argument Description /on_failed_dependen cy This argument informs HP SUM how to proceed when a component has a failed dependency. The default of OmitHost causes the host to be put in a failure state and no install is attempted on it. OmitComponent clears the affected components and proceeds with any updates that do not have dependency failures. Force attempts all updates, even if they have dependency failures.
Command-line argument Description /current_credential This argument enables the credentials of the local host to be used as the credentials to access the targets instead of providing the username and password explicitly for each target. The assumption is that the current credentials are valid for the targets being accessed. (Applies to Windows® operating systems only.
Command-line argument Description /report This argument generates a report listing, a target summary, and how the components in the repository affect the target (For example, whether each component applies to the target or not). The report name is of the format, HPSUM_ Report__
• • • o ProLiant Support Pack for Microsoft® Windows Server™ 2003 v7.90 (BP000323.xml) o ProLiant Support Pack for Microsoft® Windows Server™ 2003 v7.80 (BP000315.xml) Firmware: o System ROM o Smart Array controller o Hard drives o iLO Software—later version of: o HP Insight Diagnostics Online Edition for Windows Server™ 2003 (cp008097.exe) o HP Systems Management Homepage for Windows® (cp008257.
• hpsum /group "Management Servers" /current_credential /use_latest /allow_update_to_bundle /allow_non_bundle_components /force:all /override_existing_connection /continue_on_error ServerNotFound /silent /logdir "Management_Server_Files" • hpsum /target "Management Server1" /target "Management Server2" /target "Management Server3" /user administrator /passwd letmein /use_latest /allow_update_to_bundle /allow_non_bundle_components /force:all /override_existing_connection /continue_on_error ServerNotFound
Linux smart component return codes Single target servers: Error level Meaning 0 The smart component installed successfully. 1 The smart component installed successfully, but the system must be restarted. 2 The installation was not attempted because the required hardware is not present, the software is current, or there is nothing to install. 3 The smart component failed to install. For more details, see the log file.
perform dry runs of installations to ensure the scripts are working without deploying the firmware updates that might be required on each target. Remove the DRYRUN=YES option to perform the updates. For parameters that can take list values, list separator can be commas, semicolons, or spaces. NOTE: The credentials can be left out of the file for greater security and passed on the command line to HP Smart Update Manager. The only limitation of this is that the userID and credentials must be the same on all.
to log into one or more remote targets, you can do so by setting the variable USECURRENTCREDENTIAL to YES. Login credentials for one or more hosts can be supplied using the variables UID and PWD. If given at the beginning of a TARGETS section, both variables must be used. If given in the middle of a TARGETS section, one or the other can be used to override the selected variable and continue using the active value for the remaining variable.
Parameter Description Possible values REBOOTALLOWED This parameter enables you to reboot, if required. YES, NO REBOOTMESSAGE This parameter enables you to create a message to be displayed prior to rebooting. Any string (not exceeding 256 characters) REBOOTDELAY This parameter enables you to delay before rebooting. Time in seconds COMPONENTSLIST This parameter enables you to limit the list of components to be updated. Component names with file extensions (.exe, .rpm, or .
Parameter Description Possible values OPTIONS This parameter can be used to specify the HP SUM CLI options inside the input file, which overrides the configuration settings. Parameters can be separated by a semi-colon, comma, or a space. One or more CLI switch This parameter replaces the LSPOPTIONS parameter that was previously supported with LDU. USESNMP This parameter specifies that components, which use SNMP protocol, are available to be selected for installation.
Parameter Description Possible values apply to Integrity Servers. USEPROXYSCRIPT This parameter enables the inclusion of a proxy script to access the HP FTP site (ftp://ftp.hp.com). This parameter does not apply to Integrity Servers. Web URL (for example, autoproxy.com) DELETEINPUTFILE This parameter enables you to instruct HP SUM to delete the input file after it has been read in.
Parameter Description Possible values only.) CMAMGMTSTATIONRWCOMM STR This parameter enables you to specify an SNMP read/write community string for a system with read/write access that serves as a management station. You can specify multiple strings separated by a space. (Applies to Linux PSP only.) SNMP read/write community string CMAMGMTSTATIONROIPOR DNS This parameter enables you to specify the IP address or DNS host name of a system with read-only access to serve as a management station.
Parameter Description Possible values health application loads. (Applies to Linux PSP only.) • management driver) NO (do not start the HP Lights-Out management driver) HPVCAVCRMSERVER This parameter informs the VCA of the name of the VCRM to use as a software distribution repository. (Applies to Linux PSP only.) VCRM name HPVCAVCRMLOGINID This parameter is the login ID that the VCA uses to communicate with the VCRM. (Applies to Linux PSP only.
Parameter IP-RESTRICTEDEXCLUDE IP-RESTRICTEDINCLUDE LOCALACCESS-ENABLED LOCALACCESS-TYPE TRUSTMODE Description Possible values web server, this parameter must be set to yes, and values must be provided to the IPRESTRICTED-EXCLUDE or IP-RESTRICTEDINCLUDE parameters. This parameter is used by the HP Systems Management Homepage to exclude specific IP address/NetMask pairs from logging into the web services. (Applies to Linux PSP only.
Parameter Description Possible values values are case-sensitive and must be capitalized as shown. Failure to do so prevents the trust relationship from being set up properly during installation and might affect access to the web server. CERTLIST This parameter enables a user to provide a list of certificate files or servers where certificates can be obtained for trust relationships for the HP Systems Management Homepage. (Applies to Linux PSP only.
ALLOWUPDATEBUNDLE = YES SKIPTARGET = NO IGNOREERRORS = ServerNotFound, FailedDependencies SOURCEPATH = c:\pkgsource1 USELATEST = YES SILENT = YES OPTIONS = /f:rom [TARGETS] HOST = schinta1 HOST = schinta2 UID = root PWD = root123 HOST = 234.567.765.432 [END] USAGE: hpsum /inputfile Examples of inputfile.txt file: Example 1: The two targets are passed to be updated. The targets do not necessarily have to be OAs. They can be any target supported by HP SUM.
HOST=winserver UID=Userid PWD=password [END] Example 4 SILENT = YES IGNOREERRORS = ServerNotFound,BadPassword, FailedDepedencies SKIPTARGET = NO SOURCEPATH = C:\ fwcd\firmware-8.70-0\hp\swpackages FORCEALL = YES REBOOTALLOWED = YES REBOOTDELAY = 30 REBOOTMESSAGE = “Install complete, server will reboot in 30 seconds” [TARGETS] HOST=16.83.62.141 UID=Userid PWD=password [END] [TARGETS] HOST=16.83.61.48 UID=Userid PWD=password [END] [TARGETS] HOST=16.83.62.196 UID=Userid PWD=password [END] [TARGETS] HOST=16.83.
Report type Description Report file information* target (for example, whether each component applies to the target or not). Usage: hpsum /report /inventory_report /firmware_report This argument generates a report listing of the components in the specified repository. • Usage: hpsum /inventory_report hpsum_Inventory_Report_.h tml • hpsum_Inventory_Report_.x ml This argument generates a report listing of the firmware in the specified repository.
The following figure illustrates the HP SUM report in HTML format.
The following figure illustrates the HP SUM Inventory report in HTML format.
The following figure illustrates the HP SUM Firmware report in HTML format.
Advanced topics Software component configuration Some components might have required or optional configuration settings. Configuration parameters can include information necessary to set up the component correctly or passwords required for software installed by the component. If the optional configuration data of a component is not provided and the component has not been installed previously, then default values for that configuration data are used.
Deploying firmware and software simultaneously This topic applies to ProLiant servers and options supported by the server, but does not apply to Integrity servers. HP SUM utility enables you to deploy firmware and software components simultaneously. The latest firmware and software components must be located in the same directory. To deploy firmware and software components simultaneously, select the location where the firmware and software components are located in the Source Selections screen.
connects to the admin$ share, it copies a small service to the target server for the duration of the installation. After this service starts, HP Smart Update Manager uses this service to communicate between the local and remote target server. During this process, HP Smart Update Manager opens ports in the Windows® firewall to enable HP Smart Update Manager to use SOAP calls over SSL to pass data among local and remote systems.
short-name and full IPv6 notation. You do not need to add the optional interface number when you enter the address. If you cannot connect to the target server or receive a Discovery failed message when executing HP Smart Update Manager in an IPv6 environment, see the troubleshooting section ("Troubleshooting HP Smart Update Manager in IPv6 networks" on page 107). After you connect to the target server, all other HP Smart Update Manager functions work identically.
addresses for both local and remote target servers. Windows Vista®, when used as a client to run HP Smart Update Manager to remote Windows Server® 2008 operating systems or as a target operating system on HP Workstation server blades, provides the infrastructure that supports full IPv6 deployment of software and firmware updates from HP Smart Update Manager. NOTE: Windows® XP clients are not supported in IPv6 networks for HP Smart Update Manager deployment.
If you cannot connect to the target server or receive a Discovery failed message when executing HP Smart Update Manager in an IPv6 environment, see the troubleshooting section ("Troubleshooting HP Smart Update Manager in IPv6 networks" on page 107). After you connect to the target server, all other HP Smart Update Manager functions work identically. Log files for IPv6 hosts are stored with all other HP Smart Update Manager files in the \CPQSYSTEM\hp\log\ directory.
IPv6 addresses can be passed to HP Smart Update Manager in command line arguments or using the HP Smart Update Manager user interface. In the HP Smart Update Manager user interface, you can add a remote host on an IPv6 network by either entering the DNS name of the IPv6 target server or by selecting the IPv6 address button and entering the IPv6 address. HP Smart Update Manager supports both the short-name and full IPv6 notation.
Limitations of IPv6 for Linux The only current limitation of HP Smart Update Manager in a Linux IPv6 environment is that all remote target Linux-based servers must have the iptables-ipv6 rpm file installed. You can find the file on the distribution media for both Red Hat Enterprise Linux and Novell SUSE Linux Enterprise Server operating systems. HP Smart Update Manager uses this file to open a port in the IPv6 firewall to communicate with the Linux system that runs HP Smart Update Manager.
Troubleshooting Recovering from a failed ROM upgrade Recovering from a failed system ROM upgrade Use redundant ROM or ROMPaq to recover from a system ROM upgrade failure. Redundant ROM recovery When you flash the system ROM, ROMPaq writes over the backup ROM and saves the current ROM as a backup, enabling you to switch easily to the alternate ROM version if the new ROM becomes corrupted for any reason.
6. Power up the server. The server generates one long beep and two short beeps to indicate that it is in disaster recovery mode. If the disk is not in the correct drive, then the system continues to beep until a valid ROMPaq disk is inserted. The ROMPaq disk flashes both system ROM images. If successful, a sequence of ascending audible beeps is generated. If unsuccessful, a sequence of descending audible beeps is generated, and you must repeat the disaster recovery process. 7. Power down the server. 8.
Recovering from an installation failure Collecting trace directories HP Smart Update Manager generates a set of debug trace logs located in the %TEMP%\hp_sum directory on Windows systems and \tmp\hp_sum on Linux systems. These files contain internal process and debug information, which can be useful in determining HP Smart Update Manager failures. NOTE: To break out to a Linux console while booted to the HP Smart Update Firmware DVD, press Ctrl Alt d b x. Each key (d, b, x) is hit in succession.
The following is an example of the output trace in the OpMan.trace on how to determine if a component was prevented from being shown on the Select Items to Install screen or being deployed from the silent console mode. In the example, the binary image files 0.bin and 1.bin (which represented iLO firmware files), components cp011301.exe and cp011500.exe, and the HP BladeSystem Firmware Update Bundle for Windows represented by bundle file bp000648.xml were added to the installation set.
• In rare cases, external storage enclosures might cause HP SUM to report a discovery failure or to hang. To resolve this issue, disconnect the external storage until the firmware updates are completed. • For Linux, ensure that the target server can be contacted through SSH and that the scp command is available to securely send files to the target server. • Ensure the firewall ports on any routers in the network as documented in the Enabling ports in HP Smart Update Manager section of this document.
Recovering from a blocked program on Microsoft Windows Configuring Windows firewall settings The Windows® Security Alert appears when a program is blocked from accepting connections from the Internet or a network. To set the rules for the Windows® Firewall and Security Policy, click Unblock, and then set your firewall settings to the following: 1. Click Start>Control Panel>Administrative Tools>Windows Firewall with Advanced Security>Inbound Rules>Remote Administration (NP-IN). 2.
scanning software from denying service to the application. The SOAP server is deployed on the remote target using the initial ports described above (ports 138, 445, and 22) and then allocates another independent port as documented below for its communications back to the workstation where HP Smart Update Manager is running. During shutdown of HP Smart Update Manager, the SOAP server is shutdown and removed from the target server, leaving the log files.
Ports 60000-60007 Random ports are used in this range to pass messages back and forth between the local and remote systems via SSL. These ports are used on the system running HP Smart Update Manager to send data to the target server. Several internal processes within HP Smart Update Manager automatically use the port from 60000 when no other application uses it. If there is a port conflict, the manager uses the next available one.
For a successful reboot, you must click Exit. When the message is entered using CLI, the reboot message looks corrupted since the Japanese character set is not supported in CLI. Recovering from Fatal Error - application will exit message Running in a directory path containing double-byte characters When running in a directory path containing double-byte characters, the HP Smart Update Manager encounters a fatal error while trying to initialize.
Recovering a lost HP Smart Update Manager connection HP Smart Update Firmware DVD mounted using iLO virtual media When either iLO and NIC firmware are updated, the HP SUM connection is lost and cannot install components. Booting the Firmware DVD from iLO virtual media is only supported in Offline Automatic Firmware Update mode. Users attempting to boot in this manner might experience issues from connection timeouts, difficulties updating iLO firmware, and mouse syncing issues.
NOTE: You do not need to use the .ipv6-literal.net suffix when entering IPv6 address into the HP Smart Update Manager user interface or when passing IPv6 address using command line parameters to HP Smart Update Manager. After you validate that you can access the admin$ share on the remote target server, HP Smart Update Manager works unless other network or hardware issues exist.
• Ensure you can ping the IPv6 loopback address: ping6 ::1. • Use the DNS hostname instead of IPv6 address to ensure the address is correct. • Use ipconfig to validate you have IPv6 addresses assigned to your NICs. For more information about troubleshooting your configuration, see the Linux IPv6 How-To (http://www.linux.org/docs/ldp/howto/Linux+IPv6-HOWTO/index.html). • For more information about setting up and troubleshooting IPv6 networks, see Getting Around IPv6 by Carla Schroder (http://www.
Linux component version discrepancy for source RPMs You might observe differences in the RPM component name which might appear to be a version mismatch for the component on the Select Item to be Installed screen and the Installation Results screen. This is caused by the RPM build phase. The resulting component is actually the same version. The RPM build adds information, so it is technically the same component.
To resolve this issue, make sure to select the bundle for the OS distribution on the Select Bundle Filter screen for installation or remove the RPMs from the directory that are not applicable to the Linux distribution you are using. Issues related to bundle filtering on the Select Items to be Installed and Select Bundle Filter screens If you specify a bundle to use for installation when starting HP SUM (for example, hpsum /b bp000690.
If you experience the first issue and then select OK on the Select Bundle Filter screen to return to the Select Items to be Installed screen, the bundle you originally specified is no longer listed as the filter. To use your bundle as the filter, you must exit and restart HP SUM. If this issue occurs, from the GUI run HP SUM. HP SUM fails on Windows Vista® due to McAfee firewalls This is a known issue with McAfee that McAfee firewalls block HP SUM traffic.
As displayed in the following image, in the Message column, notice the entry similar to the following: Blocked Incoming TCP from the HOST (15.255.101.110) during execution of HP SUM. 5. From the menu, select Task>Unlock Interface. 6. Enter the password of the McAfee user interface. 7. Select the Firewall Policy tab. 8. On the bottom of the screen, click Add (Add new rule).
9. From the screen image, use the following settings for the new firewall rules on your system. 10. Click OK to ensure new firewall rules have been implemented. 11. Restart HP SUM. Performing these steps allows HP SUM to function, although after a period of time (ranging from minutes to hours), McAfee disables HP SUM access.
Virtual Connect firmware upgrade using HP SUM fails if VC reports an invalid or bad health state Virtual Connect firmware can be upgraded using HP SUM only if the health state of the VC is in a good state. If the health state is invalid or bad, HP SUM does not upgrade the VC firmware. If a VC upgrade is attempted in an invalid or bad health state, HP SUM installation fails. The details of the failure can be viewed in the installation log by clicking the View Installation log link in the Additional section.
To resolve this issue, the VCSU must be used to upgrade the firmware.
Technical support Reference documentation • To download the ProLiant Firmware Maintenance CD, Smart Update Firmware DVD, SmartStart, and other CD/DVDs, see the SmartStart download website (http://www.hp.com/go/ssdownloads). • For information about firmware support, see the ProLiant Firmware Maintenance CD/DVD Matrix (http://www.hp.com/servers/smartstart/supportmatrices). • For information about SmartStart support, see the SmartStart support matrices (http://www.hp.
Operating system information For information about Microsoft® Windows® operating systems, see the Microsoft® website (http://www.microsoft.com). For information about Linux operating systems, see one of the following websites: • Red Hat Linux (http://www.redhat.com) • SUSE Linux (http://www.novell.com/linux) HP contact information For the name of the nearest HP authorized reseller: • See the Contact HP worldwide (in English) webpage (http://welcome.hp.com/country/us/en/wwcontact.html).
Acronyms and abbreviations BMC Baseboard Management Controller CLI Command Line Interface CPLD Complex Programmable Logic Device FPGA Field Programmable Gate Array GUI graphical user interface HBA host bus adapter HP SUM HP Smart Update Manager I/O input/output iLO Integrated Lights-Out iLO 2 Integrated Lights-Out 2 iLO 3 Integrated Lights-Out 3 ISP Integrity Support Pack Acronyms and abbreviations 119
LDU Linux Deployment Utility NIC network interface controller OA Onboard Administrator POST Power-On Self Test PSP HP ProLiant Support Pack RBSU ROM-Based Setup Utility RDP Rapid Deployment Pack RILOE II Remote Insight Lights-Out Edition II SAN storage area network SAS serial attached SCSI SCSI small computer system interface SEP Symantec Endpoint Protection SNMP Simple Network Management Protocol SOAP Simple Object Access Protocol Acronyms and abbreviations 120
SPLD System Programmable Logic Device SSH Secure Shell SSL Secure Sockets Layer TPM trusted platform module VC Virtual Connect VCA Version Control Agent VCM Virtual Connect Manager VCRM Version Control Repository Manager VCSU Virtual Connect Support Utility VLAN virtual local-area network WMI Windows Management Instrumentation Acronyms and abbreviations 121
Index A adding groups 51 advanced topics 90 Allow Downgrades 42 Allow Rewrites 42 Allow Shared Devices 42 authorized reseller 117, 118 B blocked HP Smart Update Manager, recovering from 103 bundle filter options 32, 58 C CLI (Command Line Interface) 111 command line arguments 66 command line arguments, component 66 command line examples 71 command line examples, PSPs in Windows 71 command line interface, using 65 command line syntax 65 command-line usage of input file 75 component configuration 90 compone
hosts 30, 46, 47 hosts, entering credentials 54 hosts, installing multiple 45, 46 hosts, managing 47 hosts, viewing installation results 63 HP Integrity servers 22, 23 HP ProLiant Firmware Maintenance DVD, deployment options 20 HP ProLiant Servers 17 HP Smart Update Firmware DVD 16 HP SUM fails 112 HP website 118 M I N iLO (Integrated Lights-Out) 107 input file parameters 75, 76 input file, command-line age 75 installation host 30 installation issues 100, 110 installation options 42 Installation Progres
repository 110 requirements, minimum 7, 8 results, viewing after installation 43 return codes 73, 74 return codes, Linux smart components 74 return codes, Windows smart components 73 rewriting firmware 42 ROM recovery, redundant 98 ROM redundancy 98 ROM upgrade behavior 42 ROM upgrade, recovering from failed option 99 ROM upgrade, recovering from failed system 98 ROM, array controller 99 ROM, Lights-Out management 100 ROM, storage 99 ROMPaq Disaster Recovery 98 RPM return codes, Linux 74 S scenarios, deplo