
HP Integrity iLO 3 Operations Guide

2. From in the region1 organizational unit, right-click the HP devices organizational unit. Select
New, and select Object.
a. Select hpqTarget from the list of classes, and click OK.
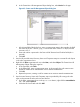
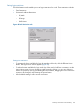
b. Enter an appropriate name and surname in the New hpqTarget dialog box. In this
example, the DNS host name of the iLO 3 device, rib-email-server, is used as the name
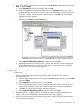
of the iLO 3 object, and the surname is RILOEII (iLO 3). Click OK. The Select Object
Subtype dialog box appears.
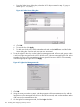
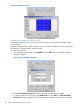
Figure 53 Select Object Subtype dialog box
c. Select Lights-Out Management Device from the list, and click OK.
d. Repeat the process for several more iLO 3 devices with the DNS names rib-nntp-server
and rib-file-server-users1 in HP devices under region1, and rib-file-server-users2 and
rib-app-server in HP devices under region2.
Creating roles
To create roles:
1. Use the ConsoleOne snap-ins provided by HP to create HP role objects in the roles
organizational units.
a. From the region2 organizational unit, right-click the roles organizational unit. Select New,
and select Object.
b. Select hpqRole from the list of classes, and click OK.
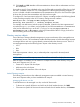
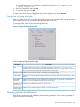
c. Enter an appropriate name in the New hpqRole dialog box. In this example, the role
contains users trusted for remote server administration and is named remoteAdmins.
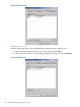
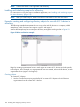
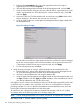
d. Click OK. The Select Object Subtype dialog box appears.
e. Select Lights-Out Management Devices from the list, and click OK.
2. Repeat the process, creating a role for remote server monitors named remoteMonitors in
region1 roles, and a remoteAdmins and remoteMonitors role in region2.
3. Use the ConsoleOne snap-ins provided by HP to assign rights to the role and associate the
roles with users and devices.
Directory services for eDirectory 129