
User Service Guide, Third Edition - HP Integrity cx2620 Server


CAUTION: Observe all ESD safety precautions while performing this procedure. Failure to
follow ESD safety precautions can result in damage to the server.
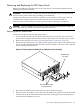
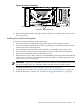
1. Clear a pathway of cables and set the fan control board in place, hooking its locking apertures
onto the standoff locks.
2. Slide the board toward the rear of the chassis (Figure 6-25 and Figure 6-26).
3. Install and tighten the single screw located at the top-left corner of the fan control board,
which secures the board to the standoffs on which it is mounted (Figure 6-26).
4. Install the terminating connectors on the cables (Figure 6-26).
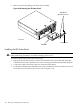
5. Install the PCI-X airflow guide. See “Installing the PCI-X Airflow Guide” (page 177).
6. Install the DVD/optical drive. See “Installing the Optical Drive” (page 183).
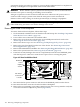
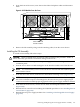
Removing and Replacing the iLO MP Card
The iLO MP card is located on the rear of the system board under the top cover. The LAN port
on the iLO MP card is configured with pertinent network settings. Capture the settings information
before you power off the server. For information on how to configure the iLO MP card using a
serial console port connection, see the installation instructions.
WARNING! Ensure that the system is powered off and all power sources are disconnected
from the server prior to removing or installing server hardware.
Voltages are present at various locations within the server whenever a DC power source is
connected. This voltage is present even when the main power switch is turned off.
Failure to observe this warning can result in personal injury or damage to equipment.
CAUTION: Observe all ESD safety precautions while performing this procedure. Failure to
follow ESD safety precautions can result in damage to the server.
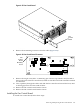
Figure 6-27 iLO MP Card
chascvroff
iLO MP Card
190 Removing and Replacing Components