
User Service Guide, Third Edition - HP Integrity cx2620 Server
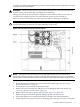

DIMMs in the first quad. If you install DIMMs in the third quad, they must be equal to or smaller
than the DIMMs in the second quad.
WARNING! Ensure that the system is powered off and all power sources are disconnected
from the server prior to removing or installing server hardware unless you are removing or
installing a hot-swappable or hot-pluggable component.
Voltages are present at various locations within the server whenever a DC power source is
connected. This voltage is present even when the main power switch is turned off.
Failure to observe this warning can result in personal injury or damage to equipment.
To install DIMMs, follow these steps:
1. Turn off the system.
2. If rack-mounted, extend a slide-mounted server out from the rack until it stops. See
“Accessing a Rack-Mounted Server” (page 58).
3. Disconnect all external cables.
4. Remove the server from the rack and place it on an ESD-protected work surface. See
“Removing the Server From a Rack” (page 59).
5. Remove the top cover from the chassis. See “Installing the Front Grill and Top Cover”
(page 63).
CAUTION: Observe all ESD safety precautions while performing DIMM installation. Failure
to follow ESD safety precautions can result in damage to the server.
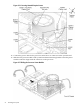
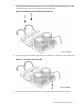
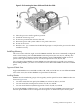
6. Remove the memory airflow guide.
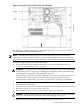
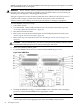
7. Locate the DIMM sockets where you will install the DIMMs (Figure 3-24).
Figure 3-24 DIMM Slots
8. Holding the DIMM by its edges, orient the DIMM so the component side is facing the
processors, and insert the DIMM into the appropriate socket.
NOTE: DIMM connectors are keyed so they can only be installed in the correct orientation.
9. Firmly and evenly push on each side of the DIMM until it seats in the socket. The socket
retainer clips return to the upright position when the DIMM is fully inserted.
80 Installing the System