
CORBA 2.6.1 Getting Started Guide for C++


9. On the Installation Manifest screen review the file locations. You may click Back to go back and change them. When you are satisfied
with them click Next. This step may take a few minutes to complete.
10. On the Installation Complete screen you may choose the check boxes to view the release documentation and to launch the DSM/SCM
planner interface. It is recommended that you review the release documentation before proceeding to install NonStop CORBA.
11. Click Finish to complete running IPSetup.
Run the DSM/SCM Planner Interface
This procedure is optional. If you choose to use DSM/SCM, see the DSM/SCM User's Guide for a description of the software configuration
process. If you launch the DSM/SCM planner interface directly from IPSetup, note that STARTTMF and STARTSCM must have been run on
your NonStop system before you log on to the planner interface. You should complete the Operator Instructions supplied by the DSM/SCM
planner before proceeding with the installation.
Change Ownership of OSS Files (if Using DSM/SCM)
If you are using DSM/SCM to manage your installation, you need to change the ownership of OSS files at this point in the installation. If you are
not using DSM/SCM, you should skip this step.
DSM/SCM allows you to set the default ownership of installed Guardian files. You cannot, however, control the ownership of OSS files. New
OSS files are owned by
SUPER.SUPER. Installed files that replace existing files inherit the ownership of the previously installed files. After you
finish running the DSM/SCM planner interface, you must change the ownership of NonStop CORBA files as follows:
1. Log on as SUPER.SUPER and start the OSS environment
2. Type this command:
chown -R user.user1 /usr/tandem/nsdoms
where user.user1 is the user ID that will own the NonStop CORBA OSS files.
3. Check the security of the files in
/usr/tandem/nsdoms to be sure that it is compatible with your system management and organization
policies.
Run the NonStop CORBA OSS Installer Setup Program
Use the NonStop CORBA OSS Installer Setup Program to install the NonStop CORBA OSS Installer program on your PC. You may choose to
install the Run Time Kit (RTK) or the Software Developer's Kit (SDK) at this time. As an option, the IIOP/SSL features can be installed as part of
the RTK or SDK. When finished, the NonStop CORBA/OSS Installer wizard starts automatically to install NonStop CORBA software on the host
system.
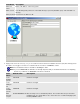
1. To start the NonStop CORBA OSS Installer Setup Program on your workstation (
\WS_SW directory), double-click the CORBA_INSTALL.EXE
file on your product CD. The Setup Program displays a Welcome screen and a screen that describes the setup program. To continue the
installation, click Next on each of these screens.
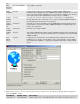
2. On the Choose Destination Location screen, choose a destination folder in which to install the NonStop CORBA OSS Installer or accept
the default location of
c:\nsorb. Click Next to continue.
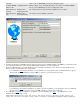
3. On the Select a Program Manager Group screen, select a Program Manager Group to contain the NonStop CORBA OSS Installer icon
or accept the default group of NonStop CORBA. Click Next to continue.
4. If the installer cannot find the
javaw.exe file (usually located in the JRE), the Java Runtime Environment (JRE) installation dialog box
appears. In this dialog, you can specify where the JRE installation that contains
javaw.exe is located. Otherwise, you can choose to
install the JRE on your workstation.
5. The Start Installation screen indicates you are ready to start the NonStop CORBA OSS Installer installation. Click Next.
6. If you have chosen to install the JRE in
Step 4, the Java Runtime Environment Setup program will take over and you will be asked to
agree to the Java licensing agreement. Click Yes to continue. As the installation runs, the installation progress is displayed on the
Installing screen. When the JRE installation is complete you will be returned to the NonStop CORBA OSS Installer Setup Program.
7. When the NonStop CORBA OSS Installer Setup Program is finished, the Installation Complete screen appears. Click Finish.
Host Installation Installer Wizard
1. The NonStop CORBA OSS Installer wizard starts automatically when you click Finish on the setup program and displays a Welcome
screen. To continue the installation, click Next.
To install NonStop CORBA later, click Cancel. The installer program is at Start>Programs>NonStop(TM) CORBA>OSS Installer.
2. After the Welcome screen, a screen appears that summarizes what the installer will do. Click Next.
Note:
To do this installation, you must have already installed NonStop Server for Java and have write access to
its directories.
3. Type values for the OSS host name, OSS user ID, and OSS password fields. Click Next to continue.
Note:
If you used the DSM/SCM planner interface to move your files onto the NonStop system and unpax them,
the host name, user ID, and password are provided as part of the Operator Instructions in DSM/SCM.