
DNS Configuration and Management Manual (G06.27+, H06.05+, J06.03+)


Quick Start
HP DNS Configuration and Management Manual—529432-003
1-2
Start DNS
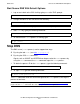
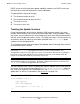
3. List the files in the directory by typing the following command:
/etc/dns923>ls -al
You should see a display that shows a list of DNS files along with their
permissions.
•
NonStop TCP/IP, Parallel Library TCP/IP, or NonStop TCP/IPv6 is running. If you
plan to use IPv6 communications, verify that NonStop TCP/IPv6 is running in
DUAL or INET6 mode; refer to the TCP/IPv6 Configuration and Management
Manual in NTL for more information.
•
You are logged in using the super ID (equivalent to a UNIX root user).
•
You have planned your DNS implementation.
•
You have configured the DNS files. See Section 3, DNS Configuration on the
NonStop Server and the appendixes.
Start DNS
This subsection shows you how to start nonsecure or secure DNS using the default
options, which is the simplest way of starting the named process. The zone files are
automatically loaded from the location specified in the named.conf file, which is looked
up, by default, in /etc. Because the named.conf file is located in the /etc/dns923/
or /etc/dns_secure/ directory in OSS, by default, you must use the -c option with
the named command to direct the program to look in the correct directory for the
configuration file.
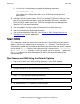
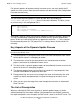
Start Nonsecure DNS Using the Default Options
1. Log on and switch to the OSS shell by typing OSH at the TACL prompt:
2. Change directories to the nonsecure DNS directory:
3. Start named by typing the following command:
4. To check that the named process is running, type:
>OSH
$ cd /etc/dns923/
$ named -c /etc/dns923/named.conf
$ ps | more