DSM/SCM Quick Reference Guide Abstract This guide provides concise, task-oriented procedures for configuring Distributed Systems Management/Software Configuration Manager (DSM/SCM). It is intended for experienced DSM/SCM users who manage and update the software configuration on HP NonStop™ systems. Product Version DSM/SCM G02 DSM/SCM H02 Supported Release Version Updates (RVUs) This publication supports J06.03 and all subsequent J-series RVUs, H06.
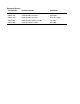
Document History Part Number Product Version Published 520611-005 DSM/SCM D31 and D46 December 2003 520611-006 DSM/SCM D31 and D46 April 2004 520611-007 DSM/SCM D31 and D46 December 2004 529847-003 DSM/SCM G01 (ABP) and H01 July 2005 529847-005 DSM/SCM G02 and H02 May 2008
Legal Notices Copyright 2008 Hewlett-Packard Development Company L.P. Confidential computer software. Valid license from HP required for possession, use or copying. Consistent with FAR 12.211 and 12.212, Commercial Computer Software, Computer Software Documentation, and Technical Data for Commercial Items are licensed to the U.S. Government under vendor's standard commercial license. The information contained herein is subject to change without notice.
DSM/SCM Quick Reference Guide Index Legal Notices What’s New in This Manual v Manual Information v New and Changed Information vi About This Guide vii Who Should Use This Guide vii What’s in This Guide vii Other DSM/SCM Information Sources Notation Conventions viii viii 1. Configuring a Host or Physical Target System Preliminary Task: Install the DSM/SCM PC Files 1-1 Task 0.1: Ensure TCPIP and LISTNER Are Installed 1-1 Task 0.2: Transfer DSM/SCM PC Files From the SUT to the PC 1-1 Task 0.
1. Configuring a Host or Physical Target System (continued) Contents 1. Configuring a Host or Physical Target System (continued) Task 5: Initialize the Target on the System 1-7 Task 5.1: Register the Target 1-8 Task 5.2: Set Target Output Defaults 1-8 Task 5.3: Set Target System Generation Defaults 1-8 Task 6: Receive Software 1-8 Task 6.1: Receive Software 1-8 Task 6.2: Create Software Revision 1-9 Task 7: Build/Apply Software Configuration 1-9 Task 7.1: Indicate Type of Build 1-9 Task 7.
3. Updating a System’s Software Configuration (continued) Contents 3.
5. Generating Reports (continued) Contents 5. Generating Reports (continued) Creating a Custom Report 5-6 6.
What’s New in This Manual Manual Information DSM/SCM Quick Reference Guide Abstract This guide provides concise, task-oriented procedures for configuring Distributed Systems Management/Software Configuration Manager (DSM/SCM). It is intended for experienced DSM/SCM users who manage and update the software configuration on HP NonStop™ systems. Product Version DSM/SCM G02 DSM/SCM H02 Supported Release Version Updates (RVUs) This publication supports J06.03 and all subsequent J-series RVUs, H06.
New and Changed Information What’s New in This Manual New and Changed Information Changes in the H06.14/J06.03 manual: • • Added a new checkpoint in the Task 1: Configure the DSM/SCM System Environment on page 1-2. Supported release statements have been updated to include J-series RVUs. Changes to the 520611.
About This Guide This guide provides experienced DSM/SCM users with concise procedures for common DSM/SCM tasks that involve configuring DSM/SCM and using DSM/SCM to manage software configuration. Who Should Use This Guide Only experienced DSM/SCM users should use this guide. If you have not performed a certain task before, use the DSM/SCM User’s Guide at least the first time. This guide provides only a concise, quick view of common procedures.
Other DSM/SCM Information Sources About This Guide Other DSM/SCM Information Sources The provides detailed step-by-step procedures for performing the various tasks possible through each of the DSM/SCM interfaces and tools. It also provides an overview of using the DSM/SCM interfaces and tools, organizing your DSM/SCM usage, and making system and personnel assignments. The DSM/SCM Messages Manual provides detailed cause, effect, and recovery information for messages that might arise while you use DSM/SCM.
General Syntax Notation About This Guide italic computer type. Italic computer type letters within text indicate C and Open System Services (OSS) variable items that you supply. Items not enclosed in brackets are required. For example: pathname [ ] Brackets. Brackets enclose optional syntax items. For example: TERM [\system-name.]$terminal-name INT[ERRUPTS] A group of items enclosed in brackets is a list from which you can choose one item or none.
Notation for Messages About This Guide Quotation marks around a symbol such as a bracket or brace indicate the symbol is a required character that you must type as shown. For example: "[" repetition-constant-list "]" Item Spacing. Spaces shown between items are required unless one of the items is a punctuation symbol such as a parenthesis or a comma. For example: CALL STEPMOM ( process-id ) ; If there is no space between two items, spaces are not permitted.
Notation for Messages About This Guide Bold Text. Bold text in an example indicates user input typed at the terminal. For example: ENTER RUN CODE ?123 CODE RECEIVED: 123.00 The user must press the Return key after typing the input. Nonitalic text. Nonitalic letters, numbers, and punctuation indicate text that is displayed or returned exactly as shown. For example: Backup Up. lowercase italic letters. Lowercase italic letters indicate variable items whose values are displayed or returned.
Change Bar Notation About This Guide % Percent Sign. A percent sign precedes a number that is not in decimal notation. The % notation precedes an octal number. The %B notation precedes a binary number. The %H notation precedes a hexadecimal number. For example: %005400 %B101111 %H2F P=%p-register E=%e-register Change Bar Notation Change bars are used to indicate substantive differences between this manual and its preceding version.
1 Configuring a Host or Physical Target System This section describes configuring DSM/SCM on a system. For more information on configuring and initializing DSM/SCM, see the DSM/SCM User’s Guide. Before you use this procedure, check that the system name and number are set to where you want to keep them. Preliminary Task: Install the DSM/SCM PC Files If DSM/SCM is not already installed on your PC or if you are installing a newer version of DSM/SCM, you must complete this task.
Configuring a Host or Physical Target System Task 0.4: Run SETUP.EXE Task 0.4: Run SETUP.EXE 1. Double-click the SETUP.EXE file in the DSMSCM directory. DSM/SCM displays the Setup Logo screen followed by licensing information, then opens a series of dialog boxes. 2. Enter the Object Manager server class name if needed; then click OK. 3. Enter the Software Product Group type (Shared or Private); then click OK. 4. Enter the CNFGINFO process name if needed; then click OK.
Configuring a Host or Physical Target System Task 2: Configure the Host Database 3. Provide the information INITENV prompts you for. When you answer the last question, INITENV ends the dialog, begins processing the information, and stops after successfully completing its tasks. Task 2: Configure the Host Database This task describes the steps to perform on the Planner Interface. To initialize a host system, use the host Maintenance Interface for Task 2.1: Add and Set Planner Security. Task 2.
Configuring a Host or Physical Target System Task 2.3: Update Host System Volume Usage 2. Review the system information and enter the default values. 3. Click OK. Task 2.3: Update Host System Volume Usage For more information, see the DSM/SCM User’s Guide. 1. Select the system you are configuring from the Configuration Revisions window. 2. Select Maintain>Volume Maintenance... and review the host system volume usage. To change volume usage: 1. Select the volume name you want to change volume usage for.
Configuring a Host or Physical Target System Task 2.5: Update the Configuration Manager Profile Task 2.5: Update the Configuration Manager Profile For more information, see the DSM/SCM User’s Guide. 1. Select the system you are configuring from the Configuration Revisions window. 2. Select Maintain>Configuration Manager. 3. Review and change information as needed. 4. Click OK to exit. Task 2.6: Move the Archive (Optional) For more information, see the DSM/SCM User’s Guide. 1.
Configuring a Host or Physical Target System Task 3: Configure the Target Database Task 3: Configure the Target Database You must run and log on to the target Maintenance Interface to perform this task. Task 3.1: Update the Target Profile For more information, see the DSM/SCM User’s Guide. 1. Select System Maintenance (selection 1); then press F1. DSM/SCM displays the System Maintenance screen. 2. Enter the system name; then press F2. 3.
Configuring a Host or Physical Target System Task 3.4: Add and Set Security for Target Database Administrators Task 3.4: Add and Set Security for Target Database Administrators For more information, see the DSM/SCM User’s Guide. 1. Select Database Administrator Security Maintenance (selection 2); then press F1. 2. Follow the instructions on the Database Administrator Security Maintenance screen to add target database administrators to DSM/SCM and to specify their permissions. 3.
Configuring a Host or Physical Target System Task 5.1: Register the Target Task 5.1: Register the Target 1. In the Configuration Revisions window, select the configuration name for the target. For a new target, the name has the form: \system_name DEFAULT 2. Select Maintain>Target maintenance>Initialize target system. 3. Click Profile. 4. Enter a descriptive target name. 5. Select the Manage OSS Files check box if you will manage OSS files on this target.
Configuring a Host or Physical Target System Task 6.2: Create Software Revision 2. Click the Software in Archive window. 3. Receive software into the Archive. For more information on how to receive the software, see Section 3, Updating a System’s Software Configuration. 4. After you receive software into the archive, select the target from the Configuration Revisions window. 5. Select Maintain>Target maintenance>Initialize target system. Task 6.2: Create Software Revision 1. Click Software....
Configuring a Host or Physical Target System Task 7.3: Resolve Discrepancies Task 7.3: Resolve Discrepancies If you applied a full activation package instead of an initialization package, this task is not necessary. 1. From the Initialize Target System dialog box, click Discrepancies.... DSM/SCM displays the Prepare Request dialog box. 2. Change the system name run-time parameter: a. Select the parameter; then click Modify parameter.... b.
Configuring a Host or Physical Target System Task 7.3: Resolve Discrepancies 2. Resolve the discrepancies. Note. You are not required to resolve discrepancies to continue. You only need to be aware of the differences and understand what they mean when the next configuration is applied. a. From the Initialize Target System dialog box, click Software.... DSM/SCM displays the product list. b. Change the product list so that it matches the software on the target system.
Configuring a Host or Physical Target System Task 7.
2 Creating an Alternate System Volume and Adding and Deleting Logical Targets This section describes adding and deleting logical targets from a DSM/SCM host or target system, and adding an alternate $SYSTEM: Procedure Page Creating an Alternate System Volume 2-1 Adding Additional Logical Targets 2-2 Deleting a Logical Target 2-3 Considerations Before adding additional logical targets, remember that: • • • • You cannot maintain more than six logical targets on a single system.
Creating an Alternate System Volume and Adding and Deleting Logical Targets Adding Additional Logical Targets 2. Run Verify Database from the Target Interface. (See Verifying a Target System Database on page 6-3.). Note. If $DATA00 is a scratch volume, Verify Database stops in a restartable state. If $DATA00 is an archive volume, after successful completion of Verify Database, update the volume usage information using the Target and Host Maintenance Interface. For details, see the DSM/SCM User’s Guide.
Creating an Alternate System Volume and Adding and Deleting Logical Targets Deleting a Logical Target a. Click SYSGEN.... DSM/SCM displays the SYSGEN Defaults dialog box. b. Enter values in the data fields as needed. c. Click OK. 9. Click OK in the Target Information dialog box. The new logical target is now defined to DSM/SCM, and its name appears on the Configuration Revisions window with a revision number of 1. Note.
Creating an Alternate System Volume and Adding and Deleting Logical Targets Deleting a Logical Target 5. Press Shift-F16 to exit the Target Interface. 6. Purge the entire SYSnn or purge only the ZPHI6030 file in this SYSnn. 7. Run Verify Database from the Target Interface. (See Verifying a Target System Database on page 6-3.
3 Updating a System’s Software Configuration This section describes placing new software on a system. This procedure is valid for configuring RVUs, SPRs, and third-party software. Procedure 1: Receive the Software Into the Archive Preliminary Task 1: Save the Existing Configuration Database 1. Run SCF. 2. Save the current system configuration. Preliminary Task 2: Log On to DSM/SCM 1. Determine the current SYSnn. 2. Start TMF if it is not already running. 3. Start DSM/SCM if it is not already running. 4.
Updating a System’s Software Configuration Procedure 2: Create a New Software Revision If the source is a tape that has an external physical label, enter the ID in the Optional external tape ID box. 7. Click OK. DSM/SCM returns to the Receive Software Request dialog box. 8. Click Scheduling.... DSM/SCM displays the Request Scheduling Options dialog box. 9. Schedule the request; then click OK. DSM/SCM returns to the Receive Software Request dialog box. 10. Click OK.
Updating a System’s Software Configuration Task 2: Review Release Documents and Softdocs b. Select File>Show revision notes.... Task 2: Review Release Documents and Softdocs This task assumes you will view softdocs and release documents online instead of printing them. Task 2.1: View Release Documents NonStop S-series system and Integrity NonStop system users should also review this release documentation for the appropriate release version update (RVU): • • • Gxx.
Updating a System’s Software Configuration Task 3: Create a New Software Revision DSM/SCM highlights differences between the software input and the existing revision. 4. Select Requests>Prepare softdocs.... DSM/SCM displays the Prepare Softdoc Request dialog box. 5. Check the Viewable formatted file subvolume location check box if it is not already checked; then click OK. DSM/SCM prepares and formats the softdocs for online viewing and adds them to the list of prepared documents. 6.
Updating a System’s Software Configuration Task 4: Copy Products to the New Software Revision 3. Modify the list as necessary by copying products to the new software revision. Task 4: Copy Products to the New Software Revision 1. Select software in the Software in Archive window. 2. Click Copy to. Task 5: Change the Software Revision Notes 1. In the New Software Revision window, click Edit revision notes.... DSM/SCM displays the Revision Notes dialog box.
Updating a System’s Software Configuration Task 5: Schedule the Request DSM/SCM returns you to the Build/Apply Request dialog box. Task 5: Schedule the Request 1. Click Scheduling.... DSM/SCM displays the Request Scheduling Options dialog box. 2. In the Build portion of the dialog box, schedule the Build. 3. In the Apply portion of the dialog box, schedule the Apply; then click OK. DSM/SCM returns you to the Build/Apply Request dialog box. Task 6: Set Output Options 1. Click Output....
Updating a System’s Software Configuration Task 10: Submit the Request Task 10: Submit the Request Click OK to submit the request. DSM/SCM begins the appropriate processes. Depending on the size of software changes, this could take several hours. Task 11: Apply Software to the Target System If you submitted a Build/Apply request, the apply and receive snapshot processes run automatically. Proceed to Procedure 5: Activate the New Software on the Target System. 1.
Updating a System’s Software Configuration Procedure 5: Activate the New Software on the Target System 2. Select Requests>Receive snapshot.... DSM/SCM displays the Receive Snapshot Request dialog box. 3. Click File or Tape. The default input location appears. 4. Specify the exact input location; then click OK. DSM/SCM receives the snapshot into the host database. Procedure 5: Activate the New Software on the Target System Task 1: Print the Planner Instructions to Operator 1.
Updating a System’s Software Configuration Procedure 6: Renaming the Managed SYSnn (Optional) 1. Check that you are in the target system ZDSMSCM subvolume. 2. Review the detailed list of every file that ZPHIRNM will rename. 3. Run ZPHIRNM in PREVIEW mode: > RUN ZPHIRNM [$vol.]SYSnn , PREVIEW [STRICT] [,option]... 4. If the process generates errors, correct them and run ZPHIRNM in PREVIEW mode again. When no errors remain, continue. 5. Run ZPHIRNM with the appropriate extensions (without PREVIEW).
Updating a System’s Software Configuration Procedure 6: Renaming the Managed SYSnn (Optional) a. Before the next Apply to the system, run Verify Database so DSM/SCM can resolve the current names of the SYSnns. (See Verifying a Target System Database on page 6-3.) b. Create an independent snapshot of the target. (See Creating a Snapshot of a Target System on page 6-4.) c. Receive the independent snapshot into the host database.
4 Backing Out a Revision This section describes backing a system out to its previous configuration revision: Procedure Page Backing Out If DSM/SCM Is Running 4-1 Backing Out If a Previous Configuration Does Not Exist or If DSM/SCM Does Not Run 4-6 Backing Out After Renaming the SYSnn 4-6 For more information, see the DSM/SCM User’s Guide. Backing Out If DSM/SCM Is Running Task 1: Start DSM/SCM 1. Start TMF if it is not already running. 2. Start DSM/SCM if it is not already running.
Task 4: Monitor the Backout Process Backing Out a Revision • If a message indicates that the request is awaiting a tape mount, press F4 to view the EMS messages for tape and tape drive information; then mount the tape. DSM/SCM then resumes processing. After the Backout finishes, the Backout - Complete Backout screen appears, displaying the SYSnn, name, date, and timestamp of the activation package that has been reapplied to the system.
Task 7: Stop the System by Halting the Processors Backing Out a Revision 2. If the process generates errors, correct them and run ZPHIRNM in PREVIEW mode again. If no errors occur, continue. 3. Run ZPHIRNM on the SYSnn for the configuration revision you are backing out to. If you did not specify a log file, a prompt appears asking whether to use a log file. 4. Specify Y; then press Enter. A prompt appears asking for a log file name. 5. Enter a disk file name. A prompt indicates the log file was created.
Task 9: Check Processor Status Backing Out a Revision b. Under SYSnn and CIIN Option, verify that the CIIN Disabled check box is cleared. c. Under Configuration File, select Saved version and enter the appropriate value. 3. Click Start system. Do not close the System Startup dialog box. Two EMS event stream windows and two startup TACL windows appear.
Task 10: Start TMF and Your Other Applications Backing Out a Revision Task 10: Start TMF and Your Other Applications 1. Start TMF. 2. Start all other applications.
Backing Out If a Previous Configuration Does Not Exist or If DSM/SCM Does Not Run Backing Out a Revision Backing Out If a Previous Configuration Does Not Exist or If DSM/SCM Does Not Run Note. You can also use this procedure if you have to back out from your first DSM/SCM configuration, and you performed your previous configuration activities using Install. Task 1: Run ZPHIRNM 1. Run ZPHIRNM in PREVIEW mode: > RUN ZPHIRNM [$vol.]SYSnn , FROM [$vol.]SYSnn, PREVIEW [STRICT] [,option]...
Task 2: Stop the System by Halting the Processors Backing Out a Revision ZPHIRNM must run without errors to complete the software activation. ZPHIRNM issues an EMS message when it has successfully completed. Task 2: Stop the System by Halting the Processors You must use OSM for NonStop NS-series servers. 1. Ensure that DSM/SCM, all other user applications, TMF, and all other subsystems are stopped, and that the spooler is drained. 2. Log on to either the OSM or TSM Low-Level Link. 3.
If the System Load and DSM/SCM Restart Succeed Backing Out a Revision 2. Run ZPHIRNM on the previous SYSnn (in this example, SYS20). The previous SYSnn is the configuration that was running before the current configuration. 3. Rename the current SYSnn (SYS00) and CSSnn (CSS00) to an unused SYSnn (SYS01) and CSSnn (CSS01), respectively. For example: > FUP RENAME $SYSTEM.SYS00.*, $SYSTEM.SYS01.* > FUP RENAME $SYSTEM.CSS00.*, $SYSTEM.CSS01.* 4.
If the System Load Fails or DSM/SCM Does Not Run Correctly Backing Out a Revision If the System Load Fails or DSM/SCM Does Not Run Correctly 1. Perform a system load from the previously working SYSnn (renamed to SYS20). 2. Rename the current SYSnn (SYS00) and CSSnn (CSS00) back to the last built SYSnn (SYS01) and CSSnn (CSS01), respectively. For example: > FUP RENAME $SYSTEM.SYS00.*, $SYSTEM.SYS01.* > FUP RENAME $SYSTEM.CSS00.*, $SYSTEM.CSS01.* 3.
Backing Out a Revision If the System Load Fails or DSM/SCM Does Not Run Correctly DSM/SCM Quick Reference Guide—529847-005 4- 10
5 Generating Reports Procedure Page Viewing a Report Online 5-1 Printing a Report 5-3 Modifying a Standard Report 5-4 Creating a System Report 5-5 Creating a Custom Report 5-6 For more information on DSM/SCM reports, see the DSM/SCM User’s Guide. Viewing a Report Online 1. Select the report to view: a. In the Planner Interface, select Requests>Prepare report....
Viewing a Report Online Generating Reports b. To write the report to a location other than the default, enter a subvolume name in the subvolume location field. 4. Schedule the request: a. The default is to prepare the report immediately. To change the default scheduling, click Scheduling...; then schedule when you want the report to be formatted for online viewing. b. Click OK. The report is prepared and formatted for online viewing as scheduled. It is also added to the list of prepared reports. 5.
Printing a Report Generating Reports Printing a Report 1. Select the report to print: a. In the Planner Interface, select Requests>Prepare report.... DSM/SCM displays the Prepare Report Request dialog box listing the standard reports and any custom reports you have added to DSM/SCM. b. Select a report from the list. c. Click Description.... DSM/SCM displays the Show Report Description dialog box. d. Click Continue.... DSM/SCM displays the Prepare Report Request dialog box. 2.
Modifying a Standard Report Generating Reports Modifying a Standard Report Task 1: Edit the Report 1. Go to the database subvolume containing the standard report you need to change. 2. Copy the existing IN_file. 3. Edit the new IN_file. For more information on changing report formats, see the SQL/MP Report Writer Guide. Task 2: Bring the Modified Report Into DSM/SCM 1. Log on to the Planner Interface. 2. Select Maintain>Report list....
Creating a System Report Generating Reports DSM/SCM displays the Add Parameter dialog box. A message reminds you that the parameter must be added to the SQLCI IN_file and that the parameter definition must be consistent with the definition in the IN_file. 2. Enter a name in the Parameter name field. 3. Select a type for the parameter you are adding from the list of parameter types. 4. In the Description field, enter a description of the parameter; then click OK. 6.
Creating a Custom Report Generating Reports Creating a Custom Report Task 1: Create the Custom Report 1. Make a copy of an existing DSM/SCM IN_file in the SQL catalog subvolume. 2. Using a text editor, make your changes to the file: a. Add a SELECT statement to extract values from the database to include in the report. b. Modify the default format to any format you want. c. Define parameters to be used as input to the report. 3. Store the IN_file in the SQL catalog subvolume.
6 Managing DSM/SCM Procedure Page Changing the ZDSMSCM Subvolume 6-1 Renaming a DSM/SCM Managed Volume 6-2 Moving a DSM/SCM Database 6-2 Moving the DSM/SCM Archive 6-3 Verifying a Target System Database 6-3 Creating a Snapshot of a Target System 6-4 For more information on managing DSM/SCM, see the DSM/SCM User’s Guide. Changing the ZDSMSCM Subvolume Moving the ZDSMSCM Subvolume to Another Volume 1. Copy the existing ZDSMSCM subvolume to a new volume: > FUP DUP $oldvol.ZDSMSCM.*, $newvol.*.
Renaming a DSM/SCM Managed Volume Managing DSM/SCM 4. Edit the PATHCOOL file to point to the $newvol.PATHSCM and the \system.$newvol.ZDSMSCM.PATHMAIN. 5. Replace all occurrences of $oldvol.ZDSMSCM with $newvol.ZDSMSCM in the PATHTARG or PATHHOST file. 6. Run PATHCOLD from $newvol.ZDSMSCM to create $newvol.PATHSCM.*. 7. Run STARTSCM from $newvol.ZDSMSCM. 8. Give ownership of the CBEXE program to the super ID (255,255). 9. Set the PROGID of the CBEXE program to the super ID (255,255). 10.
Moving the DSM/SCM Archive Managing DSM/SCM Moving the DSM/SCM Archive 1. Configure free-space table (FST) caching for the new archive volume. See the SCF Reference Manual for the Storage Subsystem. (This step is not required, but it improves system performance.) 2. At the host Maintenance Interface main menu, enter 8 (Archive Relocation) in the Selection Number field; then press F1. DSM/SCM displays the Archive Relocation screen. 3.
Creating a Snapshot of a Target System Managing DSM/SCM 4. Create an independent snapshot and transfer it to the host. (See the following subsection.) Creating a Snapshot of a Target System 1. At the Target Interface main menu, enter 2 (Perform system snapshot) in the Selection number field; then press F1. DSM/SCM displays the Create Snapshot - Submit Request screen. 2. Change the location where the snapshot is to be placed if necessary. 3. Press F1 to submit the request. DSM/SCM creates the snapshot.
Index A P Adding 2-2 Planner Interface deleting targets 2-3 target systems changing profile information 1-8 deleting a target 2-3 Profiles target changing information 1-8 B Backing out a revision after renaming SYSnn if DSM/SCM will not run or coldload fails 4-9 Build type, specifying 1-7 Build/Apply request specifying the type of build 1-7 T C CIIN file disabled 4-4 Configuration revision performing initial revision 1-7 Target systems changing profile information 1-8 D Deleting target 2-3 I Initia
T Index DSM/SCM Quick Reference Guide—529847-005 Index -2
Content Feedback First Name: __________________ Phone: _____________________ Company: ___________________ Last Name: _________________ e-mail address: ______________ (All contact information fields are required.) If you’re reporting an error or omission, is your issue: Minor: I can continue to work, but eventual resolution is requested. Major: I can continue to work, but prompt resolution is requested. Critical: I cannot continue to work without immediate response.