
NonStop Servlets for JavaServer Pages (NSJSP) 7.0 System Administrator's Guide

Installing NSJSP
NonStop Servlets for JavaServer Pages (NSJSP) 7.0 System Administrator’s Guide—
674372-005
2-16
Creating an NSJSP Installation
Creating an NSJSP Installation
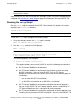
After running the setup script at the OSS prompt, you must select the Create an
NSJSP installation option to install NSJSP 7.0. Starting with the NSJSP 6.1
release, the setup script can be used to create multiple NSJSP installations.
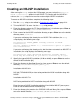
To create an NSJSP installation, complete the following steps:
1. Run the setup script, as described in Running the setup Script on page 2-14.
2. To install NSJSP 7.0, enter 1 at the setup script prompt.
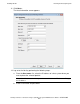
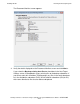
3. Enter the directory where the iTP Secure WebServer is installed or press Enter to
use the default directory, /usr/tandem/webserver.
4. Enter a name for the NSJSP installation directory or press Enter to use the default
directory name, servlets.
If you enter a directory that already has an NSJSP 7.0 installation, the setup
script displays the following message:
The directory <NSJSP_HOME> already contains an NSJSP
installation.
Use the ‘Update an NSJSP 7.0.0 installation’ option to update
this installation.
If you enter a directory that already exists, but that does not contain an NSJSP 7.0
installation, the script displays the following message:
The directory <user specified directory> already exists.
Files may be overlaid, do you want to continue <y or [n]>:
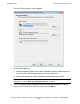
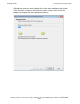
5. Specify the type of NSJSP installation (32-bit or 64-bit), or press Enter to use the
default 64-bit installation [64].
6. Enter the directory for NonStop Server for Java or press Enter to use the default
directory, /usr/tandem/nssjava/jdk170_h70.
Installation with NSJ 6.0:
NSJ 6.0 (T2766H60^ACA) or later to be provided for NSJ6 installation along with
NSJSP.
Installation with NSJ 7.0:
NSJ7 to be provided for NSJ7 installation along with NSJSP
Enter the type of NSJSP installation whether 32 or 64-bit of NSJS7 java or press
Enter to use the default 64-bit installation [64].
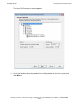
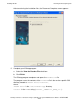
7. Enter the directory that contains the JDBC/MX JAR and library files or press Enter
to use the default location,
/usr/tandem/jdbcMx/current/lib.