
NonStop Software Essentials Installation and Quick Start Guide


2 Quick Start Guide
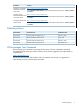
This section lists the steps involved in getting started with NonStop Software Essentials. The steps
provide links to other sections of this document that provide more detailed information, as needed.
1. Make sure you have met all “NonStop Server Software Requirements” (page 11).
2. Install the NonStop Software Essentials server product on the host system using either the
Software Essentials interface or the DSM/SCM Planner Interface, as described under “Installing
the NonStop Server Component”.
3. After ensuring you have met all “Windows Console Requirements” (page 9) or “Linux CMS
Requirements” (page 10), install the NonStop Software Essentials client software on your
Windows console or Linux CMS.
4. If the TCP/IP stack to be used for communication with the Windows-based console running
NonStop Software Essentials is not one of the default stacks, configure additional TCP/IP
stacks as described in “Configuring TCP/IP Stacks Outside of the Dedicated Maintenance
LAN (Conditional)” (page 17).
5. Start the NonStop Software Essentials process. For more information, see “Starting the NonStop
Software Essentials Process” (page 18).
6. To enable SSL (secure sockets layer), if it is not already enabled, or to configure additional
TCP/IP stacks in OSM, see “Configuring OSM (Conditional)” (page 19).
7. To use NonStop Software Essentials on your host system, discover the NonStop system in HP
SIM. For more information, see “Discovering the NonStop System in HP SIM” (page 19).
8. Launch NonStop Software Essentials from within HP SIM. For more information, see “Launching
NonStop Software Essentials” (page 19).
8 Quick Start Guide