
Pathway/iTS Web Client Programming Manual (H06.03+, J06.03+)
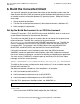
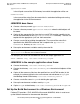
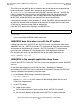

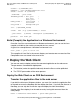
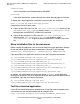
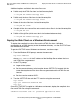
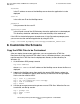
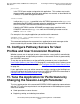
Table Of Contents
- HP NonStop Pathway/iTS Web Client Programming Manual
- Legal Notices
- Contents
- What's New in This Manual
- About This Manual
- 1 Introduction to Pathway/iTS Web Clients
- 2 How to Compile, Build, and Maintain a Pathway/iTS Web Client
- 1. Prepare the SCREEN COBOL Object File
- 2. Create a Configuration File
- 3. Run the Converter
- 4. Modify Java or SCREEN COBOL Code as Needed
- 5. Run PROFDBM to Set Up the User Profile Database
- 6. Build the Converted Client
- 7. Deploy the Web Client
- 8. Customize the Screens
- 9. Specify the Port Number of the Router Process
- 10. Configure Pathway Servers for User Profiles and User Conversion Routines
- 11. Tune the Application for Performance by Changing the Session-Length Parameter
- 12. Maintain the Client
- 3 Logon Security and User Profiles
- 4 User-Written User Conversion Procedures for Web Clients
- 5 SCREEN COBOL-to-Web Conversion Mappings
- 6 Java Import Package Reference
- 7 Introduction to Pathway/iTS 1.1
- A Client Error Messages
- B SCREEN COBOL Features Not Supported for Web Conversion
- Index
- Content Feedback
How to Compile, Build, and Maintain a Pathway/iTS
Web Client
HP NonStop Pathway/iTS Web Client Programming Manual—520270-003
2-9
Build (Compile) the Application in a Windows
Environment
OUTDIR = $(APPHOME)\bin
WEBROOT = /usr/tandem/webserver/root
JAVAC = Javac -d $(OUTDIR)
.SUFFIXES: .java.class
PROGRAM_FILES = abc.java \
xyz.java \
main.java
HTML_FILES = start.html \
Ctrl.html
GIF_FILES = background.gif
all: $(PROGRAM_FILES)
clean: del /f/q $(BUILDHOME)\*.class
.java.class: $(JAVAC) -classpath $(CLASSPATH) $?
publish: all html gif
Build (Compile) the Application in a Windows Environment
Once the Java files are transferred to a Windows environment, you can use the Java
compiler available on the machine to compile the Java source.
A typical Java compilation on a Windows environment is as:
DOS> javac *.java 2> error.txt
This compiles all Java files in the current directory and creates one or more class files.
Compilation errors are stored in the error.txt file.
7. Deploy the Web Client
You are now ready to deploy and test the converted application on the web server.
Two parameters are needed for deployment:
•
The location (under the specified web root) where the files are to be published
•
The TCP/IP port number of the router process
Deploy the Web Client on an OSS Environment
Transfer the application files to the web server
If you built the client on a Windows platform, you must first transfer the application files
to the web server on the NonStop and then deploy the client. If you built the client on a
NonStop, you can skip the file transfer step and deploy the client immediately.
Use the make file to deploy it on the web server by issuing this command from the
OSS prompt:
make -f
makefile-name
DEPLOY =
path-name
publish