
Pathway/iTS Web Client Programming Manual (H06.03+, J06.03+)
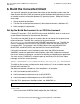
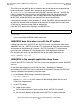

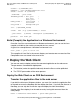
Table Of Contents
- HP NonStop Pathway/iTS Web Client Programming Manual
- Legal Notices
- Contents
- What's New in This Manual
- About This Manual
- 1 Introduction to Pathway/iTS Web Clients
- 2 How to Compile, Build, and Maintain a Pathway/iTS Web Client
- 1. Prepare the SCREEN COBOL Object File
- 2. Create a Configuration File
- 3. Run the Converter
- 4. Modify Java or SCREEN COBOL Code as Needed
- 5. Run PROFDBM to Set Up the User Profile Database
- 6. Build the Converted Client
- 7. Deploy the Web Client
- 8. Customize the Screens
- 9. Specify the Port Number of the Router Process
- 10. Configure Pathway Servers for User Profiles and User Conversion Routines
- 11. Tune the Application for Performance by Changing the Session-Length Parameter
- 12. Maintain the Client
- 3 Logon Security and User Profiles
- 4 User-Written User Conversion Procedures for Web Clients
- 5 SCREEN COBOL-to-Web Conversion Mappings
- 6 Java Import Package Reference
- 7 Introduction to Pathway/iTS 1.1
- A Client Error Messages
- B SCREEN COBOL Features Not Supported for Web Conversion
- Index
- Content Feedback
How to Compile, Build, and Maintain a Pathway/iTS
Web Client
HP NonStop Pathway/iTS Web Client Programming Manual—520270-003
2-12
8. Customize the Screens
hostname
is the IP address or name of the NonStop server where the application is to be
deployed
user-ID
is the valid user ID on the NonStop server
password
is the password for the user ID.
application-home
is the full path name of the OSS directory where the application is to be deployed.
This directory should be subdirectory to the root directory of the web server.
If the URL for the default page on the web server is http://intraweb.mycompany.com,
you can now test the converted application by using this URL:
http://intraweb.mycompany.com/testapp/INVENTORY_START.html
8. Customize the Screens
Copy the HTML Files to be Customized
After you deploy the converted application, you can customize the HTML files.
Because most of the standard HTML editors run on a Windows platform, you probably
need to copy the HTML files from the deployment directory to some directory on
Windows, as:
1. At the Windows DOS prompt, execute
ftp
host-address
where
host-address
is the IP address of the NonStop server where the files are
deployed.
2. Logon to the NonStop server then specify the remote OSS directory where the
HTML files are deployed. Specify local directory to which the files will get copied.
Set the transfer mode to ASCII.
ftp > user x.y password
ftp > cd /usr/webserver/root/testapp
ftp > lcd c:\htmledit
ftp > ASCII
3. Use the get or mget command to get one or more HTML files. When the files are
transferred, exit the ftp session.
ftp > prompt off
ftp > mget *.html
ftp > bye