
SQL/MX 2.x Installation and Management Guide (H06.04+)

Installing NonStop SQL/MX
HP NonStop SQL/MX Installation and Management Guide—540436-001
3-22
InstallSqlmx Syntax
InstallSqlmx Syntax
You must always specify the -l option first. You can specify other options in any order.
InstallSqlmx Options
Table 3-3 describes the command options for InstallSqlmx.
4 InstallSqlmx loads MXCS metadata tables in the MXCS_SCHEMA of the
system catalog with their default values.
After loading MXCS metadata tables, InstallSqlmx creates a log at
/usr/tandem/sqlmx/bin/mxcslog. The viewable log file mxcslog contains
status information about the MXCS initialization operation.
5 InstallSqlmx verifies that the system metadata tables were created in the
volume specified with the -l option of the InstallSqlmx command.
6 If the -nofcheck option is not specified, InstallSqlmx performs FCHECK on
volumes of the local node to locate SQL/MP tables with added columns. If an
SQL/MP table with an added column was duplicated, the addedColumn flag
might not have been carried over to the duplicated table, resulting in problems.
FCHECK correctly sets this flag for SQL/MP tables with added columns. NonStop
SQL/MX depends on the addedColumn flag being set correctly in the label of all
SQL/MP tables.
InstallSqlmx also creates a viewable log,
/usr/tandem/sqlmx/bin/fchecklog, that contains details about the
FCHECK operation.
If a large number of disk drives are attached to the local node, the FCHECK
portion of InstallSqlmx can take a long time to complete. To avoid this delay,
run FCHECK before you run InstallSqlmx.
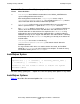
InstallSqlmx [-help | -h ] | options
options are: { [ -l \$volume [ -n national_charset_name ]
[ -nofcheck ]] | -initmxcs | -b }
volume is: the DP2 volume in which to install the system
metadata tables
Table 3-2. The Phases of InstallSqlmx (page 2 of 2)
Phase Phase Activities