
H06.05 Software Installation and Upgrade Guide

Installing SWID, DSM/SCM PVU, and Planner
Interface (PI) Client Software
H06.05 Software Installation and Upgrade Guide—541762-003
B-7
Create a New Software Revision for H02 DSM/SCM
and SWID SPRs
Create a New Software Revision for H02
DSM/SCM and SWID SPRs
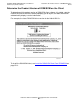
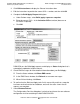
1. In the Configuration Revisions dialog box, select the target system being upgraded
and the current revision of the system being upgraded. Select New software
revision.
DSM/SCM opens the New dialog box listing the products in the last software
revision that was built for the target. Allow several minutes for the dialog box to
appear.
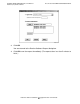
2. In the Software in Archive dialog box, select the DSM/SCM software you just
received and click Copy to.
The DSM/SCM files are copied from the Archive to the new software revision.
3. From the New software revision dialog box, verify that the new version of
DSM/SCM and SWID are included in the new software revision.
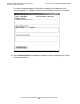
4. Edit the revision notes for the new revision:
a. Click Edit revision notes.
The Revision Notes box appears, containing the existing revision notes.
b. Enter a description of the changes to the existing text. For example:
Added 08/07/05: DSM/SWID
c. Click OK to add a written history of revisions to existing notes.
Build and Apply the DSM/SCM H02 Software
Product Revision
The Build process creates an activation package of products contained in the new
software revision. During the Apply process, the activation package is transferred to
the target system. When the Apply request is finished, a snapshot is automatically
created and returned to the host. Because you are building and applying only a few
files, it should take less than an hour before the Build and Apply requests are finished
and the snapshot is returned. When the Build and Apply requests are finished, the new
software is placed in the current SYSnn subvolume.
1. In the New software revision dialog box, click Build/Apply to display the options
for your Build/Apply.
It might take several minutes for DSM/SCM to assemble the build information.
During this time, the Build/Apply Request dialog box appears with all selections
dimmed and unavailable.
In a few minutes, the dialog box is refreshed with defaults selected. The name
assigned to the Build/Apply request appears after Request name.