
J06.08 Software Installation and Upgrade Guide
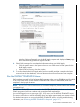
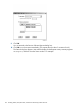
Table Of Contents
- J06.08 Software Installation and Upgrade Guide
- Contents
- About This Document
- 1 Overview of Installing This RVU
- SUT on DVD
- CLIM Software for This RVU
- Disk Space Requirements
- Operational Differences Between This RVU and H-series RVUs
- Investigating a J-Series RVU
- System Console Requirements
- Using OSM With This RVU
- Using DSM/SCM and NonStop Software Essentials With This RVU
- NonStop Software Essentials and This RVU
- DSM/SCM and This RVU
- DSM/SCM and Public DLLs
- DSM/SCM and OSS
- Upgrading the NonStop Software Essentials Client
- Upgrading the DSM/SCM Client (Planner Interface) and the T6031H02 PVU
- Summary of Software Installation Tasks
- Check or Alter the CONFTEXT File Before Installing This RVU SUT
- Installing CLIM Software
- Backing Out the DSM/SCM Revision
- Managing Microcode and Firmware
- Installation, Migration, and Fallback
- 2 Managing Microcode and Firmware
- Managing ME Firmware and ME FPGA Firmware
- Managing OA Firmware for the c7000 Enclosure
- Managing Server Blade Firmware
- Managing ServerNet Adapter Firmware
- Managing SWAN and SWAN 2 Concentrator Firmware
- Managing NonStop Cluster Switch Firmware
- Managing CLIM Firmware
- Managing S-Series Interoperability Firmware
- 3 Installation, Migration, and Fallback Considerations for This RVU
- 4 Upgrade Checklist
- 5 Preparing to Upgrade the Server Software (Preinstallation Tasks)
- Back Up Important Files
- Record the Current SYSnn
- Save the Current Configuration File (CONFxxyy)
- Verify System Processes
- Check Processor Status
- Check System Components
- Verify the State of the Internal ServerNet Fabric
- Verify Firmware
- Verify Critical System Processes
- Verify Disk Drives
- Verify Tape Drives (If Necessary)
- Verify That the CLIMs Are in the Started State
- Verify That the CIP Providers Are in the Started State
- Check the Status of the Spooler Collector
- Check for Sufficient Swap File Space
- Install Node Interoperability SPRs
- Back Up System Information
- Manually Install the NonStop Software Essentials Server Product
- 6 Installing a SUT for This RVU Using NonStop Software Essentials
- 7 Installing a SUT for This RVU Using the Planner Interface
- 8 Running ZPHIRNM
- 9 Loading This RVU
- 10 Resuming Normal Operations
- Revive the Down Half of the Mirrored Disk
- Validate Your Core License
- Start System Applications
- Run merge_whatis
- Configure Specific Products (Post-System Load)
- 11 Backing Out the DSM/SCM Revision
- 12 Running ZPHIRNM to Reactivate the Previous Software Revision
- 13 Falling Back on the CLIMs, Loading the Previous RVU, and Resuming Normal Operations
- Fallback Considerations for the Power Regulator
- Alerts
- Task Overview
- Before Halting the Processors
- Halt the Processors
- While the Processors are Halted
- Prepare the CLIMs
- Load the System
- Complete CLIM Setup
- Revert Firmware (If Necessary)
- Install Specific OSS Files (If Necessary)
- Verify That the System Is Started
- A Using DSM/SCM and NonStop Software Essentials to Install SPRs
- B Using DSM/SCM and Planner Interface to Install SPRs
- C Installing SWID and DSM/SCM PVU Using NonStop Software Essentials Client Software
- Alerts
- Copy (RESTORE) the H02 DSM/SCM Product Version to Disk (If Necessary)
- Receive the H02 SWID and DSM/SCM SPRs
- Create a New Software Revision for H02 DSM/SCM and SWID SPRs
- Build and Apply the DSM/SCM H02 Software Product Revision
- Run the INSTALL^TEMPLATES Macro
- Restart Applications
- Recovery for Problems While Installing the H02 Version of DSM/SCM
- Install the NonStop Software Essentials Client
- Install the NonStop Essentials Client From the HP Insight Control for NonStop DVD
- D Installing SWID, DSM/SCM PVU, and Planner Interface (PI) Client Software
- Alerts
- Copy (RESTORE) the H02 DSM/SCM Product Version to Disk (If Necessary)
- Receive the H02 SWID and DSM/SCM SPRs
- Create a New Software Revision for H02 DSM/SCM and SWID SPRs
- Build and Apply the DSM/SCM H02 Software Product Revision
- Rename the Applied DSM/SCM H02 Files By Running ZPHIRNM
- Run the INSTALL^TEMPLATES Macro
- Restart Applications
- Recovery for Problems While Installing the H02 Version of DSM/SCM
- Install the DSM/SCM Client From ZDSMSCM
- E Updating SWAN Concentrator CLIP Firmware
- Acronyms
- Index
and Apply requests are finished and the snapshot is returned. When the Build and Apply requests
are finished, the new software is placed in the current SYSnn subvolume.
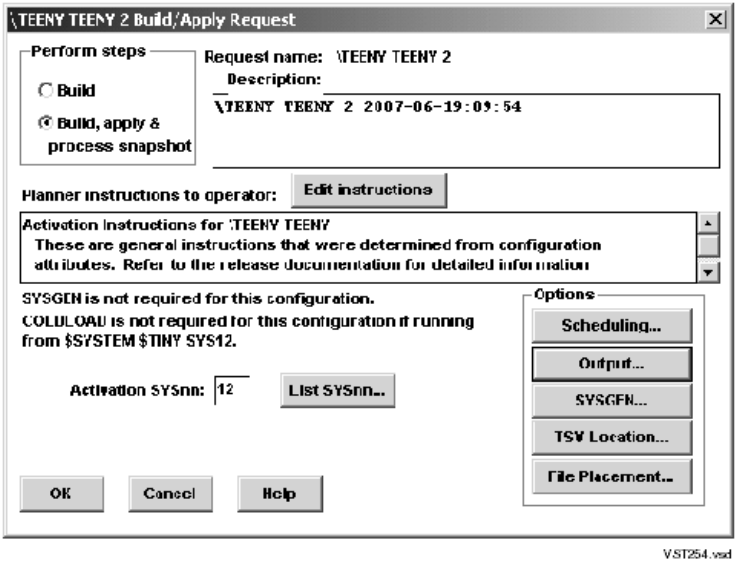
1. In the New software revision dialog box, click Build/Apply to display the options for your
Build/Apply.
It might take several minutes for DSM/SCM to assemble the build information. During this
time, the Build/Apply Request dialog box appears with all selections dimmed and unavailable.
In a few minutes, the dialog box is refreshed with defaults selected. The name assigned to the
Build/Apply request appears after Request name.
2. Click Edit instructions to display the Planner Instructions box.
3. Edit the instructions to provide the current SYSnn number, and then click OK.
4. Complete the Build/Apply Request dialog box:
a. Under Perform steps, select Build, apply & process snapshot.
b. Enter the current SYSnn in the Activation SYSnn text box (because no SYSGEN is required).
c. Click OK.
DSM/SCM runs the Build/Apply requests and displays a Status dialog box that is
automatically updated at regular intervals.
5. Check EMS messages for more detailed information about your Build/Apply:
• From the Status window, click Show EMS events.
• In the EMS Events window, click Refresh to see newer messages.
• When finished viewing, click Close.
6. To confirm that the Build and Apply tasks finish successfully and that a snapshot has been
received into the host database, wait until the status shows that all requests are complete.
7. Select Window>Refresh.
The Configurations Revision dialog box is refreshed and shows the new software configuration
revision containing the H02 DSM/SCM SPR.
158 Installing SWID, DSM/SCM PVU, and Planner Interface (PI) Client Software