
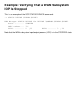
Replacing an ATM3SA CRU
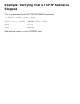


Removing an ATM3SA CRU
Note: Whenever you handle an ATM ServerNet adapter (ATM3SA) CRU, you
should follow standard operating practices to avoid damage to the equipment.
1 Disconnect the fiber optic cables from the ATM3SA CRU.
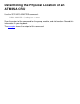
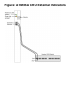
2 Put on your electrostatic discharge (ESD) wriststrap and connect the
grounding clip securely to an exposed, unpainted, metal surface on the
service side of the system enclosure, such as the processor multifunction
(PMF) CRU or I/O multifunction (IOMF) CRU ventilation holes
The figure shows how to connect the grounding clip to the ventilation holes
on the PMF CRU or IOMF CRU.
3 Unlatch the ejector on the ATM3SA CRU by pressing the blue-green tab on
the ejector and pulling the ejector outward to unseat the ATM3SA CRU
from the backplane.
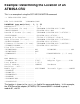
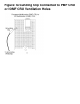
4 Grasp the ATM3SA CRU by its ejector in one hand and slowly pull the
ATM3SA CRU out of the slot while supporting the bottom edge of the
ATM3SA CRU with the other hand.
Note: The ATM3SA CRU weighs 6.75 pounds (3 kilograms).
The figure shows how to pull the ATM3SA CRU out of the slot.
5 Place the ATM3SA CRU in an ESD protective bag and return it to its
original packing container.