
Replacing an Internal Disk Drive CRU


Installing an Internal Disk Drive CRU
Follow these instructions to install an internal disk drive customer-replaceable unit
(CRU).
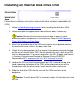
1 Follow standard operating practices when handling the disk drive CRU.
2 Unlock and open the appearance-side enclosure door, if necessary.
Caution: Minimize the time the enclosure door is open to avoid
overheating other components in the enclosure. Refer to Safe Operating
Times With Enclosure Door Open.
3 Attach the grounding clip of the ESD wriststrap to any unpainted metal on
the enclosure frame, such as the door latch stud.
4 Check for any damaged pins on the square 24-pin power connector located
on the rear of the disk drive CRU. Do not attempt to install a disk drive CRU
that has damaged pins. For more information, see NTL Support and Service
> Avoiding Connector and Backplane Damage During CRU/FRU
Replacement [NTL employee site link | NTL customer site link]
5 Holding the CRU so that the green power-on LED is toward the top (one
hand supporting the bottom of the CRU, while holding on to one of the
thumbscrews with the other hand), insert the disk drive into the slot.
6 Slide the disk drive CRU into the slot until the CRU connects to the
backplane.
Caution: The disk drive CRU is extremely fragile. Do not force the it into
the slot.