
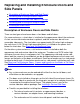
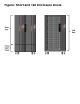
Replacing and Installing Enclosure Doors and Side Panels
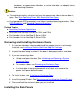


1 a. You need these tools:
Phillips head screwdriver (medium size)●
T-25 Torx head screwdriver (for M5 Torx screws)●
b. For each enclosure, you need the following
items from a 7285 full-upgrade kit:
2 side panels●
2 large brackets●
2 small brackets●
8 0.375-inch Phillips self-tapping screws●
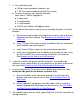
2 On the side of the enclosure where you are installing the panel, install the
brackets:
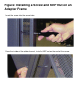
a. Position one large bracket at the top of the enclosure side and center
it between the front and back. See Brackets on the Side of an End
Enclosure.
b. Insert 2 Phillips head screws through the bottom holes on the bracket
into the bottom row of perforations.
c. Insert 2 more Phillips screws into the remaining bracket holes.
d. Install one small bracket near the bottom of the enclosure side, using
the 2 existing M5 Torx screws already installed on the enclosure.
See Brackets on the Side of an End Enclosure.
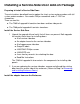
3 If you are installing side panels on both enclosures of a double high
enclosure stack, repeat Step 2 to install brackets on the other enclosure of
the stack. See Brackets on the Side of Stacked End Enclosures.
4. Install a side panel on the enclosure (for a double-high enclosure stack,
install the side panel on the bottom enclosure first):
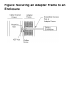
a. Examine the back of the side panel and make sure the mounting
brackets and foam strip are secure. See Front and Back Views of
Side Panel.
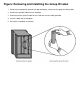
b. Lift the side panel into position and slide it down until its mounting
brackets engage with the brackets on the enclosure. See Tall Doors
and Side Panel Installed On an End Enclosure.
5 For a double-high enclosure stack, repeat Step 4 to install the side panel on
the top enclosure.