
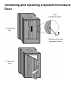
Replacing or Installing ServerNet Adapter Plug-In Cards (PICs)


SS7TE3 10Base-T (10 Mbps)
and 100Base-T
(100 Mbps) LANs
Either:
One SS7TE3 operating at 10 Mbps with
up to three SS7TEs or SS7TE2s
●
Two SS7TE3s operating at 10 Mbps with
no other PICs
●
One or two SS7TE3s operating at 100
Mbps with no other PICs
●
Replacing or Installing a PIC
The replacement and installation instructions are the same for all types of
ServerNet/DA and CCSA PICs, although the cabling is different. For more information,
see the 6760 ServerNet/DA Manual and the 6763 Common Communication ServerNet
Adapter Installation and Support Guide.
Caution: Replace PICs on one ServerNet/DA or CCSA at a time. Replacing PICs
on more than one adapter at a time might cause connectivity problems, processor
halts, or a system outage.
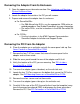
Preparing to Replace or Install a PIC
1 Unpack and inspect the PIC you will install. Examine the connectors and
pins in the connectors. If any damage is found, obtain a good PIC before
continuing.
2 You need the following tools:
Electrostatic discharge (ESD) protection kit●
#9 Torx screwdriver●
Labels or removable sticky notes (to label the ServerNet cables)●
Flashlight (to check the backplane connectors for bent or broken pins) ●
Caution:
Use appropriate ESD precautions and follow standard operating practices.
(See ESD Guidelines and Standard Operating Practices).
●
Minimize the time the enclosure door is open to avoid overheating. See Safe
Operating Times With Enclosure Door Open.
●