
Windows #002: Smart Setup Guide

Installing the OS
Reinstalling from a remote console
Chapter 3
49
Step 1. Start the server.
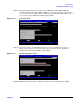
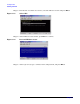
Windows displays a pop-up screen indicating that an EMS channel (headless server MP
port) is present. It may take 2 to 15 minutes for the mouse and keyboard to start
operating in this mode.
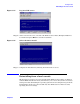
Step 2. When prompted to enter setup information at the local console, click OK.
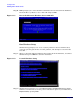
Step 3. From the Windows Setup Wizard, enter the following setup information:
1. In the License Agreement window, click Accept and then Next.
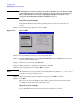
2. In the Regional and Language Options window, click Next.
3. In the Your Product Key window, enter the product key.
The product key is located on the label attached to the server.
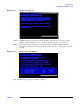
4. In the Licensing Modes window, select the license you purchased.
5. In the Administrator Password window, enter the server name and a password.
6. In the Date and Time window, select the appropriate timezone, and click Next.
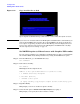
The server reboots to the EFI Boot Manager and then boots up Windows Server 2003.
You can now log in to the server using the administrator password you selected.
Reinstalling from a remote console
HP Integrity servers that are factory-installed with Windows Server 2003 are shipped
with the HP Re-Installation media, which allows you to restore the system to its factory
settings if needed. Reinstalling the operating system involves loading the image from the
Re-Installation media on to the boot disk and, after Windows Server 2003 is loaded,
specifying the server settings.
WARNING Reinstallation overwrites all files on the Boot Disk. Please note the Boot Disk
is determined by bus search order and may not be the disk you expect it to be.
HP recommends disconnecting or unplugging ALL drives from the server
except the Boot Disk. This includes all SAN storage too.
Load the system image
To re-install Windows Server 2003 from a remote console:
Step 1. Power on the server. The server boots to EFI.