
Boot from SAN Guide


1. Install all server, switch/interconnect and array hardware.
2. Install all HBAs in the servers. It is recommended that you record WWNs of the HBAs for future
reference.
3. Install all fibre channel connections.
4. All c-Class Virtual Connect users who intend to manage HBA boot path from the Virtual Connect
Manager see Step 3 - Virtual Connect Manager; all others see Step 2.
Configure the HBAs — BIOS enable
Virtual Connect Manager (VCM) users should skip to Step 3 - Virtual Connect Manager.
Step 2a – QLogic HBAs
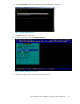
1. While the server is booting, press Ctrl+Q to enter Fast!UTIL.
2. From the Select Host Adapter menu, select the HBA you want to boot, and then press Enter.
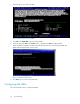
3. From the Fast!UTIL Options menu, select Configuration Settings, and then press Enter.
4. From the Configuration Settings menu, select Adapter Settings, and then press Enter.
5. From the Adapter Settings menu, change Host Adapter BIOS to Enabled by pressing Enter.
6. Save the changes by pressing the Escape key twice, then select Save Changes.
7. Reboot the server.
8. Exit theFast!UTIL feature.
9. Go to Step 4 - Hardware setup - SAN configuration.
Step 2b – Emulex HBAs
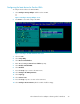
1. While the server is booting, press Alt+E to enter BIOS setup.
2. From the Enter a Selection prompt, select the first HBA.
3. Select Option 2, Configure This Adapter’s Parameters.
4. Select Option 1, Enable or Disable BIOS.
5. Press 1 to enable BIOS, then press the Escape key.
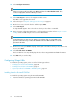
6. Select Option 4, Topology Selection.
7. Select Fabric Point to Point. Press the Escape key.
8. Press X to exit and reboot the server.
9. Go to Step 4 - Hardware setup - SAN configuration.
Step 3 – Virtual Connect Manager setup
Refer to the HP Virtual Connect for c-Class BladeSystem User Guide to perform the following steps.
NOTE:
You cannot set boot path configurations or PXE settings using Virtual Connect on the BL860c and
BL870c blade servers.
1. Before setting up the Virtual Connect,
a. Power off all blade servers for which you need to create a profile.
Boot from SAN22