
SMS Inventory Tool for HP ProLiant and Integrity Update User Guide

1.
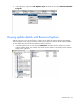
In the Properties window, click Advanced. The Advanced Security Settings window appears.
2. Click domain\synchostmachinename in the Permission entries list box.
3. Select Replace permission entries on all child objects with entries shown here that
apply to child objects, and then click OK.
Providing WMI permissions for the sync host machine
NOTE: The following procedures are based on the Windows 2003 operating system and are slightly
different when using Windows 2000.
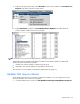
1. On the SMS Provider machine desktop, right-click My Computer, and select Manage. The
Computer Management window appears.
2. Click Services and Applications, right-click WMI Control, and select Properties. The WMI
Control Properties window appears.
3. Click the Security tab, and then expand Root to select the SMS node.
4. Click Security. The Security for Root\SMS window appears.
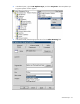
5. Click Add, and then enter domain\synchostmachinename$.
6. Click Check Names, and then click OK.
7. In the Security for Root\SMS window, select domain\synchostmachinename$.
8. Under Permissions for domain\synchostmachinename$, select all of the checkboxes under Allow.
9. Click OK twice.
10. Click the Security tab, and then expand Root to select the SMS node.
11. Expand the SMS node, and select Site_sitecode.
12. Click Security. The Security for Root\SMS\ Site_sitecode window appears.
13. Click Add, and then enter domain\synchostmachinename$.
14. Click Check Names, and then click OK.
15. Select domain\synchostmachinename$.
16. Under Permissions for domain\synchostmachinename$, select all of the checkboxes under Allow.
17. Click OK twice.
Changing the HP Updates Sync program properties
1. In the SMS Administrator console, click Site Database>Packages>HP Updates>Programs.
Advanced topics 49