
User Service Guide, Third Edition - HP Integrity rx4640 Server
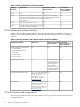
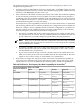
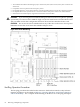
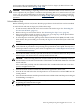

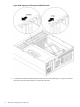
Table Of Contents
- HP Integrity rx4640 Server User Service Guide
- Table of Contents
- About This Document
- 1 Introduction
- 2 Controls, Ports, and LEDs
- 3 Powering Off and Powering On the Server
- 4 Removing and Replacing Components
- Safety Information
- Service Tools Required
- Accessing a Rack Mounted Server
- Accessing a Pedestal Mounted Server
- Removing and Replacing the Front Bezel
- Removing and Replacing the Front and Top Covers
- Removing and Replacing the Memory Extender Board
- Removing and Replacing Memory DIMMs
- Removing and Replacing the Processor Extender Board
- Removing and Replacing a Processor
- Removing and Replacing Hot-Swappable Chassis Fans
- Removing and Replacing the I/O Baseboard
- Removing and Replacing Hot-Pluggable PCI-X Cards
- Removing and Replacing OLX Dividers
- Removing and Replacing Core I/O Cards
- Removing and Replacing the Server Battery
- Removing and Replacing Hard Disk Drives
- Removing and Replacing the SCSI Backplane Board
- Removing and Replacing the Midplane Riser Board
- Removing and Replacing the Power Supplies
- Removing and Replacing the Power Distribution Board
- Removing and Replacing the DVD Drive
- Removing and Replacing the DVD I/O Board
- Removing and Replacing the Display Board
- Removing and Replacing the QuickFind Diagnostic Board
- 5 Troubleshooting
- Troubleshooting Tips
- Possible Problems
- Troubleshooting Using LED Indicators
- Diagnostics
- Recommended Cleaning Procedures
- Where to Get Help
- A Parts Information
- B Booting the Operating System
- Operating Systems Supported on HP Integrity Servers
- Configuring System Boot Options
- Booting and Shutting Down HP-UX
- Booting and Shutting Down HP OpenVMS
- Booting and Shutting Down Microsoft Windows
- Booting and Shutting Down Linux
- C Utilities
- Extensible Firmware Interface Boot Manager
- EFI/POSSE Commands
- Specifying SCSI Parameters
- Using the Boot Configuration Menu
- Index
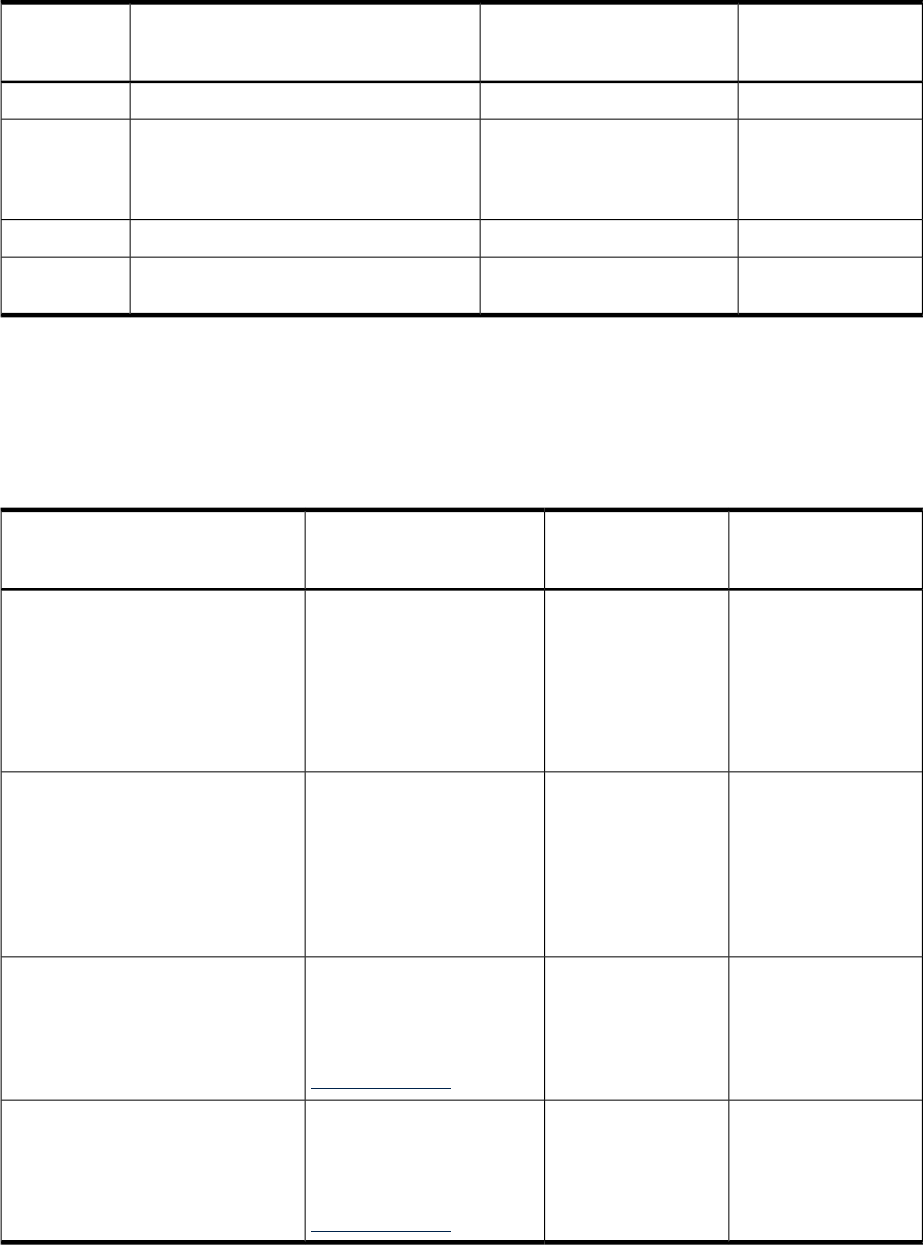
Table 4-6 Hot-Plug Operation and OS Compatibility
Linux Red Hat
Enterprise Advanced
Server 4 Update 3
Windows Server 2003
Enterprise Edition
HP-UX 11i v2Hot-Plug
Operation
NoYesYesOL-A
NoNo. But, you can perform a
combination of OL-D and OL-A
to replace a card.
Yes. HP-UX 11i v2 demands like-for-like
replacement. A like-for-like card means that
the new card is exactly the same as the card
being replaced.
OL-R
NoYesNot supported by HP-UX 11i v2.OL-D
NoNoYes. Only supported through the command
line interface or the web interface.
Locate
PCI-X Hardware and Software Interfaces
Table 4-7 shows what hot-plug hardware and software interfaces are available on HP-UX 11i v2,
Windows Server 2003 Enterprise Edition, and Linux Red Hat Advanced Server 2.1 operating
systems.
Table 4-7 Hot-Plug Hardware and Software Interfaces and OS Availability
Linux Red Hat
Enterprise Advanced
Server 4 Update 3
Windows Server 2003
Enterprise Edition
HP-UX 11i v2Hot-Plug PCI-X Interface
NoYesYesHardware interface comprised of:
—Attention Button
—Manual Retention Latch
—Power LED
—Attention LED
—PCI-X card lock
No
Yes. Use the Safely
Remove Hardware
icon in the tool tray or
device manager to
remove a device
(OL-D). OL-A is only
possible through the
hardware interface.
YesGraphical User Interface
NoNo
Yes -olrad command. Read
Interface Card OL* Support for
HP-UX Servers and
Workstations, olrad
Command Line Interface at
http://hp.com.
Command Line Interface (CLI)
NoNo
Yes- pdweb command. Read
Interface Card OL* Support for
HP-UX Servers and
Workstations, pdweb-Peripheral
Device tool Web Interface, at
http://hp.com.
Web Interface
PCI-X Slot Locations and Configurations
PCI-X slots are numbered from 1 through 8 in the server. Figure 4-25 shows the slot locations on
the I/O baseboard.
62 Removing and Replacing Components