
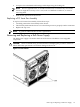
HP Integrity rx7620 Server - User Service Guide, Sixth Edition

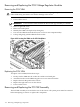

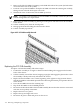

6. Remove all of the PCI MRLs, beginning on the OLR cable side of the system (left side when
viewed from the rear of the system).
7. Push out on top of the PCI MRL to unclip the PCI MRL axle from the retaining slot carefully,
taking care not to break off the optic sensor tab.
8. With the tab clear of obstruction, lift the MRL up and out.
NOTE: It is highly recommended that extra PCI MRLs are available, as these may be easily
broken during removal or replacement.
9. Remove the PCI OLR assembly by pushing in on the plastic tabs that secure the assembly
to the chassis.
10. Tilt the assembly away from the attach points.
11. Disengage the bottom holding the tabs from the chassis.
12. Lift the assembly up and out.
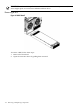
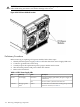
Figure 6-25 PCI OLR Assembly Removal
Replacing the PCI OLR Assembly
To replace a PCI OLR assembly, follow these steps:
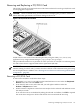
1. Position the assembly at an angle so that the bottom holding tabs engage into the bottom
holes of the chassis.
2. Tilt the assembly toward the chassis, bringing it upright, and engage the plastic tabs so that
the assembly is firmly and evenly attached to the chassis.
3. Replace all the PCI MRLs one at a time, beginning at the right-most clip position. Ensure
that the PCI MRL is in the OPEN position before inserting the bottom pivot pin into the hole
in the chassis.
4. Press the PCI MRL axle into the retaining clip.
5. Flip all the PCI MRLs to the CLOSED position.
6. Reconnect the PCI OLR cable to the PCI OLR assembly. Be sure that the connector is inserted
with the correct polarity orientation.
7. Replace the PCI access panel.
8. Replace the top and right side covers.
9. Reconnect all power cables and power on the server.
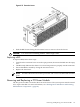
118 Removing and Replacing Components