
HP Integrity rx8620 Server User Service Guide
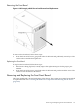

Replacing the Removable Media Drive
To replcae the media drive, follow these steps:
1. Attach the rails and clips to the drive.
2. Connect the cables to the rear of the drive.
3. Position the drive in the chassis. If applicable, install the bottom drive before installing the
top drive.
4. Turn the power on to the server.
5. To ensure that the system recognizes the drive, verify operation of the drive. Perform a
SEArch or INFO at the EFI shell.
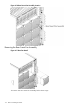
Removing and Replacing a Cell Board
The cell boards are located in the right side of the chassis. The cell power must be turned off to
replace this FRU. Refer to “Powering Off Hardware Components and Powering On the Server”
(page 106) and Appendix E (page 203).
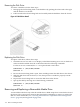
Cell boards are shipped with all four processors installed. Should the old cell board to be replaced
have fewer processors than the new cell board, you must remove the processors from the new
cell board to match what the customer has installed on the old cell board. The DIMMs from the
old cell board must be transferred to the new cell board.
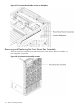
To remove and replace a cell board, follow these steps:
1. Prepare an ESD safe work surface large enough to accommodate two cell boards. Use a
grounded mat and an anti-static wrist strap, such as those included in the ESD Field Service
Kit.
2. Place the new cell board on the work surface.
3. Remove the cell board from the server and place it on the work surface. See “Removing the
Cell Board” (page 121).
4. Transfer the DIMMs from the old cell board to the new cell board.
5. Remove any additional processors from the new cell board and return the processors with
the old cell board. See “Removing and Replacing a Central Processing Unit” (page 141).
6. Install the new cell board in the server. See “Replacing a Cell Board” (page 123).
120 Removal and Replacement