
HP Matrix 7.2 KVM Private Cloud Backup and Restore
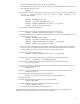
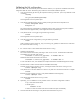

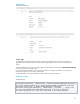
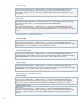
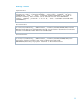
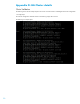
Table Of Contents
- Abstract
- Matrix Operating Environment with Matrix KVM Private Cloud Overview
- Backup and restore strategy for Matrix OE with Matrix KVM Private Cloud
- Matrix KVM Private Cloud backup and restore
- Matrix KVM Private Cloud Images repository backup and restore
- Matrix KVM Private Cloud High Availability (HA) cluster configuration backup and restore
- Appendix A: KVM Private Cloud restore resynchronization actions
- Appendix B: Images repository restore resynchronization actions
- Appendix C: Alerts and Audit messages
- Appendix D: HA Cluster details
- Appendix E: Backup and Restore REST API
- Appendix F: Sample Backup Script
- Appendix G: Sample Restore Script
- References
- For more information
Ignore the “WARNING: About to destroy all data on /dev/mapper/….
12. Verify that the Quorum disk has been created successfully. This command should display the details of the
qdisk created from the previous step.
mkqdisk -L
13. Recreate the KVM Private Cloud volume group and logical volume on one node. To find the heartbeat host
name for the vgchange command, check the “volume_list” attribute configuration in the
/etc/lvm/lvm.conf file.
pvcreate /dev/mapper/isc_root
vgcreate vg_iscvm /dev/mapper/isc_root
vgchange –-addtag <heartbeat host name> -a y vg_iscvm
lvcreate –L200G –n lv_iscvm vg_iscvm
14. Recreate the KVM Private Cloud appliance.
15. Deactivate the volume group vg_iscvm and remove the tag on the same node.
vgchange –-deltag <heartbeat-host-name> -a n vg_iscvm
16. Recreate the Images repository volume group and logical volume. Use the correct /dev/mapper/ to create
the volume group on one node.
pvcreate /dev/mapper/isc_glance
vgcreate vg_osimage /dev/mapper/isc_glance
vgchange –-addtag <heartbeat host name> -a y vg_osimage
lvcreate –LxxxG –n lv_osimage vg_osimage
17. Restore the contents of the Images repository disk from its backed up copy, using the storage management
tool of your choice. For example, to test this whitepaper, the 3PAR storage management tool “Promote the
virtual copy” feature was used to restore the contents from a backed up virtual copy.
18. On the same node perform the following:
vgchange –-deltag <heartbeat host name> -a n vg_osimage
19. Change the context of the VM configuration file using the following command on both nodes:
chcon –v --type=bin_t /vm/config/<vm>.xml
20. Check the syntax of the cluster configuration file using the following command on both nodes:
ccs_config_validate
21. Set the password for ricci to enable the use of the cman_tool update for the cluster configuration file. Use
the following command on both nodes:
passwd ricci
22. Set the ricci service to automatically start on reboot using the following command on both the nodes:
chkconfig ricci on
23. Set up the HA-LVM using the following command on both nodes:
dracut -H -f /boot/initramfs-$(uname -r).img $(uname –r)
24. Reboot both nodes.
25. Start the cluster manually using the following command on both nodes:
service cman start
26. Start the rgmanager manually using the following command on both nodes:
service rgmanager start
Verify that the cluster and rgmanager come up without errors.
After completing the above restore steps, it is important to follow the steps outlined in the “Validating the HA
configuration” section below to make sure the cluster is functioning properly.
21