
Replacement Instructions for the Air Bleeder Valve HP Modular Cooling System

Shutting off the water
1. Shut off the water flowing into the MCS unit at the
facility-side shut-off valve.
2. Confirm that no water is flowing into the MCS unit.
Required tools
To complete the following steps, you will need:
• T-25 Torx driver
• Pliers
• Water hose fitting wrench (included with your original
MCS unit)
• Counter hold fitting wrench (included with your original
MCS unit)
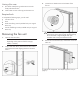
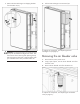
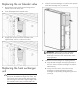
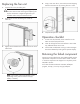
Removing the fan unit
1. Open the rear MCS door.
NOTE: The number of horizontal brackets varies
depending on the position of the fan unit (top,
middle, or bottom).
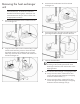
2. Using a T-25 Torx driver, remove the four Torx screws
securing the horizontal shipping bracket to the MCS
frame.
3. Loosen the two thumbscrews on the bottom of the
fan unit.
CAUTION: The fan unit weighs 16.8 k
g
(37 lb). Use
extra caution when removing and replacing the top
fan unit because it might be higher than your
shoulders and is heavy and awkward to lift.
4. Pull the fan unit out toward you, and remove it from the
MCS unit.
To replace this component, see "Replacing the fan unit (on
page 7)."