
Replacement Instructions for the Air Bleeder Valve HP Modular Cooling System
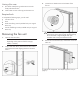
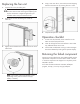
Replacing the air bleeder valve
1. Reach into the access panel cut-out and align the air
bleeder valve to the check valve.
2. Firmly hand-tighten the air bleeder valve.
3. Slightly open the top vent of the air bleeder valve,
approximately 3/4 turn, to allow for air flow.
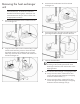
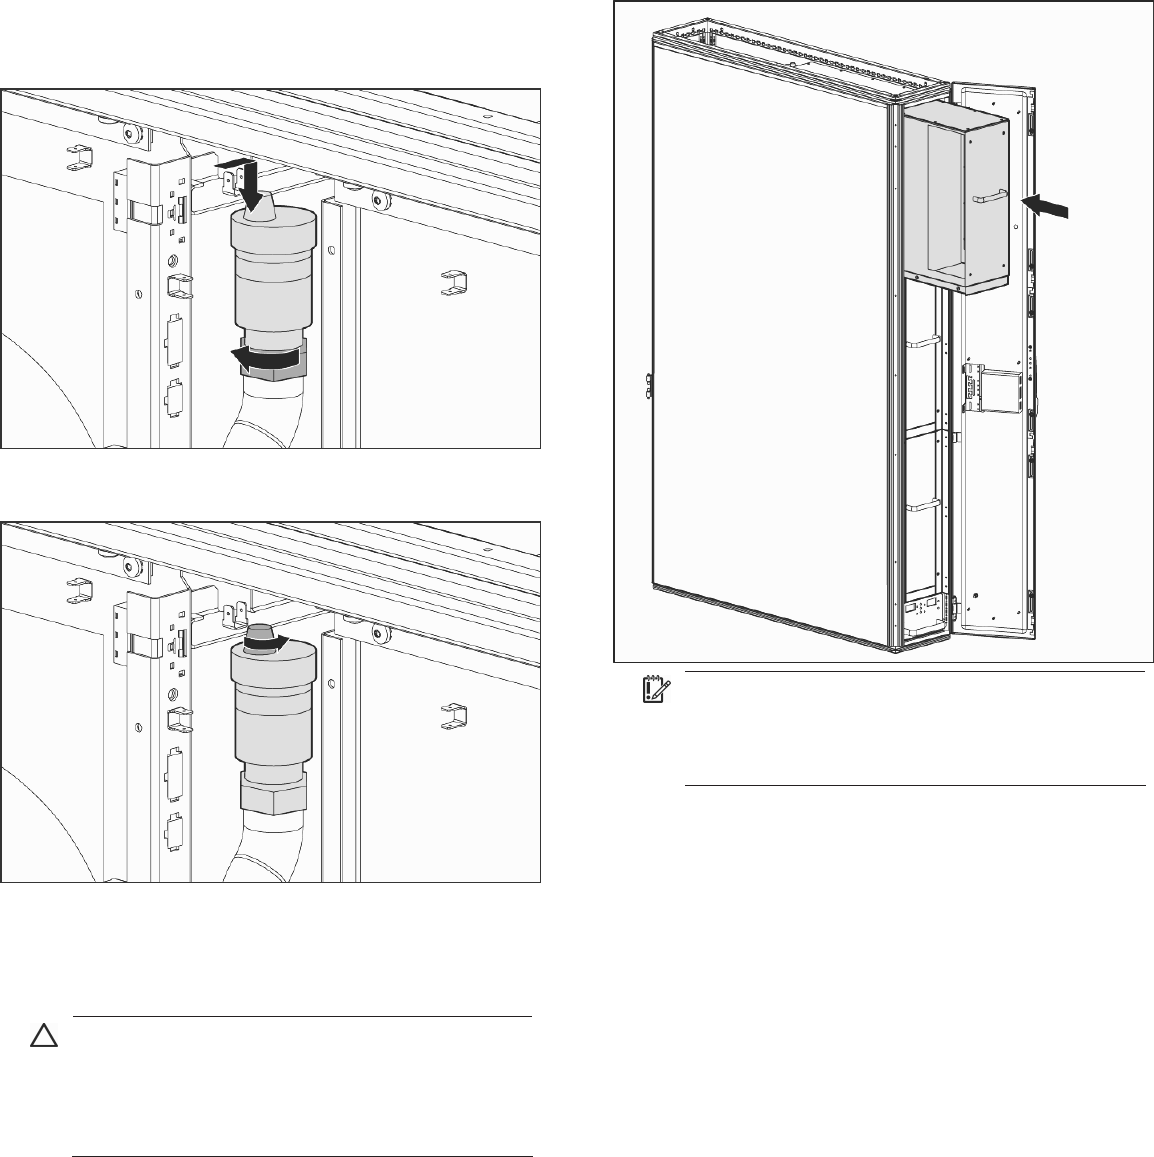
Replacing the heat exchanger
unit
CAUTION: The heat exchanger unit weighs 23.6 kg
(52 lb) with the additional weight of the water. Use
extra caution when removing and replacing the top
heat exchanger unit because it might be higher than
your shoulders and is heavy and awkward to lift.
1. Insert the new heat exchanger unit into the same position
as the heat exchanger unit you removed.
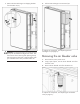
IMPORTANT: Keep the Torx screws separated
according to their thread type and note which
thread type came from which hole location on the
shipping bracket.
2. Install the two heat exchanger unit shipping brackets.
a. Align the heat exchanger unit shipping brackets to
the screw holes on the heat exchanger unit and the
MCS frame (1).
b. Using a T-25 Torx driver, secure the two heat
exchanger unit shipping brackets to the heat
exchanger unit by inserting and tightening four Torx
screws (2).