
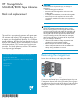
HP StorageWorks MSL4048/8096 Tape Libraries rack rail replacement (AH218-96005, March 2007)


Removing the Lib
rary
10878
2
1
(1) With a #2 Phillips screwdriver, loosen the captive
screws on the front bezel. The MSL4048 has two screws
on each side; th
e MSL8096 has three screws on each side.
(2) With assistance, slide the Library out of the rack.
CAUTION:
When lifting the Library, hold it under its side edges. Lifting
it in other locations can damage the chassis and cause
Library error
s.
Removing the old rails
With a #3 Phillips screwdriver, remove the screws holding
the rails to the rack.
Determining your rack type
The rack kit includes two bags of screws and clip nuts.
• The HP System/E rack has 7.1 mm round holes in
the rack column. Choose the bag labeled HP Rack
System/E.
• The HP 5000 and 10000 racks have 9.5 mm square
holes in the rack column. Choose the bag labeled HP
Rack 5000, 10
000.
Securing the rails to the rack
10779
Using the screws for your rack type and a #3 Phillips
screwdriver , secure one rail to each side of the rack. The
front of each rail is straight and the back is angled as
shown.
Installing the c
lip nuts
MSL4048 MSL8096
11288
1
4
2
3
1. C l i p n u t l o c a t i o n
2. Rail screw location
3. Bottom of Library
4. U marker
11287
1
2
4
3
On the front of the rack, install the clip nuts in the locations
shown, if necessary.
Installing the Librar y
11289
Slide the Library onto the rails. Secure the Library to the
rack by tightening the captive screws in the bezel on each
side of the Library.
Slide the
magazines into the Library. Re-attach the cables
and power up the Library.
Getting help
• HP Product information:
www.hp.com/products/tapestorage
• HP technical support and phone numbers:
www.hp.com/support
• HP StorageWorks Library & Tape
Tools (L
&TT) diagnostic software:
www.hp.com/support/tapetools