
R2511-HP MSR Router Series Interface Configuration Guide(V5)

42
• IP addressing
• Backup center settings if the interface is to be used as a primary or secondary interface for backup
• Firewall
NOTE:
The timeslots on a CE1/PRI interface can be bundled into either channel sets or a PRI set, but not both a
t
a time.
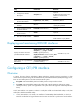
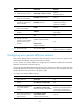
Configuring other CE1/PRI interface parameters
Step Command Remarks
1. Enter system view.
system-view N/A
2. Enter CE1/PRI interface view.
controller e1 number N/A
3. Configure the interface
description.
description text
Optional.
By default, the description of an
interface is interface-name
Interface.
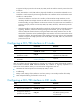
4. Set the line code format.
code { ami | hdb3 }
Optional.
The default is high density bipolar
3 (HDB3).
5. Configure to perform AIS
(alarm indication signal) test.
detect-ais
Optional.
By default, AIS test is performed.
This command is available when
the CE1/PRI interface is operating
in E1 mode.
6. Set the cable type.
cable { long | short }
Optional.
The default cable setting is long
mode.
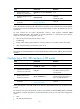
7. Set the clock mode.
clock { master | slave }
Optional.
The default clock mode is slave,
which is line clock.
8. Enable automatic clock mode
change.
clock-change auto
Optional.
Disabled by default.
9. Set the framing format.
frame-format { crc4 | no-crc4 }
Optional.
The default is no-CRC4.
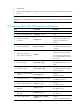
10. Set the line idle code type.
idlecode { 7e | ff }
Optional.
The default is 0x7E.
11. Set the type of interframe
filling tag.
itf type { 7e | ff }
Optional.
The default is 0x7E.
12. Set the number of interframe
filling tags.
itf number number
Optional.
The default is 4.
13. Set the loopback mode.
loopback { local | payload |
remote }
Optional.
Loopback is disabled by default.