
R2511-HP MSR Router Series Layer 2 - LAN Switching Configuration Guide(V5)

120
voice VLAN directly specified for LLDP advertisement, the voice VLAN configured on the port, or the voice
VLAN assigned by a server, depending on your configuration.
To identify the voice VLAN advertised by LLDP, execute the display lldp local-information command, and
examine the MED information fields in the command output.
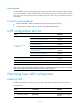
Specifying the voice VLAN to be advertised through LLDP
Ste
p
Command
Remarks
1. Enter system view.
system-view N/A
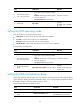
2. Enter interface view or port
group view.
• Enter Layer 2 Ethernet interface
view:
interface interface-type
interface-number
• Enter port group view:
port-group manual
port-group-name
Use one of the commands.
3. Specify the voice VLAN to be
advertised through LLDP.
lldp voice-vlan vlan-id
By default, LLDP advertises the
voice VLAN configured on the
port.
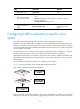
Dynamically advertising server-assigned VLANs through LLDP
Dynamic advertisement of server-assigned VLANs through LLDP must work with 802.1X or MAC
authentication, and is available only for LLDP-enabled IP phones. If 802.1X authentication is used, make
sure the IP phones also support 802.1X authentication.
To implement this function for an IP phone, perform the following configuration tasks:
• Enable LLDP globally and on the port connected to the IP phone.
• Configure 802.1X or MAC authentication to make sure the IP phone can pass security
authentication. For more information about 802.1X authentication, MAC authentication, and VLAN
assignment by servers, see Security Configuration Guide.
After the IP phone passes authentication, LLDP advertises the server-assigned VLAN in the network policy
TLV to the IP phone. The IP phone will send its traffic tagged with the assigned VLAN.
Configuring LLDP trapping
LLDP trapping notifies the NMS of events such as newly-detected neighboring devices and link
malfunctions.
To prevent excessive LLDP traps from being sent when the topology is unstable, set a trap transmit interval
for LLDP.
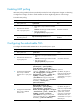
To configure LLDP trapping:
Step Command Remarks
1. Enter system view.
system-view N/A