
R2511-HP MSR Router Series Terminal Access Configuration Guide(V5)


42
Ste
p
Command
Remarks
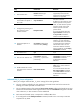
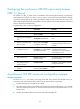
13. Enable printing of
terminal connection
information on the
terminal.
print connection-info
Optional.
By default, terminal connection information
is printed on the terminal.
Use the print menu command before using
this command.
14. Configure the router to
print information on the
terminal.
print information
Optional.
By default, the router prints information on
the terminal.
15. Configure the print
language.
print language { chinese |
english }
Optional.
Chinese by default.
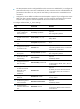
16. Configure the maximum
size of data to be sent to
a terminal at one time.
sendbuf bufsize size
Optional.
500 bytes by default.
17. Configure the terminal
send buffer threshold.
sendbuf threshold value
Optional.
Not configured by default.
18. Configure TCP
parameters.
tcp { recvbuf-size recvsize |
sendbuf-size sendsize |
nodelay | keepalive time count }
Optional.
By default, receive buffer size is 2048
bytes, send buffer size is 2048 bytes, delay
is enabled, keepalive interval is 50
seconds, and keepalive number is 3.
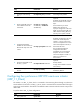
19. Configure the password
for the VTY
authentication.
vty vty-number password
{ simple | cipher } string
Optional.
Not configured by default.
20. Configure the RTC server
to perform VTY
switching by priority (the
lower the VTY number,
the higher the priority).
vty-switch priority
Optional.
By default, VTY switching is not performed
by priority.
21. Update the
configuration.
update changed-config
Optional.
If you modify the terminal template that has
been applied to an interface, use this
command to apply the latest configuration.
Executing this command will disconnect
connections. Make sure critical services are
not affected.
Configuring the TCP RTC many-to-one relay server
(TCP_n1_Server)
The initiators are multiple TCP_11_Clients, which are connected to monitoring devices. The receiver is a
TCP_N1_Server which is not connected to any monitored device.
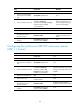
To perform basic and advanced TCP_N1_Server configurations:
Ste
p
Command
Remarks
1. Enter system view.
system-view
N/A