
HP DC SAN Backbone Director Switch Hardware Reference Guide (5697-2158, August 2012)


4. Verify that the power LED on the power supply displays a steady green light.
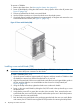
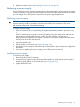
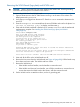
Figure 38 Power supply
Replacing a blower assembly
IMPORTANT: To ensure continuous adequate cooling, maintain three operating blower assemblies
at all times except for the brief period when replacing a blower assembly.
The procedure for each blower assembly takes less than five minutes. The following items are
required for the blower assembly replacement:
• Replacement blower assembly
• #2 Phillips screwdriver
Removing a blower assembly
CAUTION: Wear a grounded ESD strap when handling DC SAN Director components. The
Director chassis provides a grounding connection above the power connectors. Also, store
ESD-sensitive components in antistatic packaging.
To remove a blower assembly:
1. Before removing a blower assembly, verify that the other blower assemblies are functioning
correctly. The power LEDs should be steady green.
2. Use the screwdriver to loosen the captive screws at the top and bottom of blower assembly.
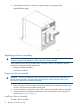
3. Support the blower assembly from underneath, and use the handle to remove the blower
assembly (see Figure 39 (page 77)).
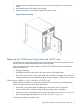
Installing a blower assembly
To install a blower assembly:
76 Replacing DC SAN Director FRUs