
Neoview Database Administrator's Guide (R2.2)
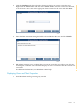

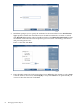

2. Click the Database tab, then navigate to the schema and table to display its views in the left
pane.
3. Expand the Views folder in the left pane.
4. Right-click the view name and then select Drop.
5. DB Admin prompts you to confirm the drop. When you click Yes, it drops the view.
For additional information, see DB Admin online help.
Materialized Views
Creating Materialized Views
A materialized view is like a cache: a copy of data that can be accessed quickly. It is a named
specification of a result table that is stored in a regular table. You can then query this table directly.
Neoview SQL defines the following two types of materialized views:
• Materialized Join View (MJV): The results of a join query with inner equi-joins of several
tables. Outer joins and cross joins are not supported. These tables can be base tables or other
MVs. The query does not include aggregations.
• Materialized Aggregate View (MAV): The result of a GROUP BY query with any of these
aggregate functions: SUM, AVG, VARIANCE, STDDEV, MIN, MAX, COUNT(*), and
COUNT(x). The aggregate function can include expression on the columns, such as SUM(a+b).
Aggregate MVs can be of two types:
— MAV on Single Table: the MAV is defined on a single base table or MV
— MAV on Explicit Join (MAJV): the MAV is defined on an inner equi-join of several base
tables, MVs, or both.
A materialized view is created with the same number of partitions and maximum extents as the
base table. The primary and secondary extent size of the materialized view is half the size of the
base table.
You cannot create materialized views in schemas with delimited names.
Creating a Materialized Join View
1. Start DB Admin and log on using any user ID that is authorized to access the table for which
you want to create a materialized view.
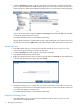
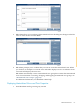
2. Click the Database tab, then select the schema in which you want to create a materialized
view. Right-click the Materialized Views folder and then select Create materialized view
to start the Create Materialized View Wizard. You can also click Create a materialized view
in the right pane.
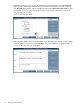
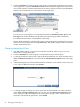
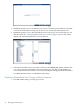
Select Join View. Enter a name for the materialized view and click Next:
Materialized Views 63