
HP Netserver AA Solution Administrator's Guide v4.0 SP1

Endurance Server Maintenance 9-23
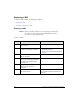
Replacing a Failed Ethernet Adapter
To replace a failed Ethernet adapter, complete the following procedures:
• Installing the Replacement Adapter
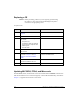
• Configuring the Replacement Adapter
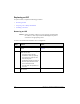
Installing the Replacement Adapter
Caution: Before proceeding, make sure you are properly grounded using,
for instance, a wrist strap with an attached alligator clip that is
connected to an appropriate ground.
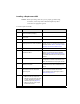
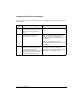
To replace a failed Ethernet adapter:
Step Action Notes
1 Obtain a replacement Ethernet adapter. Obtain an adapter from the same manufacturer
with the same or a very similar model number.
2 Shut down the IOP that contains the
adapter that you are replacing.
Follow
the instructions on page 9-5 to do so.
Make sure that the IOP is disabled at the
completion of this procedure.
3 Label and remove the Ethernet cable
attached to the adapter that you are
replacing.
4 Remove the cover of the system,
following the manufacturer’s
instructions.
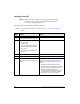
5 Remove the adapter. Note the slot in which the adapter was installed.
You install the new adapter into the same slot.
6 Replace the adapter.
7 Connect the cable to the replacement
adapter.
8 Replace the cover on the IOP.
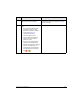
9 Power on the IOP and allow it to boot in
Operational Endurance I/O Processor
mode.
The IOP should remain disabled.
10 Proceed with configuring the adapters.