
HP Netserver AA Solution Installation Guide v4.0 SP1


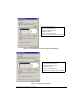

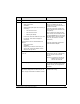

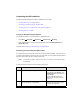
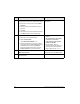
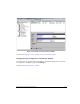
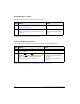
Table Of Contents
- Contents
- Tables
- Figures
- Preface
- Preparing for the Installation
- Installing the Hardware
- Installing Windows and the Endurance Software
- Adding a KVM or Video Switch to the Hardware
- Index

3-20 HP Netserver AA Solution Installation Guide
3 If a red circle with a minus sign appears
superimposed on a disk icon, complete these steps:
a. Right click on the red circle, and select Write
Signature.
b. Click the check box for all disks that require a
signature.
c. Click OK.
d. Verify that the red circle has cleared and that the
word Basic appears under the disk icon(s).
Only Basic Disks are supported for CE
boot devices.
4 Create and format the partition(s):
a. Right click on an unallocated space.
b. Select Create Partition.
The Create Partition Wizard runs.
c. Follow the instructions on the screen, making
sure that the CE boot partition does not exceed
4000 MB and that you select the NTFS file
system (the default). Also be sure you select
Primary Partition for the CE boot partition.
• NTFS is the only supported file
system.
• Due to limitations in some SCSI
controllers, the maximum
supported size for the CE boot
partition is 4000 MB.
• When formatting, assign a
descriptive label to the partition. For
example, for the CE boot partition,
assign a label such as CE_Boot.
5 Right click on the CE boot partition, and select
Mark Partition Active.
You must complete this step for the CE
boot partition to be a bootable partition.
6 See Figure 3-6 for an example of properly
partitioned disks.
Step Action Notes