
HP Support Anywhere Installation and User Guide


Chapter 3 Installing the HP Support Anywhere Software
56
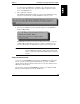
1. Insert the HP Navigator CD into the CD-ROM drive and, at the DOS
command prompt, type:
x
:\HPSA\US\SERVER\DISK1\WINNT\SETUP.EXE
where
x:
is the drive letter of the HP NetServer's CD-ROM drive.
Follow the instructions on the screen to install pcANYWHERE32.
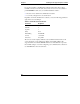
2. Once pcANYWHERE32 is installed, restart the server and run
pcANYWHERE32 by double-clicking the pcANYWHERE32 program
icon in the pcANYWHERE32 program group.
Configuring pcANYWHERE32 on the NetServer
The first time you start pcANYWHERE32, the Smart Setup Wizard helps you
configure your system and prompts you for basic information including COM
port and modem type. Select the modem on the list that most closely matches the
one you intend to use.
In Windows NT, to set up Serial A (COM 1) or Serial B (COM 2) as the serial
port:
1. Click Ports in the Control Panel.
2. In the Ports dialog box, select COM 1 (or COM 2).
3. Click "Settings..." and then "Advanced...".
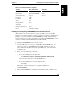
Configure using the following address and IRQ settings:
Table 5: HP NetServer E 40 and E 45 Default Serial Port Interrupts
E 40 and E 45 Label
Port Interrupt
Serial A COM 1 3F8h IRQ 4
Serial B COM 2 2F8h IRQ 3
For best performance, check the FIFO Enabled box.
Be sure to select the same COM port you identified when you configured the
NetServer during BIOS setup. Check by booting DOS and, when prompted
during boot-up, press [F2] to run the Setup program.
NOTE You must reinitialize the modem to enable Remote Console
Redirection.
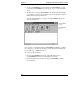
On the BIOS Setup Main Menu, cursor to the Configuration menu and select
"Integrated I/O Ports." Check the display of Integrated I/O Ports.