HP NetServer E 60 Remote Administrator Guide Server Management Solution March 1999
Notice The information contained in this document is subject to change without notice. Hewlett-Packard makes no warranty of any kind with regard to this material, including, but not limited to, the implied warranties of merchantability and fitness for a particular purpose. Hewlett-Packard shall not be liable for errors contained herein or for incidental or consequential damages in connection with the furnishing, performance, or use of this material.
Contents 1 What Is Remote Administration? ..........................................................................................................1 HP Remote Console..................................................................................................................................1 Graphics Console Redirection (Windows NT) ..........................................................................................2 RCONSOLE (NetWare) ............................................................
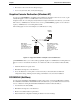
1 What Is Remote Administration? The HP NetServer E 60 systems incorporate remote access capabilities. Using pcANYWHERE32 (included on the HP NetServer Navigator CD-ROM) or terminal emulation software of your own choosing, you can access your NetServer from a remote site. Remote access is particularly useful for network administrators, VARs, support technicians, and other support experts who can evaluate, maintain and, if necessary, reconfigure a NetServer remotely.
Chapter 1 What is Remote Administration? • Remotely boot the server and view startup messages. • Set or reset system date, time, and keyboard language. Graphics Console Redirection (Windows NT) You can use pcANYWHERE32’s capabilities (when installed at both NetServer and remote console) to gain virtually full graphic control over an HP NetServer from a remote location. Using this feature, the console display exactly mimics the display at the NetServer.
Chapter 1 What is Remote Administration? Recommended Modems An updated list of recommended modems may be found on the HP NetServer Tested Products List. To review the Tested Products List, go to either: • HP NetServer Navigator CD-ROM: To access the modem list from the HP NetServer Navigator CDROM: 1. Insert the HP NetServer Navigator CD-ROM into a client with a CD-ROM drive. 2. Run Windows Explorer and double-click on the TPL.HLP file located in the TPL directory.
2 Installing HP Remote Console The HP NetServer’s built-in Remote Console Redirection feature can be used to provide troubleshooting and diagnostic services. Remote Console Redirection allows you (or a VAR or system administrator) to manage, monitor and configure a server without traveling to the NetServer site. Using Remote Console Redirection, you can access and initiate all the configuration and diagnostic features incorporated into the HP NetServer Utility Partition.
Chapter 2 Installing HP Remote Console • A 386-based (or faster) computer with 12 MB of available disk space • A communications link to the server, either through a modem or a direct serial connection • Communications software. You can make master diskettes of the pcANYWHERE32 software from the HP NetServer Navigator CD-ROM that comes with the HP NetServer system. • Microsoft Windows 95, or Windows NT Workstation 3.51 or 4.
Chapter 2 Installing HP Remote Console Table 2-1. HP NetServer E Series Default Serial Port Interrupts Label Port Interrupt Serial A COM 1 3F8h IRQ 4 Serial B COM 2 2F8h IRQ 3 NOTE Your serial port IRQ and I/O address settings must match the entry in the Console Redirect Port field. If you are unable to match these settings, consult your system administrator or HP technical representative. 5.
Chapter 2 Installing HP Remote Console Main Menu Update system BIOS DiagTools HP Console Redirection Run SCSI Configuration Utility Set Date Set Time Select keyboard language Exit Figure 2-2. HP Utility Partition Main Menu 2. On the Utility Partition Main Menu, cursor to "HP Console Redirection." The server displays the HP Console Redirection screen. 3. From the popup menu, select "Initialize the modem." The program supplies a default initialization string (AT&F).
Chapter 2 Installing HP Remote Console 6. Select Yes to initialize the modem. (Cancel returns you to the HP Utility Partition’s Main Menu.) HP Modem Initialization Utility Waiting for remote login. . . Press the space bar to abort remote console access. Figure 2-5. Waiting for a Remote Login The HP NetServer awaits a call from the remote console and is functionally disabled until a connection is made.
Chapter 2 Installing HP Remote Console Table 2-4.
Chapter 2 Installing HP Remote Console Figure 2-6. pcANYWHERE Setup, Modem Selection 8. After setup with the Smart Wizard is complete, pcANYWHERE32 displays the main program window. pcANYWHERE menu bar pcANYWHERE action button bar Figure 2-7. pcANYWHERE Main Screen Once you have completed the initial pcANYWHERE32 installation, you will need to configure for your remote console modem model and phone number for your HP NetServer.
Chapter 2 Installing HP Remote Console 6. If you wish to rename the connection item to something other than "E60Clien," right-click the connection item and then click Rename. Type in the new name. 7. You can copy and paste this icon multiple times to create an icon for each server you manage.
Chapter 2 Installing HP Remote Console 3. Right-click the "E60Clien" connection icon to display the item’s drop-down menu and click "Properties…". 4. In the Properties window, click Details and verify that the correct COM port and modem type are set. Microsoft Windows 95 and NT 4.0 will present you with a pre-configured list of Unimodem entries for your selection. Windows NT 3.51 will present you with COM port options. 5. Click the Settings tab and confirm the server's phone number. 6.
3 Installing Graphic Console Redirection (Windows NT) If you want to access an HP NetServer running Windows NT 4.0 and your remote console is running either Windows NT or Windows 95, you can redirect all the information displayed on the HP NetServer to your remote console using pcANYWHERE32. The following figure shows how the Graphic Console Redirection is set up.
Chapter 3 Installing Graphic Console Redirection Minimum Console Requirements For the remote console, you can use any ANSI X3.64 compatible terminal or terminal emulator with a modem or RS-232 connection. For best results, use an ANSI color terminal that supports 25-line mode and IBM PC character set. In addition, you will need: • A 486-based (or faster) computer with 12 MB of available disk space. • A communications link to the server, either through a modem or a direct serial connection.
Chapter 3 Installing Graphic Console Redirection Installing pcANYWHERE32 on the NetServer If the HP NetServer you are setting up for remote access does not have pcANYWHERE32 Server software already installed, you (or your customer or client) must install pcANYWHERE32 at the NetServer. Otherwise, skip the following installation steps and proceed to the following section detailing the configuration of pcANYWHERE32 on the NetServer.
Chapter 3 Installing Graphic Console Redirection pcANYWHERE menu bar pcANYWHERE action button bar Figure 3-3. pcANYWHERE Main Screen To finish configuration, at the main program window: 1. Click "Be A Host PC." 2. Select the Modem connection item (see the following figure). Figure 3-4. pcANYWHERE Be A Host PC Screen 3. Right-click the Modem connection item to display the drop-down menu. 4. Choose "Properties…" from the drop-down menu in the Connection Info section.
Chapter 3 Installing Graphic Console Redirection A pcANYWHERE32 icon appears to indicate the configuration process is complete. Your server is now ready to support a remote connection. To customize your host configuration for more options and greater security (such as creating a specific list of allowed callers, or for using features such as call-back), refer to pcANYWHERE32’s online help. To enable a Graphics Console Redirection session, proceed to the next section.
4 Installing RCONSOLE (NetWare) Novell NetWare’s RCONSOLE feature works at the NOS level to provide full remote access to a NetServer running NetWare/intraNetWare. Installation of RCONSOLE requires specific setup steps at both the console and NetServer before you can establish an RCONSOLE communications link. Only the NetServer needs to be running NetWare/intraNetWare; the RCONSOLE program can be run from a DOS prompt. Thus, the only software requirement is that the client has access to DOS.
Chapter 4 Installing RCONSOLE (NetWare) load install 2. At the NetServer installation utility, select "NCF files options," then "Edit AUTOEXEC.NCF file". 3. Edit AUTOEXEC.NCF by typing the following commands, each on a separate line: load remote load aio load aiocomx load rs232 19200 4. Save and exit the edit by pressing [F10], then quit the install program. 5. Take the server off line. Type: down 6. Quit the NOS. Exit the NetWare environment and enter DOS, type: exit 7.
Chapter 4 Installing RCONSOLE (NetWare) console session. For further information about RCONSOLE capabilities such as dial-back and inband remote, refer to your Novell NetWare documentation.
A Software License, Warranty, and Support HP Software License Agreement ATTENTION: USE OF THE SOFTWARE IS SUBJECT TO THE HP SOFTWARE LICENSE TERMS SET FORTH BELOW. USING THE SOFTWARE INDICATES YOUR ACCEPTANCE OF THESE LICENSE TERMS. IF YOU DO NOT ACCEPT THESE LICENSE TERMS, YOU MAY RETURN THE SOFTWARE FOR A FULL REFUND. IF THE SOFTWARE IS BUNDLED WITH ANOTHER PRODUCT, YOU MAY RETURN THE ENTIRE UNUSED PRODUCT FOR A FULL REFUND.
Appendix A Software License, Warranty and Support applicable. You have only those rights provided for such Software and any accompanying documentation by the applicable FAR or DFARS clause or the HP standard software agreement for the product involved. Warranty Refer to your system HP NetServer Warranty and Service/Support Booklet for software and hardware warranty information.
B Terminal Emulation Keys When keyboard commands are redirected to the NetServer’s keyboard from a remote console, keystrokes generated on a generic terminal keyboard may not be able to control all the NetServer’s keyboard keys. When there is no direct mapping between the remote keyboard and the NetServer keyboard, special keys on the NetServer keyboard are emulated using character strings.
Index C Console Redirection Installing, 6 D Disconnects when using Graphic Console Redirection, 19 Disconnects when using Remote Console, 13 Docmentation, 3 E Ending the Remote Console session at the server, 9 G Graphic Console Redirection loss of session, 19 Overview, 2 Graphics Console Redirection configuring the NetServer, 17 using, 19 I Installation RCONSOLE setup at the NetServer, 21 RCONSOLE setup at the remote client, 22 server setup for Remote Console redirection, 6 Remote Console, 10 Installing Rem
Index W Warranty information, 25 Windows NT console requirements for graphic console redirection, 16 30 Windows NT server pcANYWHERE32 installation, 17 Windows NT server requirements for graphic console redirection, 15