
HP Netserver DiagTools v2.0 User Guide


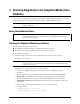


Chapter 3 Running DiagTools in the Graphical Mode (from Diskette)
14
When you create a Support Ticket, you can enter a path where you want it saved. Its default filename and
location appear on the screen.
Each time you create a Support Ticket, it overwrites the previous one. To preserve a Support Ticket, copy its
file elsewhere, rename it, or remove the diskette it is located on from the drive.
You can view a Support Ticket with a text editor. You can also use the text editor to add your comments to
the Support Ticket.
Save Support Tickets you think contain important information for future reference. Supply the relevant
Support Ticket when you communicate with your support provider.
To Create A Support Ticket
1. When Basic System Tests are completed, press the F4 function key twice to create a Support Ticket.
When Advanced System Tests have been run, press Esc to return to the previous menu, and follow
directions for creating a Support Ticket. In both cases, the Support Ticket lists the hardware detected
and the results of the Basic System Test and of any Advanced System Tests you ran.
The Support Ticket text file will be written to the flexible diskette in the drive, which can be either
the DiagTools flexible diskette or another formatted flexible diskette. If you have a large
configuration or plan on looping tests HP recommends that you use a newly formatted diskette to
ensure there is enough space on the floppy to save the entire Support Ticket.
For information about the Support Ticket, see "About the Support Ticket."
2. Use a text editor to view the Support Ticket file to determine which tests were failed.
For the failed tests, do the following:
a. Note the error codes associated with these tests.
b. Open the Error Code Viewer by selecting the Misc menu on the Advanced System Test Main
Menu and then choosing Error Code Viewer. Or, consult the list of error codes in Chapter 3 of
this Guide.
c. Look up each error code to find its meaning and suggested corrective actions.
Troubleshooting When Devices are not Detected
If any processors, memory, or SCSI devices were not detected (see Table 3-1), save and print a Support
Ticket. Record this ticket for later use by saving it to its own newly formatted diskette.
Processor and Memory Non Detected Troubleshooting
If processors or memory were not detected, redo the installation of the NetServer. To do so, press the F3
function key to exit DiagTools. Refer to the NetServer Documentation CD included with the unit. Shut
down the NetServer, redo the installation, and replace all covers. Redo the system installation using the
Setup utility on the HP NetServer Navigator CD-ROM. Then run DiagTools again to see whether all
components are detected.
• If (after reconfiguring the NetServer and booting up with DiagTools) all components are detected,
then rerun the basic tests. See “Running the Basic Tests.”
• If any processors, memory or SCSI devices (listed in Table 3-1) are still not detected, it is
recommended that you run the Basic System Tests and create a Support Ticket anyway. Doing so
may give more information to help diagnose the problem.